
In the realm of woodworking, the mastery of curved cuts is often regarded as an art form in itself. Like a skilled painter delicately maneuvering their brush across a canvas, a woodworker with a table saw must possess both precision and finesse to achieve seamless curved cuts.
This article delves into the intricacies of this technique, offering guidance on how to become proficient in the art of curved cuts with your table saw.
Understanding the Basics of Curved Cuts forms the foundation for success in this endeavor, as it allows you to grasp the principles behind creating smooth and flowing curves.
From there, Marking and Planning Your Curved Cuts becomes essential for ensuring accuracy and consistency throughout your project.
Once these initial steps are taken care of, Setting Up Your Table Saw properly will provide you with a stable base from which to execute your cuts effectively.
Techniques for Making Curved Cuts explore various methods that can be employed depending on the desired results and complexity of the cut. These techniques require practice and patience but can yield remarkable outcomes when approached with expertise.
As safety should always remain paramount, Safety Tips for Curved Cuts are provided to ensure that accidents are minimized during this intricate process.
Additionally, Finishing and Sanding Curved Cuts illuminate how attention to detail in post-cutting stages can elevate the final result.
Lastly, Practicing and Perfecting Your Curved Cuts is emphasized as continuous refinement is key to achieving mastery in any craft. By dedicating time and effort towards honing your skills, you too can unlock the secrets behind flawless curved cuts with your table saw.
Key Takeaways
- Mastery of curved cuts in woodworking requires precision and finesse.
- Proper setup of the table saw, including selecting the right blade and adjusting the settings, is crucial for accurate curved cuts.
- Safety measures such as wearing protective eyewear and using push sticks should always be followed when performing curved cuts.
- Finishing and sanding curved cuts involve using the right sanding techniques and choosing the appropriate sandpaper.
Understanding the Basics of Curved Cuts
The mastery of curved cuts with a table saw begins with a deep understanding of the fundamental principles involved in creating fluid and precise shapes.
Curved cut design is a complex process that requires careful planning and execution. It involves determining the desired shape, selecting the appropriate blade, adjusting the table saw settings, and executing the cut with precision. Troubleshooting curved cuts can also be a challenging task, as slight variations in technique or equipment can greatly affect the final result.
When designing curved cuts, it is crucial to have a clear vision of the desired shape before starting the cutting process. This involves careful consideration of factors such as symmetry, proportions, and overall aesthetics. Taking time to sketch out the design on paper or using computer-aided design software can help ensure accuracy and clarity.
Selecting the right blade for curved cuts is equally important. A blade with a smaller radius will allow for tighter curves, while a larger radius blade will produce broader curves. Additionally, choosing blades specifically designed for smooth cutting in different materials can greatly enhance the quality of curved cuts.
Adjusting the table saw settings correctly is another critical aspect of mastering curved cuts. The height and angle of both the blade and fence need to be set precisely to achieve accurate results. Making small adjustments and test cuts are essential steps in achieving optimal settings.
Troubleshooting curved cuts often requires analyzing any deviations from the intended shape or inconsistencies in cutting quality. Factors such as improper blade alignment, insufficient feed rate control, or inadequate support may contribute to these issues. Identifying these problems early on allows for timely adjustment and refinement of technique.
Gaining proficiency in creating precise and fluid shapes with a table saw necessitates an understanding of fundamental principles involved in designing curved cuts. Attention to detail during all stages – from design conception to troubleshooting – is crucial for achieving successful outcomes when working with curved cuts on a table saw.
Marking and Planning Your Curved Cuts
When marking and planning curved cuts, precision and accuracy are crucial in ensuring a successful woodworking process. To achieve this, several strategies can be employed.
Firstly, careful measuring and layout are essential. Accurate measurements will determine the size and shape of the curve, enabling woodworkers to plan accordingly. This involves using a combination of rulers, tape measures, and other measuring tools to mark out the desired curve on the workpiece.
Additionally, choosing the right blade for the task is crucial. Different blades have various tooth configurations that affect their cutting capabilities. For curved cuts, it is recommended to use a narrow blade with fine teeth. The narrowness allows for tighter turns while the fine teeth provide smoother edges.
Furthermore, it is important to consider the grain direction of the wood when marking and planning curved cuts. Wood grains can affect how easily a piece can be shaped into a curve without causing unwanted splitting or tearing. By aligning the curve with the grain direction or making small adjustments as necessary, woodworkers can ensure better results.
Achieving precision and accuracy in marking and planning curved cuts requires meticulous measuring and layout techniques as well as selecting an appropriate blade for the task at hand. Taking into account factors such as grain direction adds an extra level of control over shaping curves effectively. By employing these strategies, woodworkers can master the art of curved cuts with their table saws efficiently.
Setting Up Your Table Saw for Curved Cuts
To optimize the potential of achieving precise and accurate results, a proper setup of the table saw is essential for executing curved cuts. Here are three key factors to consider when setting up your table saw for curved cuts:
– The use of specific accessories can greatly enhance your ability to make curved cuts with precision.
– One such accessory is a sliding miter gauge, which allows you to guide the workpiece along a predetermined path. This helps maintain consistency and control throughout the cutting process.
– Another useful accessory is a featherboard, which applies pressure against the workpiece, keeping it firmly in place against the fence or table surface. This prevents any unwanted movement that could lead to inaccurate cuts.
- Choosing the Right Blade:
– Selecting an appropriate blade for curved cuts is crucial to achieving clean and smooth results.
– A general-purpose combination blade may be suitable for some curved cutting tasks, but for more intricate or delicate designs, a specialized blade specifically designed for making curves should be used.
– These blades typically have a higher tooth count with smaller gullets, allowing for finer and more controlled cuts.
- Blade Height Adjustment:
– Properly adjusting the height of the blade is essential when making curved cuts on a table saw.
– The blade should be set at a height that allows it to cut through the material without excessive force or resistance while maintaining optimal contact with the workpiece throughout the entire cut.
– Adjusting the blade height accurately ensures clean and precise curves without any tearing or splintering.
By considering these factors and taking necessary precautions, such as wearing appropriate safety gear and following manufacturer instructions, you can effectively set up your table saw for performing accurate and smooth curved cuts.
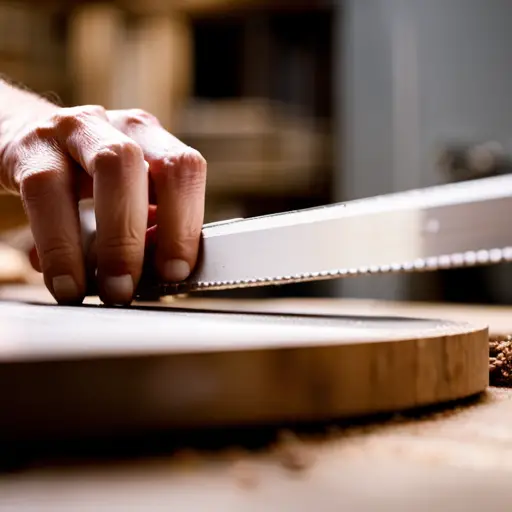
Techniques for Making Curved Cuts
Achieving precise and smooth results while cutting curves on a table saw requires employing specific techniques that ensure optimal control and accuracy.
One of the key considerations when making curved cuts is the selection of appropriate jig options. Jigs are devices that help guide the workpiece through the cutting process, providing stability and control. There are several types of jigs available for making curved cuts on a table saw, including circle-cutting jigs, sleds, and templates.
Circle-cutting jigs are particularly useful for creating perfect circles or arcs of various sizes. They consist of a pivot point and an adjustable radius arm that allows for precise measurements.
In addition to choosing the right jig, troubleshooting tips can also enhance the quality of curved cuts. One common issue with curved cuts is tear-out along the edges of the workpiece. To minimize tear-out, it is important to use a sharp blade with fine teeth specifically designed for smooth cutting.
Another troubleshooting tip is to make multiple shallow passes instead of trying to cut through in one go. This reduces strain on both the blade and the material being cut, resulting in cleaner edges.
Furthermore, maintaining proper technique during curved cuts is crucial for achieving accurate results. It is recommended to feed the workpiece slowly and steadily into the blade while keeping constant pressure against either a fence or a guide attached to the table saw’s surface.
Additionally, maintaining proper body posture and using safety measures such as wearing eye protection and using push sticks can further contribute to successful curved cuts.
Mastering curved cuts with a table saw requires selecting appropriate jig options based on specific needs and considering troubleshooting tips such as using sharp blades and making multiple passes. Employing these techniques will allow woodworkers to achieve precise and smooth results while ensuring optimal control and accuracy in their projects.
Safety Tips for Curved Cuts
Safety should always be a top priority when working with a table saw, especially when performing curved cuts. It is crucial to follow safety guidelines and take necessary precautions to prevent accidents and injuries. When making curved cuts, there are specific safety tips that should be followed to ensure a safe working environment.
Importance of proper eye protection during curved cuts:
- Wearing protective eyewear is essential when using a table saw for curved cuts. The high speed of the blade can cause small wood particles or debris to fly towards the operator’s face, posing a risk of eye injury. Proper eye protection, such as safety glasses or goggles, should be worn at all times to shield the eyes from potential hazards.
Common mistakes to avoid when making curved cuts:nn1. Rushing the cut: One common mistake is rushing through the cut without taking proper precautions. It is important to take your time and carefully plan each step before executing the cut. This includes marking the curve accurately and adjusting the table saw settings accordingly.
- Poor blade selection: Using an inappropriate blade for curved cuts can lead to kickbacks or inaccurate results. It is crucial to choose a blade specifically designed for cutting curves, such as a narrow kerf blade with fewer teeth.
- Lack of support: Failing to provide adequate support for both the workpiece and yourself can result in instability during the cut, increasing the risk of accidents or mistakes. Always use appropriate supports, such as featherboards or jigs, to ensure stability throughout the cutting process.
By following these safety tips and avoiding common mistakes, you can enhance your safety while performing curved cuts on a table saw. Remember that proper preparation, attention to detail, and adherence to safety protocols are key factors in preventing accidents and promoting successful outcomes in woodworking tasks involving curved cuts.
Finishing and Sanding Curved Cuts
The final step in the woodworking process involves refining the contours and texture of the curved workpieces, ensuring a polished finish that enhances their visual appeal. This is achieved through various sanding techniques and choosing the right sandpaper.
Sanding curved cuts requires a delicate touch to avoid altering their shape. One effective technique is to use a flexible sanding block or sponge wrapped with sandpaper. This allows for better conformity to the curves and prevents flat spots from forming on the workpiece. It is important to move the sanding block in a consistent motion along the grain of the wood, applying even pressure throughout.
Another technique is using an oscillating spindle sander, which has a cylindrical drum covered in sandpaper that rotates rapidly while moving up and down. This tool provides precise control when sanding curves by allowing you to guide the workpiece against the rotating drum.
When it comes to choosing the right sandpaper for curved cuts, it’s essential to consider both grit size and abrasive material. Finer grits, such as 220 or higher, are generally recommended for finishing purposes as they create smoother surfaces with less visible scratches. Silicon carbide or aluminum oxide abrasives are commonly used for woodworking projects due to their durability.
Mastering the art of finishing and sanding curved cuts involves employing proper techniques such as using flexible sanding blocks or an oscillating spindle sander. Additionally, selecting appropriate grit sizes and abrasive materials is key to achieving a polished finish that enhances both visual appeal and tactile quality of these intricate woodworking pieces.
Practicing and Perfecting Your Curved Cuts
Practicing and perfecting the technique of creating precise and flawless curved cuts requires a thorough understanding of woodworking principles and a commitment to honing one’s skills. When it comes to mastering curved cuts, finding inspiration is an important aspect.
Woodworkers can explore various sources such as books, magazines, online platforms, or even visiting galleries and exhibitions to gain exposure to different styles and designs. By studying existing curved cuts created by skilled artisans, woodworkers can develop their own unique ideas.
However, even with inspiration, challenges may arise when attempting curved cuts. Common issues include tear-out, wavy edges, or inconsistent curves. To troubleshoot these problems effectively, woodworkers must analyze the root cause behind each issue.
Tear-out can often be minimized by using sharp blades with fine teeth or employing techniques like masking tape on the cutting line. Wavy edges are usually caused by improper blade alignment or uneven feed pressure; therefore, ensuring proper blade tension and applying consistent feed pressure can help prevent this problem.
Inconsistent curves may result from incorrect blade angle settings or poor control during the cutting process. It is crucial for woodworkers to carefully measure and mark the desired curve before making any cuts. Additionally, using a push stick or sled can provide better control over the workpiece while guiding it through the table saw.
Ultimately, mastering curved cuts requires patience and practice. Woodworkers should dedicate time to experimenting with different techniques and materials until they achieve desired results consistently.
With continued practice and attention to detail in troubleshooting common issues, woodworkers can develop their skills in creating precise and flawless curved cuts that enhance their craftsmanship abilities.
Frequently Asked Questions
Can I use any type of wood for making curved cuts with a table saw?
When it comes to making curved cuts with a table saw, the choice of wood is crucial. Different types of wood exhibit varying levels of suitability for this purpose.
Hardwoods such as maple, walnut, and cherry are often preferred due to their stability and resistance to warping.
Softwoods like pine and cedar can also be used but may require additional support or reinforcement.
Achieving precise curved cuts involves using the appropriate blade, setting the correct angle, and employing steady control throughout the cutting process.
Are there any specific blades that are recommended for making curved cuts?
Recommended blade types for making curved cuts on a table saw include scroll blades and band saw blades. When choosing the right blade for curved cuts, it is important to consider the blade’s width, tooth count, and tooth configuration.
Narrower blades with higher tooth counts are generally more suitable for intricate curves while wider blades with fewer teeth are better for larger curves. Additionally, selecting a blade with a fine-tooth configuration can help achieve smoother and cleaner cuts.
Can I make intricate curved cuts with a standard table saw or do I need a specialized tool?
Achieving intricate curved cuts with a standard table saw can be challenging without specialized tools. It’s like trying to paint a detailed portrait with a large, blunt paintbrush.
However, there are techniques that can help achieve precise curved cuts. For example, using a jigsaw or scroll saw for initial rough cuts and then using the table saw for fine-tuning the curves can yield excellent results. This method allows for more control and accuracy in creating intricate curved cuts.
How can I ensure that my curved cuts are smooth and free from tear-out?
Techniques for reducing tear-out when making curved cuts with a table saw involve careful planning and execution. Choosing the right technique is crucial in achieving smooth and tear-free cuts.
One effective method is using a zero-clearance insert, which provides support to the workpiece and minimizes tear-out. Additionally, using a sharp blade with the appropriate number of teeth can also help reduce tear-out.
Proper feed rate and maintaining consistent pressure throughout the cut are equally important in ensuring smooth curved cuts without tear-out.
Are there any specific safety precautions I should take when making curved cuts with a table saw?
Table saw safety precautions are essential when making curved cuts.
Firstly, it is crucial to wear appropriate personal protective equipment such as safety glasses and hearing protection.
Additionally, ensure the table saw is properly maintained and the blade is sharp.
It is imperative to use a push stick or a featherboard to keep hands at a safe distance from the blade.
When selecting wood for curved cuts, choose straight-grained lumber without knots or defects to minimize tear-out and improve overall smoothness of the cut.
Conclusion
In conclusion, mastering the art of curved cuts with your table saw requires a solid understanding of the basics, careful planning and marking, and proper setup.
By employing techniques specifically designed for making curved cuts, practicing safety measures, and diligently finishing and sanding the cuts, you can achieve professional-quality results.
Remember the adage ‘practice makes perfect’ as you continue to refine your skills in this specialized woodworking technique.
With knowledge, precision, and experience, you can confidently create beautiful curved cuts that will enhance your woodworking projects.


