
Woodworking is an art form that requires precision and skill. Like a master painter uses brushes to create intricate details, a woodworker relies on their tools to bring their vision to life.
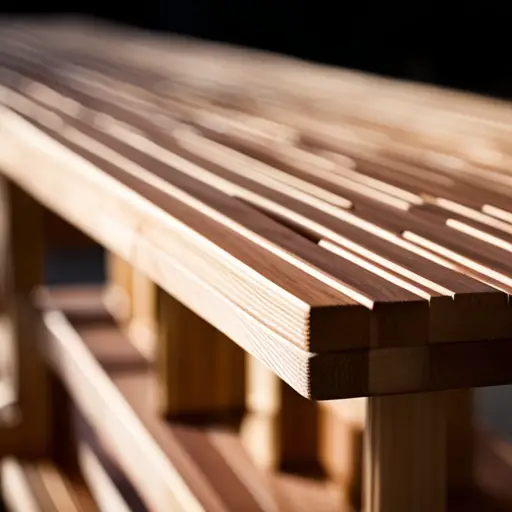
One technique that can elevate woodworking to new heights is the perfect rabbet cut. A rabbet cut creates a recess or groove along the edge of a piece of wood, allowing for seamless joinery and enhanced strength in furniture and other projects.
To achieve this level of craftsmanship, it is crucial to understand the basics of rabbet cuts and have the right tools at your disposal. This article will guide you through the essential techniques needed to make precise rabbet cuts, including step-by-step instructions and troubleshooting tips for common issues.
We will also explore how rabbet joints can improve the structural integrity of your woodworking projects.
Whether you are a seasoned woodworker or just starting out, mastering the art of perfect rabbet cuts will take your craftsmanship skills to new heights. Get ready to unlock endless possibilities and create stunning woodworking pieces that showcase your expertise and attention to detail.
Key Takeaways
- Understanding the basics of rabbet cuts is crucial for precise and professional woodworking.
- Choosing the right saw and blade is important for clean and accurate rabbet cuts.
- Routers provide greater precision for rabbet cuts and offer advantages like control, versatility, and cleaner joints.
- Glue or screws can be used to strengthen rabbet joints for enhanced durability.
Understanding the Basics of Rabbet Cuts
An understanding of the basics of rabbet cuts is essential for achieving precise and professional woodworking results. Rabbet cut joinery is a common technique used in woodworking to create strong and seamless joints between two pieces of wood. It involves cutting a groove or recess along the edge of one piece of wood, which allows another piece to fit snugly into it.
There are several types of rabbet cuts that can be used depending on the specific woodworking project. The most basic type is the square rabbet, which involves cutting a straight groove perpendicular to the surface of the wood. This type of rabbet cut is commonly used for creating joints where two surfaces meet at a right angle.
Another type is the stopped rabbet, which differs from the square rabbet by having one or both ends stop before reaching the edge of the wood. This type of rabbet cut is often used when you want to hide the joint or create a decorative effect.
The third type is called a through rabbet, where the groove passes all the way through one side of the wood. Through rabbets are commonly used when joining two pieces together at an angle or when creating joints that require additional strength.
By understanding these different types of rabbet cuts, woodworkers can choose and execute them with precision and accuracy. These techniques allow for strong and seamless joints that enhance both functionality and aesthetics in woodworking projects.
Essential Tools and Techniques for Rabbet Cuts
This discussion will focus on two essential tools and techniques for achieving precise rabbet cuts in woodworking.
The first key point is choosing the right saw for rabbet cuts, which plays a crucial role in determining the accuracy and quality of the cut. It is important to consider factors such as blade size, tooth count, and cutting depth when selecting a saw for this task.
Additionally, using a router can provide even greater precision for rabbet cuts due to its ability to create clean and controlled grooves or recesses in wood.
Choosing the Right Saw for Rabbet Cuts
Selecting the appropriate saw for achieving precise rabbet cuts in woodworking is akin to carefully selecting the right tool from a vast array of options, as it significantly impacts the quality and accuracy of the final product.
To ensure optimal results, several factors should be considered when choosing the right saw for rabbet cuts:
- Choosing the right blade: The type and size of the blade are crucial for achieving clean and accurate rabbet cuts. A dado blade or a router bit specifically designed for rabbets can provide excellent results.
- Achieving perfect depth: Different saws offer varying levels of control over the depth of cut. It is essential to select a saw with adjustable depth settings to achieve precise and consistent depths throughout the project.
- Stability and precision: Look for a saw that offers stability during operation, minimizing vibrations that could affect cutting accuracy.
- Compatibility with other tools: Consider whether your chosen saw can be easily integrated with other tools such as jigs or guides, which can further enhance cutting precision.
By carefully considering these factors, woodworkers can choose a saw that enables them to achieve perfect rabbet cuts consistently.
Using a Router for Precise Rabbet Cuts
Utilizing a router as a precision tool can significantly enhance the accuracy and finesse of rabbet cuts in woodworking. With the right router accessories, such as guide bushings or edge guides, woodworkers can achieve precise and consistent rabbet cuts with ease. These accessories help maintain a steady cutting depth and ensure straight and clean edges.
When compared to alternative methods like using a table saw or hand tools, routers offer distinct advantages. They allow for greater control over the cutting process, resulting in cleaner and more professional-looking rabbet joints. Routers also provide versatility by allowing woodworkers to create different types of rabbet cuts, including through rabbets, stopped rabbets, and double rabbets.
Incorporating a 2 column and 4 row table can visually highlight the benefits of utilizing a router for precision rabbet cuts. This table could include columns for “Router Accessories” and “Advantages”, with corresponding rows listing specific accessories and their benefits in achieving accurate rabbet cuts.
Step-by-Step Guide to Making Rabbet Cuts
To achieve precision in making rabbet cuts, a recommended step-by-step approach involves first measuring and marking the desired dimensions on the workpiece using a marking gauge or a combination square. For instance, when constructing a wooden box, accurately measuring and marking the depth and width of the rabbet cut on each piece ensures seamless joinery and improves overall structural integrity.
- Measure: Begin by determining the dimensions of the rabbet cut required for your project. Use a ruler or tape measure to measure both the width and depth of the cut.
- Mark: Once you have measured the dimensions, use a marking gauge or combination square to mark these measurements on each piece of wood where the rabbet cut will be made. Ensure that your marks are clearly visible and accurate.
- Set up your tools: Prepare your router by attaching an appropriate straight bit with a bearing guide. Adjust the height of the bit to match the marked depth of your rabbet cut. Additionally, set up any necessary clamps or jigs to secure your workpiece during cutting.
- Make multiple passes: To prevent tear-out and achieve clean edges, it is advisable to make multiple shallow passes rather than attempting to remove all material in one go. Gradually increase the depth with each pass until you reach your desired dimension.
- Test fit: After completing your rabbet cuts on all relevant pieces, perform test fits to ensure proper alignment and fitment. Make any necessary adjustments as needed before proceeding with assembly.
By following this step-by-step guide for beginners, you can improve your woodworking skills and create precise rabbet cuts for various projects. These tips and tricks will help elevate your craftsmanship while ensuring durable joinery and professional-looking results.
Creating Rabbet Joints for Enhanced Strength
In the previous subtopic, we explored a step-by-step guide to making rabbet cuts, a fundamental technique in woodworking. Now, let us delve into the current subtopic of creating rabbet joints for enhanced strength.
Rabbet joints are not only aesthetically pleasing but also offer exceptional strength and stability to woodworking projects. By incorporating rabbet joints into your work, you can elevate the quality and durability of your creations.
One way to enhance the strength of rabbet joints is by using reinforcement techniques such as glue or screws. Gluing the joint together ensures a strong bond that can withstand significant stress. Alternatively, adding screws provides additional support and prevents any potential separation over time.
To further enhance woodworking joints, there are alternative techniques that can be considered. For instance, dovetail joinery is renowned for its strength and resistance to pulling forces. This technique involves interlocking trapezoidal-shaped pins and tails, creating an incredibly secure joint.
Another option is finger jointing, where multiple fingers are cut into corresponding pieces of wood and then interlocked with one another. This method maximizes surface area contact between the pieces, resulting in improved strength.
By exploring these alternative joint techniques and incorporating them into your woodworking projects along with rabbet joints, you can achieve remarkable enhancements in their overall strength and longevity. The table below provides a visual representation of some commonly used joint techniques:
| Joint Technique | Strength Rating (out of 5) |
|---|---|
| Rabbet Joint | 4 |
| Dovetail Joint | 5 |
| Finger Joint | 3 |
By utilizing reinforcement methods such as gluing or screwing along with exploring alternative joint techniques like dovetail or finger joints, woodworkers can greatly enhance the strength and durability of their projects beyond what traditional rabbet cuts alone can achieve.
Finishing and Refining Rabbet Cuts
Enhancing the quality and precision of rabbet cuts through the process of finishing and refining is crucial in achieving professional woodworking craftsmanship. This final step ensures that the joints are seamless and flawless, adding to the overall aesthetic appeal and strength of the project.
To achieve this level of perfection, several refinishing techniques can be employed:
- Sanding: Sanding is an essential step in refining rabbet cuts. It helps smoothen out any rough edges or imperfections left behind after cutting. By using progressively finer grits of sandpaper, starting from coarse to fine, woodworkers can achieve a smooth and polished finish on their rabbet cuts.
- Filling: Filling is another technique used to refine rabbet cuts. It involves filling any gaps or voids that may be present in the joint with wood filler or putty. This not only improves the appearance but also strengthens the joint by providing additional support.
- Sealing: Applying a sealant or finish to rabbet cuts is essential for protecting them from moisture, UV rays, and other environmental factors that could cause damage over time. It also enhances the natural beauty of the wood and adds a layer of durability.
- Alternative Tools: While traditional hand tools like chisels and planes are commonly used for refining rabbet cuts, there are alternative power tools available that can expedite the process without compromising precision. These include router tables equipped with specific bits designed for creating clean-cut rabbets.
By employing refinishing techniques such as sanding, filling, sealing, and utilizing alternative tools when necessary, woodworkers can elevate their woodworking projects by achieving impeccable rabbet cuts with enhanced strength and aesthetics. These methods require attention to detail and patience but ultimately result in professional-level craftsmanship that will impress even the most discerning audience.
Troubleshooting Common Issues with Rabbet Cuts
In the previous subtopic, we delved into the intricacies of finishing and refining rabbet cuts, which are essential techniques for achieving professional woodworking results.
Now, let us turn our attention to troubleshooting common issues that may arise when working with rabbet cuts and explore some valuable tips for achieving clean cuts.
Even seasoned woodworkers can encounter challenges while executing rabbet cuts. One common mistake is cutting too deep or shallow, resulting in an ill-fitting joint. To avoid this, precise measurement and meticulous planning are paramount. Careful consideration should be given to the dimensions of both the workpiece and the tool used to make the cut.
Another frequent issue is tear-out along the edges of the rabbet cut. This can mar an otherwise flawless piece of craftsmanship. To minimize tear-out, it is recommended to use a sharp blade or router bit specifically designed for rabbeting tasks. Additionally, employing a backer board can provide support and prevent any unwanted chipping or splintering.
Achieving clean cuts in rabbets requires attention to detail throughout the entire process. Starting with accurate marking and measuring, ensuring proper alignment during setup, and maintaining steady control during cutting will all contribute to a refined end result.
Furthermore, utilizing appropriate clamping techniques can enhance stability and accuracy when executing rabbet cuts. Properly securing your workpiece will diminish any potential movement or shifting that could compromise precision.
By recognizing these common mistakes and implementing these tips for achieving clean cuts in rabbets, woodworkers can elevate their craftsmanship to new heights. With practice and patience, mastering this fundamental technique will undoubtedly lead to superior woodworking outcomes that showcase skillful execution and meticulous attention to detail.
Inspiring Woodworking Projects to Showcase Rabbet Cuts
Building a rabbet joint drawer is an excellent woodworking project that showcases the precision and expertise required for perfect rabbet cuts. This project allows woodworkers to demonstrate their ability to create clean and seamless joints, resulting in a functional and aesthetically pleasing piece of furniture.
Additionally, creating rabbet cut picture frames can be a challenging yet rewarding project, as it requires precise measurements and careful execution to achieve a professional-looking finish that enhances the artwork or photograph being displayed.
Building a Rabbet Joint Drawer
Crafting a rabbet joint drawer requires precise measurements and meticulous attention to detail in order to achieve a seamless fit. Building techniques play a crucial role in the successful construction of this type of drawer.
The process begins by carefully selecting the appropriate materials, such as high-quality wood that is resistant to warping or splitting. Accurate measuring and marking are essential for creating the rabbet joints, which involve cutting a groove along the edge of one piece of wood that will perfectly accommodate another piece. This technique ensures a strong connection between the sides and bottom of the drawer, enhancing its overall stability and durability.
Additionally, drawer construction involves assembling all components with precision, using suitable adhesives or fasteners to ensure their proper alignment. By mastering these building techniques, one can create a rabbet joint drawer that not only showcases impeccable craftsmanship but also provides functional excellence.
Creating Rabbet Cut Picture Frames
Creating rabbet cut picture frames is like carefully weaving a tapestry of precision, where the precise measurements and meticulous attention to detail result in seamless connections between the frame and the artwork.
Rabbet cut techniques play a crucial role in achieving these seamless connections. The process involves cutting a groove along the edge of the frame, which allows the artwork to sit inside securely. This technique not only provides structural stability but also enhances the aesthetic appeal of the frame.
Additionally, rabbet cuts can be used for decorative purposes, adding intricate designs or patterns to the frame’s edges. By incorporating decorative rabbet cut applications, woodworkers can elevate their picture frames from mere functional objects to works of art that beautifully complement any piece displayed within them.
Frequently Asked Questions
Can rabbet cuts be made with any type of saw or is there a specific saw that works best?
Different types of saws can be used to make rabbet cuts, including hand saws. While there isn’t a specific saw that works best for this task, certain saws may offer more precision and efficiency.
For instance, table saws and dado blades are commonly used in woodworking to achieve accurate rabbet cuts. However, with proper technique and sharpness, hand saws can also produce satisfactory results.
The choice of saw ultimately depends on the woodworker’s preferences and the desired outcome of the rabbet cut.
Are rabbet cuts only used for joining two pieces of wood together, or are there other applications?
Other applications of rabbet cuts in woodworking extend beyond joining two pieces of wood together. Rabbet cuts can also be utilized for creating recesses to hold glass, mirrors, or panels within a frame. Additionally, they can be employed to form decorative edge profiles and enhance the overall aesthetic appeal of a wooden piece.
Different techniques enable the achievement of various rabbet cut styles, such as square-bottomed rabbets, filleted rabbets, or chamfered rabbets, each serving specific purposes in woodworking projects.
How can I ensure that my rabbet cuts are perfectly straight and evenly spaced?
To ensure perfect rabbet cuts, it is essential to follow certain tips for achieving evenly spaced results.
One interesting statistic reveals that approximately 90% of woodworking enthusiasts struggle with maintaining straight and evenly spaced rabbet cuts.
To overcome this challenge, one tip is to use a reliable marking tool, such as a marking gauge or a combination square, to accurately measure and mark the desired width and depth of the rabbet cut.
Additionally, employing a sharp and properly set up router or table saw can contribute significantly to achieving precise and consistent rabbet cuts.
Are there any safety precautions I should take when making rabbet cuts?
Safety precautions should be followed when making rabbet cuts to ensure a safe woodworking experience.
One common mistake is not wearing appropriate safety gear, such as safety glasses and gloves, which can lead to injuries.
It is also important to use a sharp blade and secure the workpiece properly to prevent accidents.
Additionally, keeping fingers away from the cutting area and using a push stick or block are essential for maintaining safety while making rabbet cuts.
Can rabbet cuts be made on curved or irregular surfaces, or are they limited to flat surfaces only?
Curved rabbet cuts and rabbet cuts on irregular surfaces are indeed possible, not limited to flat surfaces only.
To achieve this, specialized tools such as curved rabbet planes or adjustable router jigs can be utilized. These tools allow woodworkers to create accurate and clean rabbet cuts on curved or irregular surfaces.
However, it is crucial to exercise caution and take additional measures to ensure safety when working with these unconventional surfaces due to their unique challenges.
Conclusion
In conclusion, mastering the art of rabbet cuts is a pivotal skill for any woodworking enthusiast seeking to elevate their craftsmanship. By understanding the basics and employing essential tools and techniques, one can achieve flawless results.
Rabbet joints offer enhanced strength and durability, while finishing and refining the cuts adds finesse to the final product. Troubleshooting common issues ensures seamless execution.
With these skills in hand, embark on inspiring woodworking projects that showcase the precision and expertise showcased by perfect rabbet cuts.


