
In the realm of woodworking, a table saw is often considered the heart and soul of any workshop. Its versatility and precision make it an indispensable tool for both amateurs and professionals alike. However, to truly harness the power of this mighty machine, one must equip it with the right accessories.
Just as a painter needs brushes and a musician requires strings, a woodworker relies on various attachments to optimize their table saw’s performance. Imagine your table saw as a blank canvas waiting to be transformed into a masterpiece. To turn this vision into reality, you will need an array of must-have accessories that serve as tools in your artistic journey.
From miter gauges that ensure precise crosscuts to push sticks that keep your fingers safe during operation, each accessory plays a crucial role in enhancing both safety and accuracy. This essential guide aims to shed light on the most vital table saw accessories you should consider adding to your arsenal.
By exploring items such as featherboards for added stability or zero-clearance inserts for reduced tearout, we will delve into the intricate details that can elevate your woodworking projects from good to exceptional. Whether you are an experienced craftsman or just embarking on your woodworking adventure, this comprehensive guide will provide invaluable insights and recommendations for maximizing the potential of your table saw while ensuring safety remains at the forefront.
So grab your notepad and pencil – it’s time to dive into The Essential Guide to Must-Have Table Saw Accessories!
Key Takeaways
- Regular maintenance and cleaning of the table saw is necessary for optimal performance.
- Upgrading the miter gauge can improve accuracy and stability during crosscutting and angle adjustments.
- Using a push stick is essential for safety and keeping hands away from the blade.
– Featherboards enhance safety and accuracy by applying pressure against the workpiece, and alternative options like magnetic featherboards and adjustable fences are available.
Miter Gauge
The miter gauge is a crucial accessory for table saws as it allows for precise and accurate crosscutting and angle adjustments, ensuring the user can achieve clean and professional-looking cuts. This essential tool consists of a guide bar that fits into the miter slot on the table saw, along with a headstock that holds the workpiece at the desired angle.
The miter gauge is primarily used for making angled cuts, such as miters or bevels, but it can also be utilized for straight crosscuts.
One important aspect of using a miter gauge is its maintenance. Regular cleaning and lubrication of both the guide bar and headstock are essential to ensure smooth sliding action and accurate measurements. It is necessary to remove any dust, debris, or build-up from these components to prevent them from interfering with movement or causing inaccuracies in cuts. Additionally, periodic calibration may be required to maintain precision.
For those looking to enhance their cutting capabilities, upgrading your miter gauge can be an excellent investment. Advanced models often offer improved accuracy through enhanced design features such as finer adjustment controls or precision scales. Some high-end options even incorporate digital displays for more precise angle settings. Upgrading can also provide added stability and durability, allowing for smoother operation over extended periods.
The miter gauge is an indispensable accessory for table saws due to its ability to facilitate precise crosscutting and angle adjustments. Proper maintenance of this tool through regular cleaning and lubrication ensures optimal performance, while upgrading to more advanced models can further improve accuracy and stability during operations.
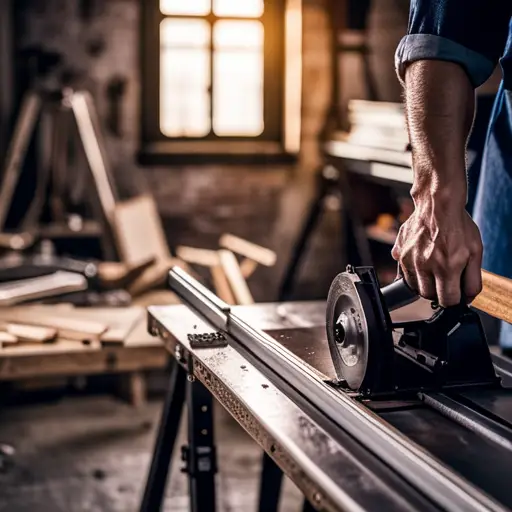
Push Stick
One practical tool for ensuring safety and precision while operating a table saw is the push stick. The push stick is a device designed to keep hands away from the blade by providing a secure grip on the workpiece. This essential accessory helps prevent accidents, such as fingers getting too close to the spinning blade, which can result in severe injuries.
To ensure maximum safety when using a push stick, it is important to follow some precautions:
- Always wear appropriate safety gear, such as goggles and gloves, to protect yourself from any potential flying debris or accidental contact with the blade.
- Position yourself in a stable and balanced stance before using the push stick. This will help maintain control over both the workpiece and the tool itself.
- Maintain constant pressure on the workpiece while pushing it through the saw to ensure smooth and accurate cuts.
Different types of push sticks are available on the market, each with its own unique design and purpose:
- Basic Push Stick: This simple yet effective tool features a long handle with notches or hooks at one end that securely grip the workpiece during cutting operations.
- Angled Push Stick: As its name suggests, this type of push stick has an angled handle that provides better visibility of the cut line while keeping your hand safely away from the blade.
- Magnetic Push Stick: Equipped with magnets at one end, this innovative accessory allows for easy storage on metal surfaces near your table saw for quick access whenever needed.
Incorporating a push stick into your table saw setup is crucial for maintaining safety and precision during cutting operations. By following proper precautions and choosing an appropriate type of push stick for your needs, you can enhance your woodworking experience while minimizing any potential risks associated with using a table saw.
Featherboards
Featherboards are a useful tool for enhancing safety and accuracy while operating a table saw. These devices are typically made of wood or plastic and feature multiple thin fingers or ‘feathers’ that can be adjusted to apply pressure against the workpiece, keeping it firmly against the fence and table of the saw. This prevents kickback and ensures more precise cuts.
There are various techniques for using featherboards effectively. One common method involves installing two featherboards on either side of the blade, with one pressing against the fence and the other applying downward pressure on top of the workpiece. This setup helps maintain consistent contact between the workpiece and the fence throughout the entire cut, reducing the risk of binding or wandering.
Another technique is to use a single featherboard in combination with a push stick. The featherboard is placed behind the blade, exerting pressure against both sides of the workpiece while pushing it forward with the push stick. This technique offers added stability and control, particularly when cutting narrow stock or working with irregularly shaped pieces.
While featherboards are highly effective accessories for table saws, there are some alternatives available as well. Magnetic featherboards use magnets instead of traditional clamps to secure themselves to metal surfaces on a table saw, providing flexibility in positioning without sacrificing stability. Additionally, aftermarket fences often come equipped with built-in adjustable feathers that serve similar purposes as traditional featherboards.
Featherboards play an important role in enhancing safety and accuracy when using a table saw. Understanding different techniques for their usage can greatly contribute to successful woodworking projects. Moreover, considering alternative options like magnetic featherboards or adjustable fences can provide additional convenience and versatility in various cutting scenarios.
Dado Blade Set
A Dado Blade Set is like a sculptor’s chisel, allowing the woodworker to create precise and intricate grooves or dados in their workpieces. This essential table saw accessory consists of two circular saw blades with chippers in between, which are used to remove material and create accurate dado cuts.
Here are three important points to consider when using a dado blade set:
- Dado Blade Compatibility: Before using a dado blade set on your table saw, it is crucial to ensure that your saw is compatible with this accessory. Some table saws have arbor sizes that may not accommodate dado blades, so it is important to check the manufacturer’s specifications or consult the user manual before making any purchases.
- Safety Considerations: Working with a dado blade set requires extra caution due to its design and potential for kickback. To minimize the risk of accidents, always wear appropriate safety gear such as safety goggles and gloves. Additionally, make sure the blade guard is properly installed and adjusted to protect against flying debris.
- Precise Measurements and Setup: Achieving accurate dado cuts relies heavily on proper measurement and setup. Take time to carefully measure and mark your desired width for the groove before making any cuts. Use precision tools such as calipers or measuring tapes for accuracy. It is also crucial to align the blades properly using spacers or shims if necessary.
A dado blade set is an indispensable tool for creating precise grooves in woodworking projects. However, it is essential to ensure compatibility with your table saw, follow strict safety precautions, and pay attention to precise measurements and setup for optimal results.
Zero-Clearance Inserts
Zero-clearance inserts are specialized accessories that can be installed on a table saw to minimize chip-out and support the workpiece during cutting. These inserts are designed to fit snugly around the saw blade, creating a zero-clearance gap between the blade and the insert surface. This helps prevent small pieces of wood from getting caught in the gap, reducing the risk of chip-out.
One key advantage of zero-clearance inserts is their customizable options. Woodworkers can create inserts that match specific blade sizes or angles, ensuring a precise fit for their particular needs. Some manufacturers even offer pre-made inserts for popular table saw models, making installation quick and easy.
When installing zero-clearance inserts, it is important to follow some essential tips. Firstly, users should always refer to the manufacturer’s instructions for proper installation procedures. It is crucial to ensure that the insert sits flush with the table surface and aligns perfectly with the blade opening. Additionally, it is recommended to use adhesive tape or other securing methods to keep the insert firmly in place during operation.
Zero-clearance inserts are valuable accessories for table saws as they provide both chip-out prevention and enhanced support for workpieces. Their customizable options allow woodworkers to tailor them precisely to their needs, while following proper installation procedures ensures optimal performance and safety.
Incorporating these accessories into one’s table saw setup can greatly improve cutting accuracy and reduce potential damage or accidents caused by chip-out.
Outfeed Table
Zero-clearance inserts are an essential accessory for table saws as they help reduce tear-out and increase cutting accuracy. However, another crucial accessory that can greatly enhance the functionality of a table saw is an outfeed table.
An outfeed table provides support to the workpiece as it exits the rear of the saw, ensuring that it remains level and stable throughout the entire cutting process.
When it comes to assembling an outfeed table, there are a few important tips to keep in mind. First and foremost, it is essential to carefully follow the manufacturer’s instructions and guidelines. This will ensure proper alignment and stability of the table. Additionally, using high-quality materials such as sturdy plywood or solid wood for construction is recommended for durability and longevity.
Maintenance and care for an outfeed table are equally important to ensure its optimal performance. Regular cleaning is necessary to remove any sawdust or debris that may accumulate on the surface. It is also advisable to periodically check for any signs of wear or damage on the table legs or supports, making any necessary repairs promptly.
To maximize safety while using an outfeed table, it is crucial to maintain proper alignment with the saw blade height. This ensures smooth material flow and minimizes kickbacks during cutting operations.
Incorporating an outfeed table into your workshop setup can greatly enhance the functionality of your table saw. By following assembly tips and regularly maintaining this accessory, you can ensure its long-term effectiveness in providing support and stability during woodworking projects.
Blade Guard and Splitter Assembly
When considering the functionality and safety of a table saw, the blade guard and splitter assembly plays a crucial role in protecting the operator from potential harm and preventing kickbacks during cutting operations.
The blade guard is a protective device that covers the exposed portion of the saw blade, shielding the operator’s hands and body from accidental contact. It also helps to contain flying debris, reducing the risk of injury.
The splitter assembly is a thin metal plate that sits behind the blade and prevents wood from pinching against it. This helps to maintain a straight cut by keeping the kerf open and minimizing binding.
Proper usage of both the blade guard and splitter assembly is essential for ensuring safe operation. When using the table saw, it is important to always keep the blade guard in place unless absolutely necessary to remove it for certain cuts. The guard should be adjusted so that it sits just above the workpiece, providing maximum protection without interfering with visibility or maneuverability.
In addition, regularly inspecting these accessories for damage or wear is crucial for their effectiveness. Any cracks or missing parts should be addressed promptly to ensure optimal safety during use.
Overall, investing in high-quality blade guards and splitter assemblies is an important step towards creating a safe working environment when using a table saw. By following proper usage guidelines and conducting regular maintenance checks, operators can minimize risks associated with kickbacks and potential injuries while achieving accurate cuts with their table saws.
Frequently Asked Questions
How do I properly align a miter gauge on my table saw?
Proper alignment of a miter gauge on a table saw is crucial for accurate and safe woodworking.
To achieve this, start by loosening the locking mechanism of the miter gauge.
Place a reliable square against the table saw’s blade and adjust the gauge until it aligns perfectly with the square.
Ensure that there is no deviation between the miter slot and the fence.
Once aligned, tighten the locking mechanism securely to maintain accuracy while cutting.
Can I use a regular stick or block of wood as a push stick, or should I buy a specific one?
Using a regular stick or block of wood as a push stick for a table saw has both pros and cons. The main advantage is that it can be easily improvised and doesn’t require any additional cost. However, there are safety considerations when using DIY push sticks, such as the lack of ergonomic design and grip.
Alternatively, buying a specific push stick offers benefits like better control and safety features. When purchasing one, it is important to look for features such as a comfortable handle and non-slip surface. Some popular options include the GRR-RIPPER 3D Pushblock System and the Micro Jig GRR-RIP Block Smart Hook Pushblock.
Are featherboards compatible with all types of table saws?
Featherboards, a common table saw accessory, are generally compatible with most types of table saws. However, it is important to consider alternative options when using featherboards.
Featherboard alternatives include push sticks and blocks of wood.
Featherboards offer several benefits such as increased safety by preventing kickback and ensuring consistent cutting results. They provide additional support and control over the workpiece during cutting operations, resulting in improved accuracy and reduced risk of injury.
What safety precautions should I take when using a dado blade set?
Properly handling a dado blade set requires meticulous attention to safety precautions.
Before use, it is essential to inspect the blades for any signs of wear or damage. Regular maintenance, such as sharpening and cleaning, ensures optimal performance and prolongs their lifespan.
Additionally, utilizing blade guards is crucial to protect against potential accidents and minimize the risk of injury.
By following these guidelines, users can ensure safe operation while maximizing the efficiency and durability of their dado blade sets.
How do I choose the right zero-clearance insert for my table saw?
Choosing the right zero-clearance insert for a table saw involves considering the pros and cons of different types.
Zero-clearance inserts help reduce tear-out and increase accuracy when cutting.
Common materials used for these inserts include phenolic, wood, and metal.
Phenolic inserts offer durability and smoothness, but may be more expensive.
Wood inserts can be customized to fit specific needs but may require more maintenance.
Metal inserts provide stability but may be prone to warping.
Considering these factors will aid in selecting the most suitable zero-clearance insert for a table saw.
Conclusion
In conclusion, it is undeniable that the table saw accessories discussed in this guide are absolutely indispensable for any serious woodworker.
From the precision and versatility offered by the miter gauge to the safety provided by the blade guard and splitter assembly, these tools elevate your woodworking game to new heights.
The push stick ensures smooth and controlled cuts, while featherboards keep your workpiece firmly in place.
The dado blade set enables you to make precise grooves, while zero-clearance inserts prevent tear-out.
Lastly, an outfeed table provides crucial support for larger pieces.
With these must-have accessories, your table saw becomes a powerhouse of efficiency and accuracy.


