
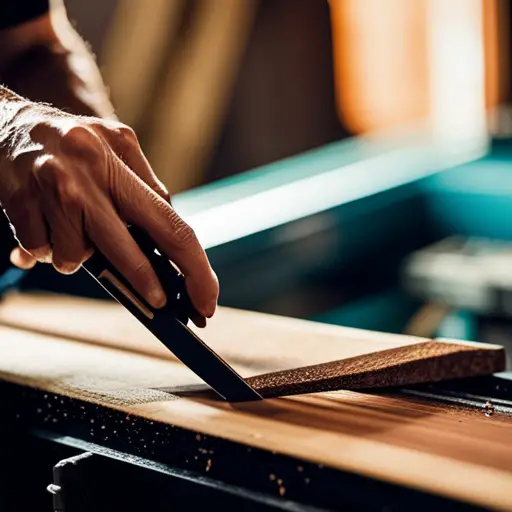
Woodworking is a craft that requires precision, skill, and attention to detail. One crucial aspect of woodworking is cross-cutting, which involves making straight cuts across the grain of the wood. Expert cross-cutting techniques can greatly enhance the quality and appearance of your woodworking projects.
Imagine a master craftsman meticulously cutting through a piece of wood with ease, as if it were butter. The smoothness of each cut leaves behind clean edges that fit seamlessly together like pieces of a puzzle. This level of expertise can be achieved by understanding and implementing proper cross-cutting techniques.
In this article, we will explore the importance of cross-cutting in woodworking and provide you with expert tips to enhance your projects. We will discuss choosing the right saw for the job, measuring accurately, using guides or fences for straight cuts, practicing safety precautions, and finishing touches such as sanding and smoothing the edges.
By mastering these techniques, you will elevate your woodworking skills to new heights and create impressive pieces that showcase your craftsmanship. So let’s delve into the world of cross-cutting techniques and unlock endless possibilities for your woodworking projects.
Key Takeaways
- Expert cross-cutting techniques improve the quality and appearance of woodworking projects.
- Cross-cutting allows for better utilization of resources and reduces material wastage.
- Choosing the right saw, measuring accurately, and using guides or fences are crucial for proper cross-cutting.
– Incorporating guides or fences enhances precision and eliminates errors in cross cuts.
Understand the Importance of Cross-Cutting
The understanding of the importance of cross-cutting in woodworking projects is crucial for achieving precise and professional results, evoking a sense of satisfaction and pride in the craftsmanship.
Cross-cutting refers to the process of cutting wood across its grain, as opposed to along its length, which is known as ripping. By incorporating cross-cutting techniques into woodworking projects, craftsmen can improve accuracy and minimize waste.
One key benefit of cross-cutting is its ability to enhance accuracy in woodworking projects. When wood is cut with the grain, it tends to split or tear out along the natural lines of the wood fibers. This can result in imprecise cuts that negatively impact the overall quality of a project. Cross-cutting helps overcome this issue by cutting across the grain, reducing the likelihood of splintering or tearing out.
Additionally, cross-cutting enables craftsmen to minimize waste materials. Through careful planning and strategic cross-cuts, pieces can be efficiently divided into smaller sections without sacrificing their structural integrity or aesthetic appeal. This allows for better utilization of available resources and reduces unnecessary expenses associated with material wastage.
Understanding the importance of cross-cutting in woodworking projects is essential for achieving accurate and professional results while minimizing waste materials. Incorporating these techniques enhances precision and brings about a sense of fulfillment in one’s craftsmanship.
Choose the Right Saw for the Job
When selecting the appropriate tool for a woodworking task, it is vital to carefully consider the most suitable saw for achieving precise and accurate cuts, as choosing the wrong one can potentially compromise the overall quality of the final product.
Here are some key considerations to keep in mind when it comes to saw selection:
- Blade type: Different blades are designed for specific cutting tasks. For cross-cutting, a fine-toothed blade with more teeth per inch (TPI) is recommended. This type of blade produces smoother cuts and reduces tear-out.
- Saw size: The size of the saw should be chosen based on the scale and complexity of the project. Smaller saws are easier to handle and maneuver but may have limitations when it comes to cutting thicker materials.
- Power source: There are three main types of power sources for saws – hand-powered, electric-powered, and battery-powered. Each has its own advantages and disadvantages, so choose one that suits your needs and preferences.
- Safety features: Look for features such as blade guards, anti-kickback mechanisms, and ergonomic handles to ensure safe operation while maintaining cutting accuracy.
By considering these factors during saw selection, woodworkers can enhance their projects by achieving precise and accurate cross-cuts that contribute to the overall quality of their workmanship.
Measure Twice, Cut Once
Precision in woodworking can be achieved by following the age-old advice of measuring twice before making a single cut. Accurate measurements are crucial to ensuring that the final product fits together seamlessly and functions as intended. To achieve this, woodworkers utilize various precision cutting techniques.
One such technique is using a marking gauge or a combination square to mark the desired length or angle on the wood surface. This allows for consistent and accurate measurements throughout the project. Additionally, using a sharp pencil or a scribing knife ensures clear and precise marks that won’t be easily erased or smudged.
Another important aspect of precision cutting is selecting the appropriate cutting tool for each task. Table saws, circular saws, miter saws, and handsaws all have their specific uses depending on the type of cut required. It is essential to understand each saw’s capabilities and limitations to achieve accurate cuts.
Furthermore, employing clamps or jigs can help hold the wood securely in place during cutting, minimizing errors caused by movement or vibration. These tools aid in maintaining accuracy and consistency throughout the project.
Achieving precision in woodworking relies heavily on accurate measurements and precision cutting techniques. By incorporating these practices into their projects, woodworkers can enhance their skills and create high-quality pieces that meet their design specifications with precision and finesse.
| Cutting Technique | Description | Benefits |
|---|---|---|
| Marking Gauge | Used to mark consistent lengths along a piece of wood | Ensures accurate measurements |
| Combination Square | A versatile tool used for measuring angles, checking squareness, and marking lines | Provides precise measurements |
| Sharp Pencil/Scribing Knife | Creates clear marks on wood surfaces that won’t easily smudge or erase | Enhances visibility when making cuts |
| Selecting Appropriate Cutting Tool | Choosing the right tool for each task, such as table saws, circular saws, miter saws, or handsaws | Ensures accurate and efficient cuts |
| Clamps/Jigs | Holds wood securely in place during cutting | Minimizes errors caused by movement or vibration |
Use a Guide or Fence for Straight Cuts
Using a guide or fence is an essential technique in woodworking that ensures accurate and straight cuts, resulting in flawless edges and seamless joinery. When it comes to cross cutting, using a circular saw can be highly effective.
The circular saw is a versatile tool capable of making accurate cuts across the grain of the wood. To achieve precise cross cuts, it is crucial to use a guide or fence. This helps to keep the saw on track and prevents any unwanted deviations from the desired path.
In addition to using a circular saw for cross cutting, another useful tool is the miter gauge. A miter gauge allows for angled cuts, which are commonly required in woodworking projects such as picture frames or furniture corners. By adjusting the angle on the miter gauge and securing it to the workpiece, woodworkers can achieve precise angled cuts with ease.
When using either a circular saw or a miter gauge, it is important to ensure that the guide or fence is securely attached and parallel to the blade or cutter. This guarantees accuracy and consistency throughout the entire cut, resulting in clean edges that fit together seamlessly during assembly.
Overall, incorporating guides or fences into woodworking projects enhances precision and eliminates errors when making cross cuts. Whether using a circular saw for straight cuts or a miter gauge for angled cuts, these tools provide woodworkers with confidence in achieving professional-looking results.
Practice Proper Safety Precautions
Practicing proper safety precautions is crucial in woodworking to ensure a safe and accident-free working environment. Woodworking involves the use of various tools and equipment that can be potentially dangerous if not handled properly. Therefore, it is essential for woodworkers to prioritize their safety by wearing appropriate protective gear.
One of the most important aspects of safety in woodworking is wearing the necessary protective gear. This includes safety glasses or goggles, ear protection, and gloves. Safety glasses or goggles protect the eyes from flying debris or dust particles that can cause eye injuries. Ear protection, such as earmuffs or earplugs, helps prevent long-term hearing damage caused by loud machinery. Gloves provide an extra layer of protection against cuts and splinters.
In addition to wearing protective gear, creating a clean and organized workspace is also vital for safety in woodworking. A cluttered work area increases the risk of accidents as it can lead to tripping hazards or obstructed movement. By maintaining a tidy workspace, woodworkers can minimize these risks and improve efficiency.
To summarize, practicing proper safety precautions in woodworking is paramount for ensuring a safe working environment. This involves wearing protective gear such as safety glasses, ear protection, and gloves to mitigate potential injuries.
Additionally, maintaining a clean and organized workspace reduces the likelihood of accidents occurring due to clutter or obstructions. By prioritizing safety measures, woodworkers can enjoy their craft while minimizing risks associated with woodworking activities.
Finishing Touches: Sanding and Smoothing the Edges
Efficiently achieving a smooth and polished finish is an important step in woodworking, which involves sanding and smoothing the edges of the project. To achieve a professional result, woodworkers employ various smoothing techniques. Here are three key methods:
- Sanding Block: A sanding block is a hand tool that holds the sandpaper firmly in place, allowing for controlled movements while smoothing the edges. It helps distribute pressure evenly, preventing uneven surfaces.
- Random Orbital Sander: This power tool combines both orbital and rotating motions to produce a swirl-free finish. Its random pattern prevents visible sanding marks or scratches on the wood surface.
- Hand Sanding: Although time-consuming, hand sanding provides precise control over delicate areas or intricate designs that machinery may struggle with. It allows craftsmen to reach tight corners and contours effortlessly.
In addition to employing suitable smoothing techniques, selecting appropriate types of sandpaper is vital for achieving desired results. Different grits of sandpaper can be used sequentially to gradually refine the surface texture from coarse to fine. Coarser grits remove imperfections more aggressively, while finer grits provide a smoother finish.
By utilizing these smoothing techniques and selecting the right type of sandpaper for each stage, woodworkers can ensure their projects have impeccably smooth edges that enhance their overall appearance.
Frequently Asked Questions
How do I determine the correct angle for cross-cutting different types of wood?
To ensure accurate cross-cutting of different wood types, determining the correct angle is crucial. By carefully analyzing the properties of each wood species and considering factors such as grain direction and thickness, one can determine the appropriate cutting angle.
Common mistakes to avoid when cross-cutting with a saw include neglecting to account for variations in wood hardness and failing to properly secure the workpiece.
Employing these precise techniques will yield optimal results in woodworking projects.
What are some common mistakes to avoid when using a saw for cross-cutting?
Common mistakes to avoid when using a saw for cross-cutting include:
- not measuring accurately before cutting
- using the wrong blade for the type of wood
- applying too much force during the cut
- failing to properly secure the workpiece
- rushing through the cutting process
To achieve precise and accurate cuts when cross-cutting, it is important to ensure proper alignment of the blade with the marked cut line, maintain a steady and controlled cutting motion, and use appropriate safety measures such as wearing protective gear.
Can I use a circular saw instead of a miter saw for cross-cutting?
Using a circular saw for cross-cutting can be an interesting choice, with its own set of pros and cons.
On the positive side, a circular saw offers portability and versatility, allowing you to work in various locations. However, it may lack the precision and accuracy of a dedicated miter saw.
To properly set up a circular saw for cross-cutting, ensure that the blade is sharp and aligned correctly, use a straight edge as a guide, and practice caution to avoid any mishaps.
What are some tips for achieving precise and accurate cuts when cross-cutting?
Achieving precise and accurate cuts when cross-cutting requires attention to two main factors: using the right blade and securing the wood during cuts.
The choice of blade is crucial as it determines the quality of the cut. Blades with a high tooth count provide smoother and cleaner cuts, while blades with fewer teeth are better suited for rougher cuts.
Additionally, securing the wood properly using clamps or a workbench ensures stability and reduces the risk of mistakes or accidents during cutting.
Are there any specific safety precautions I should take when using a miter saw for cross-cutting?
What safety precautions should be taken when using a miter saw for cross-cutting?
Ensuring miter saw safety is crucial to prevent accidents and injuries. Proper miter saw technique includes:
- Wearing appropriate personal protective equipment (PPE) such as safety glasses and hearing protection
- Securing the workpiece firmly
- Maintaining a clear workspace free from clutter
Additionally, it is important to:
- Follow the manufacturer’s instructions
- Use a sharp blade
– Maintain proper body positioning throughout the cutting process.
Conclusion
In conclusion, mastering the art of cross-cutting is essential for any woodworking enthusiast. By understanding the importance of this technique and choosing the right saw, you can ensure precise and accurate cuts every time.
Remember to measure twice before cutting and use a guide or fence for straight lines. Safety should never be compromised, so always follow proper precautions.
Finally, don’t forget about the finishing touches – sanding and smoothing the edges – to create a flawless final product that will leave others in awe of your woodworking skills.


