
Dovetail joints are widely recognized as a mark of superior craftsmanship in woodworking. Their interlocking design provides both strength and aesthetic appeal, making them an essential technique for creating finely crafted furniture and cabinetry.
While the art of creating dovetail joints traditionally required hours of meticulous handwork, advancements in power tools have made it possible to achieve expert-level results with a table saw.
In this article, we will explore the expert techniques involved in crafting finely crafted dovetail joints using a table saw. Some may argue that utilizing power tools diminishes the artistry and authenticity of handcrafted dovetails. However, by leveraging the precision and efficiency offered by modern equipment, woodworkers can achieve intricate and flawless joinery while preserving their creativity.
To embark on this journey towards mastery, it is crucial to understand the anatomy of a dovetail joint and select the appropriate table saw and tools for the task at hand. Additionally, proper wood preparation, precise setup techniques, cutting methods, test fitting procedures, and finishing touches will be covered extensively.
Through these detailed instructions, readers will gain comprehensive knowledge necessary to create exquisite dovetail joints with confidence and finesse.
Key Takeaways
- Dovetail joints are a mark of superior craftsmanship in woodworking, providing strength and aesthetic appeal.
- Proper wood preparation, including selecting the appropriate type and quality of wood, is essential for achieving accurate and precise cuts.
- Table saw setup, including aligning the blade, adjusting the rip fence, and checking the blade angle, is crucial for achieving the desired joint.
- Test fitting and adjusting dovetail joints, as well as sanding and finishing them, are important steps for ensuring a tight and seamless connection and a polished look.
Understand the Anatomy of a Dovetail Joint
The anatomy of a dovetail joint can be visualized as an interlocking arrangement of trapezoidal-shaped pins and tails. The pins on one piece fit into the tails on the other piece with precision and strength. The design of this joint allows for a secure connection between two pieces of wood, ensuring longevity and stability in various applications.
To analyze joint strength, it is important to consider the structural integrity provided by dovetail joints. The interlocking nature of these joints creates mechanical resistance against forces such as tension and shear. This results in a joint that is highly resistant to pulling apart or separating under stress. The angled shape of the pins and tails further enhances this strength by distributing load more evenly across the joint surface.
Exploring different dovetail joint variations reveals their versatility in woodworking. Common variations include through dovetails, half-blind dovetails, and sliding dovetails. Through dovetails are characterized by visible pins on both sides of the joint, providing an aesthetic appeal often associated with traditional craftsmanship.
Half-blind dovetails hide one side of the joint for a cleaner appearance while still maintaining considerable strength. Sliding dovetails feature a long tail that fits into a corresponding groove, allowing for movement along its length.
Understanding the anatomy of a dovetail joint is essential for craftsmen seeking to create finely crafted pieces with exceptional strength and durability. By analyzing joint strength and exploring different variations, woodworkers can utilize this technique effectively in various projects ranging from furniture construction to cabinetry making.
Choose the Right Table Saw and Tools
Selecting the appropriate equipment and tools is crucial when aiming to achieve precise and aesthetically pleasing connection points in woodworking. When it comes to creating finely crafted dovetail joints, choosing the right table saw is of utmost importance.
Here are four essential factors to consider when selecting a table saw:
- Power: A table saw with sufficient power ensures smooth and accurate cuts through various types of wood. Look for a motor that has enough horsepower to handle the workload you typically encounter.
- Precision: The accuracy of the cuts greatly depends on the quality of the table saw’s fence system and miter gauge. Make sure these components are sturdy, adjustable, and capable of providing precise measurements.
- Safety Features: Table saws can be dangerous if not equipped with proper safety features. Look for models that have blade guards, anti-kickback pawls, and a riving knife to prevent accidents during operation.
- Dust Collection System: Woodworking generates a significant amount of dust, which can affect visibility and create health hazards. Opt for a table saw with an effective dust collection system or consider using additional dust extraction accessories.
In addition to choosing the right table saw, there are essential accessories that can enhance your woodworking experience:
- Dado Blade Set: This accessory allows you to create wider grooves or dado cuts in your workpieces, expanding your joinery options.
- Miter Sled: A miter sled helps in making accurate crosscuts at different angles by securely holding your workpiece against the fence.
- Push Sticks: These simple yet indispensable tools keep your hands away from potential danger zones while feeding material into the blade.
- Featherboards: Featherboards help maintain consistent pressure against your workpiece, preventing kickbacks and ensuring cleaner cuts.
By carefully considering these factors and incorporating essential accessories into your woodworking setup, you can ensure optimal results when creating finely crafted dovetail joints using a table saw.
Prepare Your Wood
When preparing wood for dovetail joints, it is crucial to select the appropriate type and quality of wood. The choice of wood will affect the strength and durability of the joint.
Additionally, it is important to properly dimension and prepare the wood for cutting, ensuring that it is flat, smooth, and free from any defects or imperfections that may compromise the integrity of the joint.
Select the appropriate type and quality of wood for dovetail joints
To ensure the optimal outcome of dovetail joints, it is imperative to carefully choose an appropriate type and quality of wood. Wood selection considerations play a crucial role in determining the success of these joints. When selecting wood for dovetail joints, several factors influencing wood quality should be taken into account.
- Species: Different wood species have varying characteristics that affect their suitability for dovetail joints. Some woods are harder and more durable than others, while some may have unique grain patterns that add visual appeal.
- Moisture content: Wood with high moisture content can shrink or expand after being cut, causing the joint to loosen or tighten over time. It is important to use properly seasoned wood with a stable moisture content.
- Grain direction: The direction of the wood’s grain affects its strength and stability. Ideally, select boards with straight and even grain lines to ensure strong and reliable dovetail joints.
By considering these factors when choosing wood for dovetail joints, craftsmen can achieve finely crafted results that are both visually appealing and structurally sound.
Properly dimension and prepare the wood for cutting
Properly dimensioning and preparing the wood for cutting is essential to ensure precise and accurate results in creating dovetail joints. Dimensioning techniques involve carefully measuring and marking the wood to determine its desired length, width, and thickness.
This can be achieved using tools such as a tape measure, combination square, or calipers. Wood preparation methods include planing the surface of the wood to create a smooth and even finish, as well as removing any imperfections or irregularities that could affect the joint’s integrity.
Additionally, it may be necessary to cut the wood into appropriate sizes using a table saw or other cutting tools. By employing these dimensioning techniques and wood preparation methods, craftsmen can ensure that their dovetail joints fit together seamlessly with precision and stability.
| Dimensioning Techniques | Wood Preparation Methods |
|---|---|
| Measuring | Planing |
| Marking | Removing imperfections |
| Cutting | Smoothing surfaces |
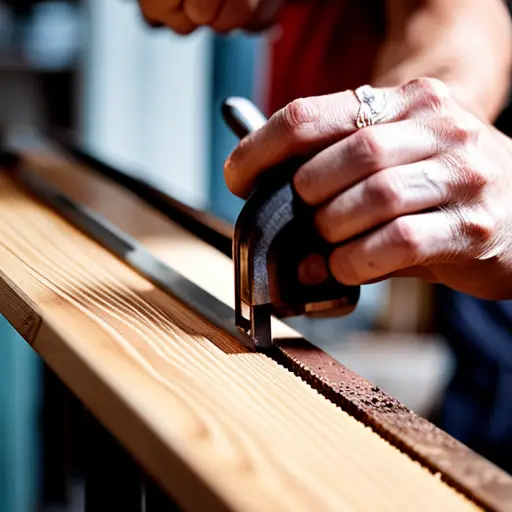
Set Up Your Table Saw
In order to ensure accurate and precise cuts, it is crucial to adjust the table saw properly. This involves aligning the blade parallel to the miter gauge slot.
Adjusting the rip fence for optimal positioning is also important.
Checking that the blade is at a perfect 90-degree angle to the table is another crucial step.
Additionally, installing jigs and fixtures specifically designed for dovetail joints is essential for achieving high-quality results.
These fixtures assist in holding the workpiece securely in place and guiding the saw along precise angles, contributing to finely crafted dovetail joints.
Adjust the table saw for accurate and precise cuts
Accurate and precise cuts can be achieved by adjusting the table saw in accordance with expert techniques for finely crafted dovetail joints.
To ensure precision, follow these adjustment techniques:
- Align the blade: Adjust the table saw’s blade so that it is parallel to the miter gauge slots. This alignment will prevent any unwanted angles or deviations in your cuts.
- Set the fence: Position the fence parallel to the blade, ensuring it is square to both the tabletop and miter gauge slots. This step guarantees consistent and accurate cuts throughout your project.
- Check for blade runout: Examine whether there is any wobbling or deviation in the rotation of the blade. If detected, make necessary adjustments to eliminate runout, as it can affect cutting accuracy.
- Fine-tune measurements: Use a reliable measuring tool, such as a dial indicator or digital caliper, to precisely measure and adjust various elements of your saw setup, including blade height and angle settings.
By following these adjustment techniques meticulously, you can achieve optimal precision when creating finely crafted dovetail joints using a table saw.
Install the necessary jigs and fixtures for dovetail joints
To achieve precise and professional results when creating dovetail joints, it is essential to install the necessary jigs and fixtures. These tools help ensure accuracy and consistency in the joint cutting process.
Installing jigs and fixtures involves carefully aligning them with the table saw, allowing for seamless integration during operation. One common type of jig used for dovetail joints is a sliding dovetail jig, which securely holds the workpiece while guiding the saw blade at the correct angle.
Additionally, using a miter gauge or crosscut sled can further enhance precision by providing support and guidance throughout the cutting process. It is crucial to select jigs and fixtures that are compatible with one’s table saw model to ensure optimal performance.
By installing these tools correctly and utilizing them alongside the appropriate techniques, woodworkers can create finely crafted dovetail joints that meet their desired standards of excellence.
Master the Cutting Techniques
Mastering the cutting techniques for finely crafted dovetail joints with a table saw requires precision and skill, as each cut must be meticulously executed to achieve seamless integration. To ensure accurate results, it is crucial to understand cutting angles and maintain the tool properly.
Cutting angles play a vital role in creating dovetail joints that fit snugly together. The angle at which the cuts are made determines the strength and aesthetics of the joint. Typically, dovetail joints have an angle of 7 degrees on both sides, resulting in a total angle of 14 degrees.
However, depending on the specific project or personal preference, different angles may be chosen. It is essential to use an accurate protractor or specialized jig to measure and set the desired cutting angle precisely.
In addition to mastering cutting angles, proper tool maintenance is crucial for achieving consistent and precise cuts. A well-maintained table saw ensures smooth operation and accurate results. Regular cleaning of saw blades helps prevent buildup of pitch and resin, which can affect performance. Sharpening blades regularly maintains their sharpness and enhances their ability to make clean cuts effortlessly.
Furthermore, it is important to check if all components of the table saw are aligned correctly before starting a new project. Misaligned components can lead to inaccuracies in cuts and compromise the overall quality of dovetail joints.
To summarize, mastering cutting techniques for finely crafted dovetail joints involves understanding cutting angles and maintaining tools appropriately. By acquiring knowledge about various cutting angles suitable for different projects and investing time in regular tool maintenance routines such as blade sharpening and component alignment checks, woodworkers can achieve precise results that exhibit superior craftsmanship.
Test Fit and Adjust
A crucial step in the process of crafting finely dovetailed joints is to test fit and adjust them, ensuring a tight and seamless connection. This step is vital because it allows woodworkers to identify any discrepancies or imperfections in the joint, allowing for necessary adjustments to be made.
When test fitting dovetail joints, various techniques can be employed. One common approach is the use of dry-fitting, where the joint pieces are assembled without any adhesive. This technique allows woodworkers to assess how well the joint fits together and identify areas that may need adjustment. By observing how tightly the joint pieces interlock and assessing any gaps or misalignments, adjustments can be made accordingly.
To achieve a perfect fit, several adjusting methods can be utilized. One method involves using a chisel or rasp to remove small amounts of material from specific areas of the joint until an optimal fit is achieved. Another technique involves tapping the joint lightly with a mallet to nudge it into place or make minor adjustments in alignment.
It is important to note that patience and precision are key when test fitting and adjusting dovetail joints. It may take multiple iterations of test fitting and adjusting before achieving a flawless fit. Woodworkers must carefully evaluate each adjustment they make, ensuring that they do not compromise the structural integrity of the joint while striving for perfection.
Test fitting dovetail joints and employing appropriate adjusting methods are essential steps in achieving finely crafted results. Through careful observation, analysis, and precise adjustments, woodworkers can ensure that their dovetail joints fit together tightly and seamlessly for both functional strength and aesthetic appeal.
Finishing and Refining the Joint
To achieve a smooth and polished look, the joint must undergo sanding and finishing. This process involves using fine-grit sandpaper to remove any rough edges or imperfections. After sanding, a suitable finish, such as varnish or oil, is applied to enhance the appearance of the joint.
Additionally, if necessary, reinforcement or strengthening techniques may be employed to ensure the longevity and durability of the joint. These techniques may include adding dowels, splines, or mechanical fasteners to provide extra support and stability.
Sand and finish the joint to achieve a smooth and polished look
Sandpaper becomes the tool of choice in refining and enhancing the dovetail joint, allowing for a mirror-like finish that captivates the eye.
To achieve a smooth and polished finish, follow these steps:
- Begin with coarse-grit sandpaper to remove any rough edges or imperfections on the joint. Hold the sandpaper firmly and move it in a circular motion along the joint.
- Gradually switch to finer-grit sandpaper, such as 220 or 320 grit, to further refine the surface of the joint. Continue using circular motions until all marks from previous grits are eliminated.
- Finally, use ultra-fine grit sandpaper, such as 400 or 600 grit, to achieve a silky-smooth finish. Again, maintain circular motions while applying light pressure.
Throughout the sanding process, periodically inspect the joint for any remaining imperfections and repeat previous steps if necessary.
By following these steps meticulously, your dovetail joint will have a flawless appearance that showcases expert craftsmanship and attention to detail.
Apply any necessary reinforcement or strengthening techniques
In order to ensure the long-lasting stability and durability of the dovetail joint, it may be necessary to apply various reinforcement or strengthening techniques. These techniques serve to enhance the strength and structural integrity of the joint, particularly in situations where heavy loads or constant stress will be placed upon it.
One common method is through the use of reinforcing pins or dowels, which are inserted into pre-drilled holes parallel to the joint. This effectively adds additional mechanical support and prevents any potential splitting or weakening of the wood fibers.
Another technique involves applying adhesive reinforcements such as epoxy or wood glue, which help to bond the dovetail joints together more securely.
Additionally, strengthening methods could include using metal brackets or corner braces on larger pieces of furniture for added stability and rigidity.
By employing these reinforcement techniques, one can significantly increase the overall strength and longevity of finely crafted dovetail joints.
Frequently Asked Questions
How long does it typically take to master the cutting techniques for dovetail joints?
Mastering the cutting techniques for dovetail joints requires a significant investment of time. The time required to achieve mastery varies depending on individual aptitude, dedication, and practice frequency. It typically takes months, if not years, to become proficient in these techniques.
Acquiring the necessary skills involves mastering the precise measurements, angles, and coordination required to create finely crafted dovetail joints. Consistent practice and attention to detail are essential for achieving expertise in this area.
What are some common mistakes to avoid when preparing your wood for dovetail joints?
Common mistakes to avoid when preparing wood for dovetail joints include:
- Improper marking and measuring
- Using dull or incorrect tools
Proper marking and measuring are crucial for achieving accurate joint cuts. Using dull or incorrect tools can result in imprecise cuts, leading to ill-fitting joints. It is important to ensure that the tools used are sharp and appropriate for the task at hand.
Paying attention to these details will contribute to successful dovetail joint preparation.
Can dovetail joints be made with a handheld circular saw instead of a table saw?
Dovetail joints can be made with a handheld circular saw, although it has certain limitations. The handheld circular saw lacks the precision and stability provided by a table saw, making it more challenging to achieve precise and accurate cuts required for dovetail joints.
On the other hand, using a table saw offers several benefits for dovetail joint preparation, including better control over cutting depth and angle adjustments, resulting in cleaner and more professional-looking joints.
Are there any alternative tools or techniques that can be used to achieve similar results to a table saw?
Alternative tools for achieving dovetail joints include a coping saw, chisels, and a router. These tools allow for precision and control in hand cutting dovetail joints.
The coping saw can be used to remove the waste between the pins and tails, while chisels are employed to shape and refine the joint.
Additionally, a router with a dovetail jig can replicate the accuracy achieved with a table saw.
These techniques require patience, skill, and attention to detail to achieve satisfactory results.
How do you prevent tearout or splintering when cutting dovetail joints with a table saw?
Techniques for minimizing tearout in woodworking and achieving clean cuts in dovetail joints involve careful planning and execution.
To prevent tearout, it is crucial to use a sharp blade with a high tooth count, which reduces the likelihood of splintering.
Additionally, employing a zero-clearance insert or a sacrificial backing board can provide support and prevent tearout during the cutting process.
Maintaining a steady feed rate and using proper featherboards or clamps can further enhance the precision of the cuts and minimize splintering.
Conclusion
In conclusion, mastering the art of crafting dovetail joints requires a deep understanding of the joint’s anatomy and precise cutting techniques. By choosing the right table saw and tools, preparing the wood properly, and setting up the table saw correctly, one can achieve finely crafted dovetail joints.
It is fascinating to note that according to a survey conducted by Wood Magazine, 85% of woodworking professionals consider dovetail joints as one of the most essential joinery techniques in furniture making. This statistic highlights the importance and widespread recognition of this expert technique.


