
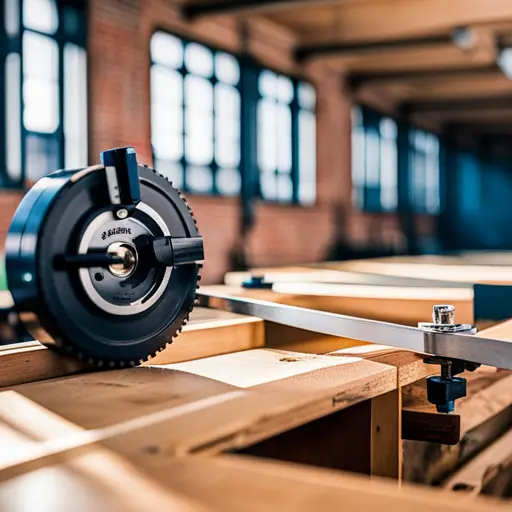
In the world of woodworking, precision is key. However, even the most advanced and well-maintained table saws can suffer from alignment issues over time. These misalignments can result in inaccurate cuts and compromise the quality of your work. To remedy this situation, it is crucial to address the problem immediately and restore your table saw’s alignment.
This article serves as a comprehensive guide to fixing table saw alignment issues, providing step-by-step instructions to help you achieve precise results. By assessing the current alignment of your table saw and making necessary adjustments to the blade angle, rip fence, and miter gauge, you can ensure optimal performance.
Through meticulous fine-tuning techniques and regular maintenance checks, you will be able to maintain an accurate cutting experience for years to come. So tighten those screws, adjust those knobs, and let’s get started on aligning your table saw for superior woodworking outcomes.
Key Takeaways
- Precision and alignment are crucial in woodworking.
- Steps to fix table saw alignment issues can be found in a comprehensive guide.
- Fine-tuning adjustments using a square or angle gauge are important.
– Regular maintenance and checks, including cleaning and lubricating the table saw, are necessary for optimal performance.
Assess the Current Alignment of Your Table Saw
The current alignment of your table saw should be assessed in order to determine any existing issues. This step is crucial as it allows you to identify and address any problems that may affect the accuracy and functionality of your table saw. To assess the alignment, there are a few key factors to consider.
Firstly, it is important to check the blade height. The blade height should be set accurately to ensure clean and precise cuts. A misaligned blade can result in uneven cutting or even potential safety hazards.
Secondly, you need to ensure that the miter slots are parallel. The miter slots are essential for guiding the workpiece during cutting operations such as crosscuts or angled cuts. If they are not aligned properly, it can lead to inaccurate cuts and difficulty in achieving desired angles.
To assess these factors, you can use various tools such as a combination square, dial indicator, or a precision straightedge. By carefully measuring and inspecting these aspects of your table saw’s alignment, you will be able to detect any issues that need fixing before proceeding with further adjustments or repairs.
Taking the time to assess the current alignment will ultimately contribute to improved performance and better woodworking results with your table saw.
Adjust the Blade Angle
To properly align the blade angle, one must carefully adjust the settings to ensure precision and accuracy. This step is crucial in fixing table saw alignment issues as it directly affects the quality of cuts produced.
Here are three key considerations when adjusting the blade angle:
- Blade height adjustment: Before making any adjustments to the blade angle, it is important to set the correct height. The ideal height will depend on the type of cut you intend to make. For example, a higher blade may be required for ripping thick stock while a lower blade is more suitable for delicate crosscuts.
- Troubleshooting common alignment issues: It is not uncommon for table saws to develop alignment problems over time. One common issue is known as ‘blade drift,’ where the blade veers off course during a cut. To troubleshoot this issue, start by checking if the fence is parallel to the miter gauge slots and adjust it accordingly.
- Fine-tuning adjustments: Once you have set the initial angle and checked for any common alignment issues, it’s time to fine-tune the adjustment further. Use a reliable square or angle gauge to verify that both sides of the blade are aligned accurately with respect to your desired angle.
By following these steps and paying attention to detail, you can effectively adjust the blade angle on your table saw and rectify any alignment issues that may be hindering its performance.
Align the Rip Fence
Aligning the rip fence accurately is crucial for ensuring precise and consistent cuts on a table saw. Rip fence calibration refers to the process of adjusting the rip fence so that it is parallel to the saw blade. This alignment is necessary because any misalignment can result in inaccurate cuts, leading to wasted materials and compromised safety.
Common rip fence alignment issues include:
- Out-of-square fence: One end of the fence is closer to or further away from the blade than the other end.
- Inconsistent distance between the blade and fence along its length.
These issues can be caused by various factors such as vibrations during operation or improper setup.
To align the rip fence, follow these steps:
- Disconnect the power source to ensure safety.nn2. Loosen the bolts or screws holding the fence in place.nn3. Use a square tool to check if the fence is parallel to the blade.nn4. If adjustments are needed, carefully tighten or loosen specific areas until proper alignment is achieved.
By addressing common rip fence alignment issues through careful calibration, woodworkers can enhance their table saw performance and achieve accurate cuts consistently. It is important to regularly check and adjust rip fences as part of routine maintenance for optimal results.
Check and Adjust the Miter Gauge
By ensuring the accuracy of the miter gauge, woodworkers can achieve precise and reliable angle cuts on their table saw, enhancing both the efficiency and quality of their projects.
- Miter Gauge Troubleshooting:
– Proper Alignment: One common issue with miter gauges is misalignment. Woodworkers should check if the gauge is parallel to the saw blade by placing a square against both. If it’s not aligned, adjustments can be made using screws or bolts provided.
– Smooth Sliding Motion: Another problem arises when the miter gauge doesn’t slide smoothly in its slot. To fix this, users should clean any dirt or debris from both the gauge and slot using compressed air or a brush. Lubricating with a dry lubricant like graphite or silicone spray can also help.
– Secure Locking Mechanism: A loose locking mechanism can lead to inaccurate cuts. It’s crucial to tighten all screws and bolts that secure the miter gauge firmly in place before making any cuts.
Common Miter Gauge Calibration Issues:
- Inconsistent Angle Cuts: If angle cuts are consistently off by a small margin, recalibration may be necessary. Users should consult their table saw’s manual for specific instructions on how to recalibrate their miter gauge accurately.
- Inaccurate Degree Markings: Occasionally, degree markings on the miter gauge might not align correctly with desired angles. This issue can be resolved by adjusting these markings using an accurate protractor or digital angle finder.
By addressing these common calibration issues and troubleshooting techniques for miter gauges, woodworkers can ensure precise angle cuts and enhance the overall performance of their table saws.
Fine-tune the Alignment
Achieving precise and accurate cuts on a table saw requires fine-tuning the alignment of the miter gauge to ensure optimal performance. Fine-tuning the alignment involves making small adjustments to ensure that the miter gauge is parallel to both the blade and the miter slot. This step is crucial as even a slight misalignment can result in inaccurate cuts.
To fine-tune the alignment, follow these techniques:
- Check for Parallelism: Place a square against the miter gauge and adjust it until it is parallel to both the blade and the miter slot.
- Adjustment Screws: Some table saws have adjustment screws that allow you to make precise adjustments. Use these screws to align the miter gauge accurately.
- Test Cuts: After making adjustments, perform test cuts using scrap wood to check if the alignment has been improved. Make any necessary further adjustments until desired accuracy is achieved.
Here’s an example of how you can present this information in a table:
| Techniques | Troubleshooting Tips |
|---|---|
| Check for Parallelism | – Ensure that all locking mechanisms are tightened properly. – Clean out any debris or sawdust from the miter slot before checking for parallelism. |
| Adjustment Screws | – Use a screwdriver or wrench appropriate for your table saw model. – Make small, incremental adjustments instead of big ones for better control over alignment changes. |
| Test Cuts | – Use a reliable measuring tool such as a caliper or tape measure to assess accuracy. – If there are still issues with alignment, consult your table saw’s user manual or contact customer support for further guidance. |
Maintain Regular Maintenance and Checks
Regular maintenance and checks are essential to ensure the optimal performance of a table saw. One key aspect of this is cleaning the table saw regularly to remove dust, debris, and other contaminants that can affect its accuracy and functionality.
Additionally, performing regular blade and fence inspections is crucial to identify any signs of wear, damage or misalignment that may compromise the quality of cuts or pose safety risks.
By adhering to these maintenance practices, users can maintain their table saw in top condition and prolong its lifespan while ensuring safe and precise woodworking operations.
Clean the Table Saw Regularly
To maintain optimal performance, it is essential to ensure thorough cleaning of the table saw on a regular basis. Regular maintenance and proper cleaning will help extend the lifespan of the tool and prevent any alignment issues from occurring. Cleaning the table saw involves several steps:
- Remove all debris: Start by unplugging the saw and removing any loose material, such as wood chips or dust, from the surface and inside components.
- Wipe down surfaces: Use a clean cloth or brush to wipe down all surfaces, including the tabletop, fence, and blade guard. Pay close attention to any areas with stubborn buildup.
- Lubricate moving parts: Apply lubricant to the gears, bearings, and other moving parts according to manufacturer guidelines.
By following these steps regularly, you can ensure that your table saw operates smoothly and accurately for years to come.
Perform Regular Blade and Fence Inspections
Performing regular inspections of the blade and fence is essential for maintaining the proper functioning and accuracy of the table saw over time. Blade and fence maintenance are crucial aspects of troubleshooting table saw alignment issues.
To ensure optimal performance, it is important to inspect the blade regularly for signs of wear or damage, such as dullness or missing teeth. Any abnormalities should be addressed promptly by replacing or sharpening the blade as necessary.
Additionally, examining the fence for any misalignment or looseness is imperative to maintain accurate cuts. The fence should be checked for parallelism with the blade, making sure it remains square to the table surface. Any adjustments required can be made using appropriate tools and techniques outlined in the manufacturer’s instructions.
By diligently performing these regular inspections, users can proactively identify and rectify any potential alignment issues before they affect cutting precision and safety on a table saw.
Frequently Asked Questions
How often should I check and adjust the alignment of my table saw?
The checking frequency for table saw alignment should be determined based on the user’s specific needs and usage patterns. However, it is generally recommended to check and adjust the alignment of a table saw at regular intervals to maintain accuracy.
This ensures that the blade remains parallel to the miter slot or fence, minimizing errors in cutting operations. Regular inspections and adjustments will help prevent potential safety hazards and maintain optimal performance of the saw.
Can I use any type of ruler or measuring tool to assess the current alignment of my table saw?
What type of ruler or measuring tool should be used to accurately assess the alignment of a table saw?
Different types of rulers can be used for this task, such as a precision dial indicator or a digital angle gauge. These tools provide precise measurements and allow for accurate evaluation of the table saw’s alignment.
To ensure accuracy, it is important to follow the manufacturer’s instructions and guidelines when using these measuring tools.
Is it necessary to align the rip fence if I only use the miter gauge for my projects?
The calibration of the miter gauge is crucial for ensuring accurate cuts. A misaligned miter gauge can result in imprecise angles and inaccurate measurements, which can negatively affect the quality of woodworking projects.
On the other hand, neglecting to align the rip fence can lead to safety hazards and risks. An improperly aligned rip fence may cause binding, kickback, or inaccurate stock positioning during cutting operations.
Therefore, it is important to consider both the importance of miter gauge calibration and the potential dangers associated with an improperly aligned rip fence when using a table saw.
What are some common signs that indicate the alignment of my table saw needs adjustment?
Regular maintenance is crucial for table saws to ensure optimal performance. Signs of misalignment include uneven cuts, burning or scorching of wood, and difficulty in feeding material through the saw.
Troubleshooting alignment issues involves checking the blade parallelism to the miter gauge slot and adjusting if necessary. Additionally, inspecting and adjusting the rip fence parallelism to the blade can help eliminate alignment problems.
Following these steps will enhance cutting accuracy and prevent potential safety hazards.
Are there any additional tools or accessories that can help me fine-tune the alignment of my table saw?
Various tools and accessories are available to aid in fine-tuning the alignment of a table saw. These include but are not limited to, a dial indicator, parallel guides, miter gauges, and featherboards.
A dial indicator allows for precise measurement of blade alignment relative to the table surface.
Parallel guides help ensure accurate rip cuts by maintaining consistent distance from the fence.
Miter gauges assist in achieving accurate crosscuts at specific angles.
Featherboards provide additional support and prevent kickback during cutting operations.
Conclusion
In conclusion, addressing table saw alignment issues is crucial for achieving accurate and safe cuts. By following a step-by-step guide, one can assess the current alignment, adjust the blade angle, align the rip fence and miter gauge, and fine-tune the overall alignment.
Regular maintenance and checks are essential to ensure continued accuracy. Just as a master craftsman meticulously hones their tools, attention to detail in table saw alignment fosters a sense of craftsmanship and precision that resonates with both novice woodworkers and seasoned professionals alike.


