
Box joints, also known as finger joints, have been a staple in woodworking for centuries. These strong and visually appealing joints are commonly used in the construction of boxes and drawers.
However, mastering box joint jigs on your table saw can be a daunting task for even the most experienced woodworker.
In this comprehensive guide, we will delve into the world of box joints and provide you with all the knowledge and techniques necessary to become a box joint virtuoso. From understanding the fundamentals of box joints to choosing the right jig for your needs, setting up your table saw with precision, cutting flawless box joints, achieving utmost accuracy in your work, and finishing and assembling your masterpieces – we will cover it all.
Whether you’re a seasoned woodworker looking to expand your skill set or a beginner eager to learn the art of joinery, this article is designed to cater to all levels of expertise.
So grab your tools, buckle up, and get ready to embark on an exciting journey towards mastering box joint jigs on your table saw!
Key Takeaways
- Box joints, also known as finger joints, provide strength, precision, and aesthetic appeal to woodworking projects.
- There are different types of box joint jigs, such as single blade, multiple blade, or router-based jigs, and factors to consider when selecting one include ease of use, accuracy, versatility, durability, and compatibility with table saws or routers.
- Setting up safety measures and carefully considering features and benefits are important when preparing a table saw for box joint jigs.
– Mastering box joint techniques and troubleshooting can result in clean and precise joints, and factors to consider for fine-tuning include alignment, fence adjustment, and blade selection.
Understanding Box Joints
Box joints are a type of joinery technique commonly used in woodworking that involves interlocking rectangular projections and corresponding slots to create strong, precise, and aesthetically pleasing corners in boxes and other furniture pieces.
The history of box joints dates back to ancient times when carpenters used similar techniques to construct wooden containers. However, it was not until the 19th century that the box joint as we know it today gained popularity.
One of the main advantages of box joints is their inherent strength. The interlocking nature of the joint provides a large surface area for glue or other adhesives, resulting in a sturdy bond. This makes box joints particularly suitable for constructing boxes or drawers that need to withstand constant use or heavy loads.
Another advantage is the precision achieved with box joints. The rectangular projections and slots ensure accurate alignment during assembly, leading to clean corners without any gaps. This level of precision is especially important when creating furniture pieces with visible corners, as it enhances the overall aesthetic appeal.
Furthermore, box joints offer versatility in design options. By adjusting the size of the projections and slots, woodworkers can create different patterns and visual effects on their projects. Whether they prefer a simple pattern with evenly spaced fingers or an intricate design with varying finger widths, box joints allow for endless creativity.
Understanding box joints is crucial for mastering box joint jigs on your table saw. With its long history and numerous advantages such as strength, precision, and design versatility, this joinery technique remains an essential skill for woodworkers seeking to create high-quality furniture pieces with seamless corners.
Choosing the Right Box Joint Jig
This discussion will focus on the types of box joint jigs available and the factors to consider when selecting a box joint jig.
Box joint jigs come in various designs, such as single blade, multiple blade, or router-based jigs. Each type has its own advantages and limitations that should be carefully considered based on the specific needs of the woodworker.
Factors to consider when selecting a box joint jig include ease of use, accuracy, versatility, durability, and compatibility with different table saws or routers.
Types of Box Joint Jigs
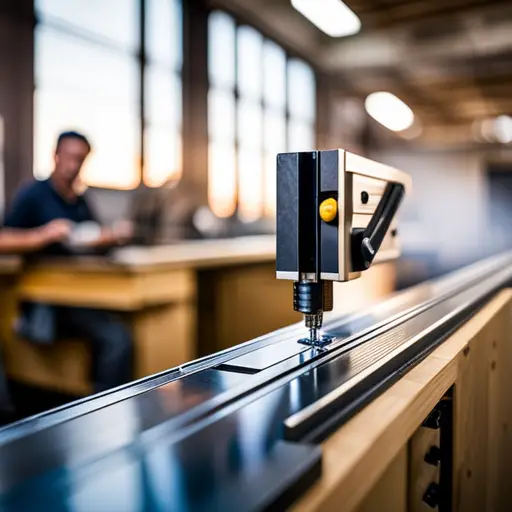
One of the most widely used methods for creating box joints on a table saw involves the utilization of specialized jigs. These jigs are designed to guide the workpiece and ensure accurate cuts, resulting in precise and tight-fitting box joints.
There are various types of box joint jigs available, each with its own features and benefits.
When it comes to materials, box joint jigs can be made from different types of wood or metal. Wood jigs are commonly used as they are easy to customize and adjust according to specific needs. Metal jigs, on the other hand, offer durability and stability during cutting operations.
Another important aspect is customizing box joint jig templates. Templates can be created using different materials such as plywood or acrylic sheets. These templates serve as guides for making repetitive cuts with consistent spacing between fingers.
By selecting the appropriate type of jig and customizing templates, woodworkers can achieve accurate and repeatable results when creating box joints on their table saws.
Factors to Consider when Selecting a Box Joint Jig
A crucial factor in the selection of a box joint jig involves carefully considering the various features and benefits offered by different types of jigs, ultimately determining which jig will best suit the woodworker’s specific needs and preferences.
Factors to consider include:
- The size and versatility of the jig, as well as its compatibility with different types of table saws.
- The size of the jig should be appropriate for the desired box joint sizes, allowing for adjustments if necessary.
- Versatility is important as it allows for a range of box joint options, such as varying finger widths or depths.
- Compatibility with different table saws ensures that the jig can be securely attached and used effectively without any issues.
Additionally, other features to consider are ease of use, durability, and precision in producing accurate joints.
By carefully evaluating these factors, woodworkers can select a box joint jig that offers optimal benefits for their woodworking projects.
Setting Up Your Table Saw
To effectively set up your table saw for mastering box joint jigs, it is essential to carefully configure the various components of the saw in order to ensure optimal precision and safety during the woodworking process. Setting up safety measures should be the first priority when preparing your table saw. This includes wearing appropriate personal protective equipment such as safety goggles, ear protection, and a dust mask to protect yourself from potential hazards. Additionally, ensure that your workspace is well-lit and free from clutter or obstructions.
Choosing the right blades for your box joint jig is another crucial aspect of setting up your table saw. The type of blade you select will depend on the material you are working with and the desired outcome of your project. For box joints, a dado blade or a stacked dado set is commonly used due to its ability to make precise cuts in narrow spaces. These blades have multiple teeth arranged in a stacked formation, allowing them to remove more material with each pass.
Incorporating a 2 column and 5 row table can provide further clarity on setting up your table saw for box joint jigs:
| Component | Configuration Tips |
|---|---|
| Fence | Ensure it is parallel to the miter gauge slot and properly aligned |
| Blade Height | Adjust it so that it extends above the workpiece by about 1/8 inch |
| Blade Angle | Set at 90 degrees for square cuts |
| Miter Gauge | Align it parallel to both the blade and fence |
| Splitter/Riving Knife | Install this device for improved safety by preventing kickback |
By following these configuration tips and considering important factors such as setting up safety measures and choosing the appropriate blades, you can effectively set up your table saw for mastering box joint jigs. This will ultimately enhance precision and promote safer woodworking practices throughout your projects.
Cutting Box Joints
When cutting box joints, it is crucial to ensure precise measurement and alignment of the workpiece and the saw blade. Mastering box joint techniques requires attention to detail and a thorough understanding of the process. To achieve accurate cuts, it is important to start by carefully measuring the width of both the workpiece and the saw blade. This will determine how many passes are needed to create the desired number of fingers in each joint.
To begin cutting box joints, position the workpiece against the rip fence with one end facing towards you. Adjust the blade height so that it matches half of the thickness of your workpiece. It is advisable to use a push block or push stick for safety when feeding your material through.
In order to create strong, tight-fitting joints, it is essential that each cut is made precisely along the marked lines. When making these cuts, take into account any potential tear-out or splintering that may occur on your material. Adjustments can be made by using a zero-clearance insert or backing up your workpiece with sacrificial pieces.
Troubleshooting box joint cuts involves identifying common issues such as uneven spacing between fingers or gaps between joints. These problems can often be rectified by adjusting either the positioning of your workpiece or making slight modifications to your setup, such as changing blade height or adjusting fence alignment.
By mastering box joint techniques and troubleshooting common issues, woodworkers can produce clean and precise box joints consistently. Practice and precision are key in achieving optimal results when creating these intricate joinery methods on a table saw.
Achieving Precision and Accuracy
This discussion will focus on fine-tuning your box joint jig to achieve precision and accuracy in your woodworking projects.
Fine-tuning the jig involves adjusting its components, such as the fence and blade alignment, to ensure that each cut is consistent and precise.
By following specific techniques and guidelines for fine-tuning, woodworkers can achieve accurate box joint cuts consistently throughout their projects.
Fine-Tuning Your Box Joint Jig
Precise adjustments and meticulous calibrations are necessary for achieving accurate box joint cuts on a table saw. To improve jig performance and troubleshoot common issues, consider the following:
- Alignment: Ensure that the jig is properly aligned with the table saw’s fence and blade. Any misalignment can result in imprecise cuts.
- Fence adjustment: Fine-tune the position of the fence to ensure that it aligns perfectly with the width of your desired box joint. This will prevent any gaps or unevenness in the joints.
- Blade selection: Choose a blade specifically designed for box joint cuts, such as a dado set or a specialized box joint cutter. These blades have multiple cutting teeth and can produce clean, precise joints.
By addressing these factors, you can enhance the performance of your box joint jig and achieve impeccable results on your table saw.
Ensuring Consistency in Box Joint Cuts
To achieve consistent and uniform box joint cuts, it is crucial to maintain a standardized feed rate while operating the table saw. This ensures tight fitting joints that are essential for the overall strength and aesthetic appeal of the finished product.
By maintaining a steady feed rate, the spacing between each cut is kept consistent, resulting in evenly sized fingers or pins. It is important to troubleshoot common issues that may arise during the cutting process, such as tear-out or misalignment of the cuts. These issues can be minimized by using a sharp blade and ensuring that the workpiece is securely held in place with a reliable jig.
Regular maintenance of the table saw, including checking for any loose components or misalignments, also contributes to achieving consistent box joint cuts.
Finishing and Assembling Box Joints
The process of finishing and assembling box joints can be likened to the delicate choreography of piecing together a complex puzzle. It requires precision, attention to detail, and knowledge of various finishing techniques. When it comes to finishing box joints, there are several methods that can be employed to enhance their appearance and durability.
One common finishing technique is sanding. After the box joint pieces have been cut and assembled, they may have rough edges or imperfections that need to be smoothed out. Sandpaper with different grits can be used to gradually refine the surface until it is smooth and even.
Another popular method is applying a finish or stain. This not only adds color and depth to the wood but also protects it from wear and tear. Before applying any finish, it’s important to ensure that the surfaces are clean and free from dust or debris.
In order to troubleshoot common issues with box joints, such as gaps or misalignment, careful measuring and marking are crucial. Using precision tools like calipers or squares can help ensure accuracy during assembly. Additionally, using clamps or other securing devices while gluing the joints together can prevent shifting or misalignment.
To further emphasize these points, consider the following table:
| Finishing Techniques | Troubleshooting Common Box Joint Issues |
| Sanding | Gaps between joint pieces |
| Applying finish | Misalignment |
| Shifting during glue application |
By employing these finishing techniques and troubleshooting common issues, one can achieve beautifully finished box joints that not only fit together seamlessly but also withstand the test of time.
Advanced Techniques and Applications
This section will explore advanced techniques and applications of box joints, focusing on two key points: creating decorative box joints and using box joints in different woodworking projects.
Creating decorative box joints involves adding unique patterns or designs to the joint, enhancing the aesthetic appeal of the finished piece.
Furthermore, understanding how to incorporate box joints into various woodworking projects allows for their versatile use in constructing cabinets, drawers, and other furniture pieces.
Mastering these advanced techniques expands one’s repertoire as a woodworker and opens up new possibilities for creative expression in woodworking projects.
Creating Decorative Box Joints
Creating decorative box joints adds an aesthetically pleasing element to your woodworking projects. These intricate patterns can elevate the overall design and enhance the visual appeal of furniture pieces.
Incorporating box joints into furniture designs allows for a seamless integration of functionality and beauty. By carefully selecting the size and spacing of the joint fingers, woodworkers can create unique decorative patterns that catch the eye.
Common decorative box joint patterns include herringbone, chevron, and diamond shapes, among others. The precision required to achieve these intricate designs adds a level of complexity to the woodworking process but yields stunning results.
Whether used as a focal point or as subtle embellishments, decorative box joints offer endless possibilities for enhancing the aesthetic value of your woodworking projects.
Using Box Joints in Different Woodworking Projects
Utilizing box joints in various woodworking projects offers a versatile and visually appealing method of joining pieces of wood together. In furniture making, box joints can be used to create strong and durable connections between wooden components. Whether it is constructing a table, chair, or bookshelf, incorporating box joints adds structural integrity and enhances the overall aesthetic appeal of the piece.
Additionally, box joints can be incorporated in cabinet doors to provide a seamless and precise fit. This technique ensures that the doors are secure and align perfectly with the rest of the cabinet structure.
By utilizing box joints in different woodworking projects, craftsmen can achieve both functional strength and visual elegance in their creations.
Frequently Asked Questions
Can box joints be cut on a router table instead of a table saw?
Box joints can indeed be cut on a router table, although there are both pros and cons to consider.
On the positive side, using a router table allows for precise and controlled cuts, as well as the ability to create intricate designs. Additionally, it eliminates the need for a table saw, which can be advantageous for those without access to one.
However, some drawbacks include limited cutting depth and the need for additional accessories like a box joint jig. Alternative methods for creating box joints without a table saw include using a handheld router or a dado blade on a radial arm saw.
Are there different types of box joint jigs available on the market?
There are various types of box joint jigs available on the market that cater to different needs and budgets. When choosing the right one, several factors should be considered.
These include the type of joints you intend to create, such as regular or variable spacing, as well as the material and thickness of the workpiece.
Additionally, factors like ease of setup, adjustability, and durability should also be taken into account when selecting a box joint jig.
How do I determine the right size of box joint for my project?
When determining the right size of box joint for a project, one must consider the dimensions and desired aesthetic. Choosing box joint templates with varying finger widths allows for customization.
For instance, if constructing a small jewelry box, a template with narrower fingers may be appropriate to enhance the delicate appearance.
Additionally, adjusting box joint spacing can affect the overall strength and durability of the joint. A closer spacing may provide greater strength while sacrificing some aesthetics.
Can box joints be used for joining materials other than wood?
Box joints can indeed be used to join materials other than wood, such as metal. When comparing metal box joints to wood box joints, there are a few key differences.
Metal box joints often require more precise machining due to the hardness and rigidity of the material. However, they offer advantages such as increased strength and durability compared to wood box joints.
Additionally, using box joints for non-wood materials allows for seamless integration with wooden components in mixed-material projects.
What are some common mistakes to avoid when cutting box joints?
Common mistakes to avoid when cutting box joints include improper measurement, inaccurate marking, and using the wrong blade.
Best practices involve taking precise measurements and using a reliable square to mark the pieces accurately.
Additionally, ensuring that the blade is properly aligned and sharp is crucial for clean cuts.
One anecdote that illustrates this is comparing box joint cutting to threading a needle – just as precision and attention to detail are essential for successful sewing, they are also vital for achieving precise box joints.
Conclusion
In conclusion, mastering box joint jigs on your table saw requires a thorough understanding of the technique and proper selection of the right jig.
Setting up your table saw accurately is crucial for achieving precise and accurate cuts.
The finishing and assembly process will ensure the durability and strength of your box joints.
Just like a skilled sculptor carving intricate details with precision, mastering box joint jigs will allow you to create flawless and sturdy joinery in your woodworking projects.


