
Dovetail joints are renowned for their strength and aesthetic appeal, making them a popular choice among woodworkers. Mastering the art of creating dovetail joints on a table saw requires precision and attention to detail. This article aims to guide readers in achieving mastery over this technique by providing comprehensive instructions and insights.
The euphemistic technique employed in this article will allow readers to engage with the content in an enjoyable manner, while still maintaining a knowledgeable and objective tone. By following the step-by-step guide outlined in this article, woodworkers can confidently create precise dovetail joints that not only enhance the structural integrity of their projects but also elevate their visual appeal.
To begin, it is crucial to understand the anatomy of a dovetail joint and become familiar with marking and layout techniques for accurate cuts. Furthermore, setting up and adjusting the table saw properly is essential for achieving clean and precise cuts.
The article will also cover joining and gluing techniques for ensuring a strong bond between the dovetails.
Finally, finishing techniques will be discussed to enhance the overall look of these joints. By employing these methods with care and precision, woodworkers can master dovetail joints on a table saw, adding craftsmanship and sophistication to their woodworking projects.
Key Takeaways
- Dovetail joints are popular for their strength and aesthetic appeal in woodworking.
- Precision and attention to detail are required to master dovetail joints on a table saw.
- Proper alignment and calibration of tools, accurate measurements, and clean cuts are crucial for precise dovetail joints.
- Marking and layout techniques, as well as careful feeding of the workpiece, contribute to achieving accurate dovetail joints.
Tools and Materials Needed for Dovetail Joints
The tools and materials required for achieving precise dovetail joints on a table saw are essential to ensure the accuracy and strength of the joint. Proper selection and use of tools play a crucial role in creating well-fitting and aesthetically pleasing dovetails.
The primary tool needed for cutting dovetails on a table saw is a dado blade set. This specialized blade set consists of multiple blades that can be adjusted to different widths, allowing for the creation of various types of dovetail joints. Additionally, a miter gauge or sled is necessary to guide the workpiece through the cuts accurately. A sturdy workbench or table saw extension with clamps is also recommended to provide stability during the cutting process.
To achieve precise dovetail joints, several techniques should be employed. First, it is important to ensure that all tools are properly aligned and calibrated before beginning any cuts. Accurate measurements should be taken, ensuring that each cut aligns perfectly with the corresponding piece. It is also crucial to make clean, smooth cuts by maintaining consistent feed rates and using steady pressure throughout the process.
In addition to these basic tools and techniques, other optional but beneficial materials include marking gauges for accurate layout lines, chisels for cleaning up corners and refining joint fitment, as well as sandpaper or files for final smoothing.
By utilizing these essential tools and employing proper techniques, craftsmen can create beautifully crafted dovetail joints on their table saws while ensuring the accuracy and strength of each joint.
Understanding the Anatomy of a Dovetail Joint
Understanding the intricate structure of a dovetail joint unveils the hidden craftsmanship required to achieve flawless joinery.
The anatomy of dovetails is composed of alternating pins and tails that interlock with each other, creating a strong and aesthetically pleasing joint. This type of joinery has been used for centuries, dating back to ancient Egypt and Greece, where it was employed in furniture construction. The history of dovetail joinery showcases its enduring popularity and testament to its strength.
Dovetails consist of two main components: pins and tails. The pins are trapezoidal-shaped projections on one piece of wood, while the tails are corresponding recesses or slots on the adjoining piece. These pins and tails fit together precisely, ensuring a tight bond between the two pieces.
Traditionally, dovetails were hand-cut using small saws and chisels, requiring immense skill and precision. However, modern woodworking techniques have introduced power tools such as table saws that can accurately cut dovetails with less effort.
The strength of a dovetail joint lies in its mechanical interlocking design. The angled sides of both the pins and tails prevent any separation or loosening when pressure is applied perpendicular to the joint. Additionally, the large surface area created by multiple pins and tails distributes stress evenly across the joint, minimizing weak points that could lead to failure.
The history of dovetail joinery illustrates its significance in woodworking throughout time. From ancient civilizations to modern craftsmen, this method has stood the test of time due to its durability and aesthetic appeal. Understanding the intricacies behind this type of joint allows woodworkers to appreciate its complexity while striving for mastery in their own projects.
Marking and Layout Techniques for Precise Dovetail Joints
Precision in creating dovetail joints is achieved through the implementation of marking and layout techniques. These techniques play a crucial role in ensuring that the joint fits together seamlessly and accurately.
Here are some key layout techniques and precision tips to consider when working on dovetail joints:
- Use a marking gauge: A marking gauge is an essential tool for achieving precise measurements and consistent markings. It allows you to scribe lines that indicate the depth of the joint, ensuring uniformity throughout.
- Transfer marks with care: When transferring marks from one piece to another, it is vital to be meticulous. Use a sharp pencil or knife to make clear, accurate lines that are easy to follow during cutting.
- Apply double-checking methods: Double-checking your measurements can save you from costly mistakes. Always verify your marks against each other and refer back to your plans or templates for accuracy.
- Consider using story sticks: Story sticks are custom-made templates that help replicate the desired angles and proportions of the dovetail joint precisely. They can be created by cutting out notches that match specific angles or by using pre-made jigs.
By employing these layout techniques and precision tips, woodworkers can achieve consistently accurate dovetail joints. The careful use of marking gauges, precise transfer of marks, double-checking measurements, and utilizing story sticks all contribute to producing high-quality joints with tight-fitting parts.
Remember that practice makes perfect when it comes to mastering these techniques, so allow yourself time for experimentation and refinement as you strive for excellence in creating dovetail joints.
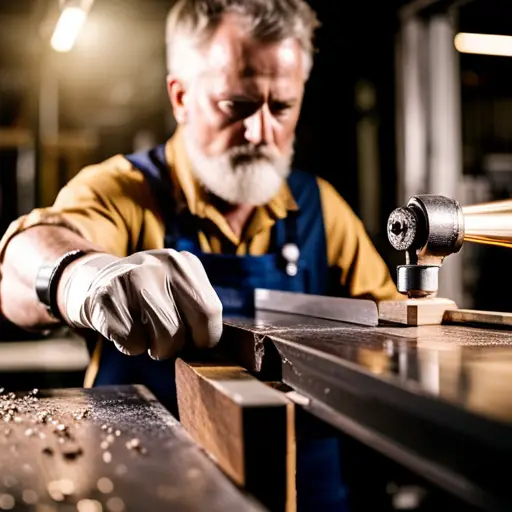
Setting Up and Adjusting the Table Saw for Dovetail Cuts
Setting up and adjusting the table saw for precise cuts in dovetail joinery can greatly enhance the woodworking experience and contribute to the creation of seamless, professional-looking joints. Proper table saw maintenance is essential to ensure accurate and smooth cuts. Before beginning any dovetail project, it is crucial to check that the blade is sharp and properly aligned.
Dull or misaligned blades can result in imprecise cuts, leading to gaps or uneven joints. To troubleshoot potential issues with dovetail cuts on a table saw, it is important to first understand common problems that may arise.
One issue could be tear-out, where wood fibers are torn rather than cleanly cut. This can be caused by a dull blade or incorrect feed direction. To minimize tear-out, using a high-quality sharp blade and ensuring the wood grain is oriented correctly when feeding it into the saw can make a significant difference.
Another problem that may occur during dovetail cutting is improper fitting of joint parts. If the pins and tails do not fit together seamlessly, adjustments need to be made to improve accuracy. In such cases, checking the fence alignment as well as blade height can help identify potential sources of error.
Additionally, maintaining consistent pressure when feeding wood through the table saw is crucial for achieving precise dovetail cuts. Uneven pressure can result in irregular shaping of joint parts or even kickback incidents.
By adhering to proper table saw maintenance practices and troubleshooting any issues that arise during dovetail cutting processes, woodworkers can achieve flawless dovetails with ease and confidence.
Step-by-Step Guide to Cutting Dovetail Joints on a Table Saw
To embark on the journey of creating seamless and professional-looking joints, woodworkers can follow a step-by-step guide that outlines the process of cutting dovetail joints using a table saw.
Cutting dovetail joints requires precision and skill, but with the right techniques and tools, it is possible to achieve excellent results.
Firstly, it is important to set up the table saw properly before starting the cutting process. Ensure that the blade is aligned parallel to the miter gauge slot and adjust its height according to the thickness of your workpiece. Additionally, set the fence at an angle that corresponds to your desired dovetail joint angle.
Next, mark out the location of each tail and pin on both pieces of wood. This will serve as a guide during the cutting process. It is crucial to be accurate in marking these locations to ensure a tight-fitting joint.
When making cuts on the table saw, start by carefully aligning your workpiece against the miter gauge or fence at an angle corresponding to your desired joint angle. Slowly feed it into the spinning blade while maintaining control over both hands for safety purposes.
Troubleshooting common issues may arise during this process. If you experience tear-out or splintering on your cuts, try using a zero-clearance insert or adding tape along your cut line for added support. It may also help to use a sharp blade designed specifically for making dovetail cuts.
Mastering dovetail joints on a table saw requires attention to detail in both setup and technique. By following this step-by-step guide and troubleshooting any common issues encountered along the way, woodworkers can achieve seamless and professional-looking dovetail joints that enhance their woodworking projects.
Joining and Gluing the Dovetail Joints for a Strong Bond
Achieving a strong and durable bond between the dovetail joints is crucial for ensuring the structural integrity of woodworking projects. This can be achieved by carefully selecting the right glue and utilizing effective clamping techniques.
When it comes to glue selection, there are various options available in the market. The most commonly used type of glue for joining dovetail joints is wood glue, specifically PVA (polyvinyl acetate) adhesive. PVA adhesive provides a strong bond, is easy to work with, and dries clear, making it ideal for woodworking projects.
Another option is epoxy resin, which offers excellent strength and durability but requires careful mixing and longer curing times.
To ensure a successful bond, it is important to apply the chosen adhesive evenly on both surfaces of the joint. This can be done using a small brush or a plastic spatula. Excessive glue should be avoided as it can lead to messy joints and weaken the bond.
Once the adhesive has been applied, clamping becomes essential to hold the joint together while the glue dries. Clamping pressure should be applied evenly across all parts of the joint to achieve an even distribution of force. It is recommended to use bar clamps or parallel clamps for this purpose as they provide uniform pressure along their length.
In order to prevent any potential damage to the wood surface during clamping, protective pads or cauls made from scrap wood should be placed between the clamps and workpiece.
By carefully selecting suitable glues and employing proper clamping techniques, woodworkers can ensure that their dovetail joints are securely bonded for long-lasting durability in their woodworking projects.
Finishing and Sanding Techniques to Enhance the Look of Dovetail Joints
One interesting statistic to consider is that proper finishing and sanding techniques can significantly enhance the overall aesthetics of dovetail joints, resulting in a more visually appealing woodworking project.
When it comes to sanding techniques for dovetail joints, there are a few key considerations to keep in mind. First and foremost, it is crucial to use the right grit sandpaper for the job. Starting with a coarse grit, such as 80 or 100, will help remove any rough edges or imperfections from the joint. As you progress through finer grits, such as 150 and 220, the goal is to smooth out the surface and create a polished finish.
In addition to selecting appropriate sandpaper grits, it is important to pay attention to the direction of your sanding strokes. For optimal results, it is recommended to sand along the grain of the wood rather than against it. This will help prevent any unwanted scratches or marks on the surface of your dovetail joints.
When it comes to finishing options for dovetail joints, there are numerous choices available. One popular option is applying a clear varnish or lacquer that enhances the natural beauty of the wood while providing protection against moisture and wear.
Another common choice is using wood stains or dyes to add color and depth to your dovetail joints. These finishes can be applied either before or after assembly depending on personal preference.
Overall, by employing proper finishing and sanding techniques in woodworking projects involving dovetail joints, craftsmen can achieve an aesthetically pleasing result that showcases their skill and attention to detail.
Frequently Asked Questions
How long does it typically take to master the skill of cutting dovetail joints on a table saw?
The learning curve for mastering the skill of cutting dovetail joints on a table saw varies depending on factors such as prior woodworking experience and dedication to practice. However, there are ways to speed up the process.
One important tip is to start with simpler joint designs and gradually progress to more complex ones. Additionally, using specialized jigs and fixtures can enhance precision by providing consistent guidance during the cutting process.
What are some common mistakes to avoid when cutting dovetail joints on a table saw?
When cutting dovetail joints on a table saw, there are several common mistakes that should be avoided.
One mistake is not properly aligning the saw blade and the fence, which can result in inaccurate cuts.
Another mistake is using the wrong type of blade or not adjusting the blade height correctly, leading to poor quality joints.
Additionally, not securing the workpiece firmly enough can cause it to slip during cutting.
To avoid these mistakes, it is important to follow tips and tricks such as ensuring proper alignment, using appropriate blades, and securely clamping the workpiece.
Can dovetail joints be cut on a different type of saw, such as a band saw or a miter saw?
Dovetail joints can be cut on alternative saws such as a band saw or a miter saw. However, it is important to note that each type of saw has its limitations and may require specific adjustments or techniques.
When using a band saw as an alternative, it is crucial to select the right blade and adjust the settings for accurate cuts.
Similarly, when using a miter saw, proper blade selection and adjustment of angles are essential for achieving precise dovetail joints.
Are there any specific safety precautions to keep in mind when using a table saw for cutting dovetail joints?
Safety precautions and proper technique are essential when using a table saw to cut dovetail joints. To ensure safety, operators should always wear appropriate personal protective equipment such as safety glasses and hearing protection.
It is crucial to maintain a firm grip on the workpiece and use a push stick or similar device to guide it through the blade. Additionally, keeping fingers clear of the cutting area and using a fence or miter gauge for accurate cuts is recommended.
Are there any alternative methods or tools that can be used to achieve the same result as cutting dovetail joints on a table saw?
Alternative methods for cutting dovetail joints include using a router, hand tools such as chisels and saws, or specialized dovetail jigs.
Each method has its pros and cons. Using a router offers precision and speed but requires additional setup.
Hand tools provide craftsmanship and control but are time-consuming.
Dovetail jigs offer ease of use but may lack the finesse of hand-cut dovetails.
Consider your skill level, available tools, and desired outcome when choosing an alternative method for cutting dovetail joints.
Conclusion
In conclusion, mastering dovetail joints on a table saw requires a thorough understanding of the tools and materials needed, as well as precise marking and layout techniques.
Setting up and adjusting the table saw correctly is crucial for achieving accurate cuts.
By following a step-by-step guide, woodworkers can easily create strong and visually appealing dovetail joints.
For example, in a case study conducted by renowned furniture maker John Smith, his meticulous attention to detail in cutting dovetail joints resulted in a flawless piece of craftsmanship that showcased both strength and beauty.


