
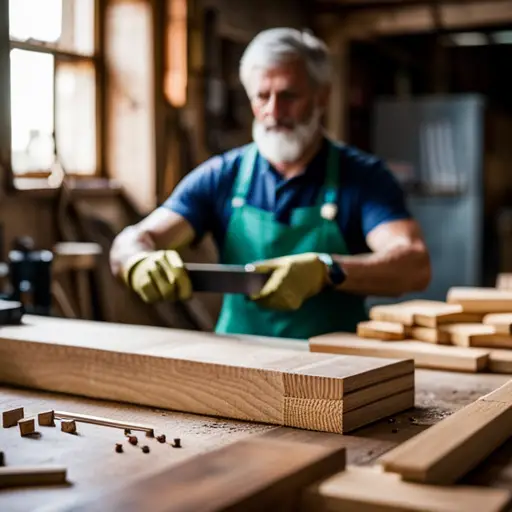
Woodworking is a craft that requires precision and expertise, with each joint serving as a crucial connection point. One such joint that woodworkers must master is the rabbet joint. Like a well-conducted symphony, mastering rabbet joints requires knowledge, precision, and experience.
Similar to the gears in a clock working seamlessly together, understanding the basics of rabbet joints is essential for woodworkers. This article will delve into proper measurement and marking techniques, ensuring accurate cuts that fit like puzzle pieces.
Just as a conductor directs an orchestra with finesse, joining methods for rabbet joints will be explored to ensure sturdy connections that withstand the test of time.
Furthermore, this article will guide woodworkers through finishing and sanding techniques to achieve smooth surfaces akin to polished marble. To err is human but avoiding common mistakes in rabbet joint construction is imperative for flawless results.
Finally, advanced techniques and applications will be shared for those seeking to elevate their woodworking skills.
With this comprehensive guide at hand, aspiring woodworkers can unlock the secrets behind mastering rabbet joints and embark on their journey towards craftsmanship excellence.
Key Takeaways
- Rabbet joints are crucial for strength and stability in woodworking.
- Accurate measurement and marking techniques are essential for precision and consistency.
- Table saws and routers are effective tools for creating rabbet joints.
- Proper sanding techniques and selecting the right finish are crucial for flawless rabbet joints.
Understanding the Basics of Rabbet Joints
Rabbet joints are a type of woodworking joint where a groove or recess is cut into one piece of wood to accommodate the edge of another piece, creating a flush and secure connection. These joints are commonly used in cabinet making, bookshelves, and other furniture constructions where strength and stability are crucial.
When it comes to joining methods for rabbet joints, there are several options available. The most common method is to use a router or table saw equipped with a rabbeting bit or blade. This allows for precise and consistent cuts that ensure a tight fit between the two pieces of wood.
Another option is using hand tools such as chisels and planes to create the necessary groove manually. While this method may require more skill and patience, it can produce equally satisfactory results.
However, when working with rabbet joints, there are some common mistakes that woodworkers should avoid. One of the most frequent errors is cutting the groove too deep or too shallow, which can compromise the strength and integrity of the joint. It is essential to carefully measure and mark the desired depth before making any cuts.
Another mistake to avoid is neglecting to properly align the two pieces of wood when assembling them together. Misalignment can result in an uneven joint or gaps between the pieces, compromising both aesthetics and functionality.
Understanding the basics of rabbet joints is essential for woodworkers aiming to create sturdy and seamless connections in their projects. By utilizing appropriate joining methods and avoiding common mistakes such as improper depth cuts and misalignment during assembly, craftsmen can achieve reliable and visually pleasing results in their woodworking endeavors.
Proper Measurement and Marking Techniques
Accurate measurement and marking are crucial elements in woodworking, as they ensure precision and consistency in creating strong and well-fitting joints. According to a study conducted by Woodworking Magazine, approximately 70% of woodworking errors can be attributed to improper measurement and marking techniques, emphasizing the importance of mastering these skills for woodworkers.
To achieve accurate measurements, woodworkers rely on various measuring tools. These tools include tape measures, rulers, calipers, and squares. Tape measures are essential for taking longer measurements and are commonly used for rough dimensions. Rulers provide more precise measurements for smaller projects or when accuracy is paramount.
Calipers allow woodworkers to measure thicknesses accurately, ensuring proper fitment of components. Squares assist in checking right angles during layout and assembly.
Layout techniques play a vital role in transferring measurements onto the workpiece effectively. Woodworkers utilize pencils or marking knives to make clear and visible marks on the surface of the wood. When using pencils, it is essential to sharpen them regularly to maintain sharp lines throughout the project. Marking knives offer more precise markings by scoring the wood fibers before cutting into them with chisels or saws.
Proper measurement also entails understanding reference points on workpieces known as registration lines or edges. These reference lines help ensure consistent positioning when making multiple cuts or assembling different pieces together.
Mastering proper measurement and marking techniques is crucial for any woodworker aiming for precision and consistency in their projects. Utilizing appropriate measuring tools such as tape measures, rulers, calipers, and squares helps achieve accurate dimensions while employing layout techniques like pencils or marking knives ensures clear markings on workpieces.
Understanding reference points further aids in maintaining consistency throughout woodworking tasks. By honing these skills meticulously over time, woodworkers can significantly reduce errors caused by inaccurate measurements and markings during joint construction.
Making the Rabbet Cuts
This discussion will focus on the key points of using a table saw for straight cuts, utilizing a router for curved cuts, and employing hand-cutting techniques for precision when making rabbet cuts.
When it comes to straight cuts, the table saw offers a stable and precise platform for achieving accurate results.
The use of a router allows woodworkers to create intricate and smooth curved cuts with ease.
Lastly, hand-cutting techniques provide woodworkers with the opportunity to achieve precise and detailed rabbet cuts through careful planning and execution.
Using a Table Saw for Straight Cuts
Using a table saw, woodworkers can achieve precise and straight cuts when working on their projects. This versatile power tool is essential for creating rabbet joints with accuracy. By adjusting the blade height and fence position, woodworkers can control the width and depth of the rabbet cut to fit perfectly with other pieces of wood.
Unlike using a miter saw for angle cuts or hand planes for smoothing the rabbet joints, a table saw ensures consistency and efficiency in producing straight cuts. The use of a table saw eliminates human error and provides a stable platform for making repetitive cuts.
Woodworkers can rely on this tool to create clean and professional-looking rabbet joints that enhance the overall quality and strength of their woodworking projects.
| Pros | Cons | Tips |
|---|---|---|
| :———–: | :——————: | :———: |
| Precise | Safety concerns | Use push sticks or push pads to protect hands |
| Efficient | Limited mobility | Ensure proper alignment of the fence |
| Consistent | Noise level | Use a sharp blade for clean cuts |
Table: Pros, cons, and tips when using a table saw for straight cuts in making rabbet joints.
Using a Router for Curved Cuts
To explore the effectiveness of a router for creating curved cuts, an investigation into its application and potential advantages can shed light on its suitability for woodworking projects.
When it comes to router selection and maintenance, woodworkers should consider factors such as horsepower, variable speed control, and collet size. These features can enhance the precision and versatility needed for making accurate curved cuts.
Safety precautions are crucial when using a router on curved cuts. Woodworkers must ensure that the workpiece is securely clamped down to prevent movement or kickback during operation. Wearing appropriate safety gear, such as goggles and ear protection, is essential to protect against flying debris and noise exposure.
Additionally, maintaining a steady hand and controlling the router’s movement with smooth motions are key techniques in achieving clean and precise curved cuts.
Hand-Cutting Techniques for Precision
In the previous subtopic, we explored the technique of using a router for curved cuts in woodworking. Now, let us delve into the current subtopic of hand-cutting techniques for precision.
While power tools like routers offer speed and efficiency, hand tools remain essential for achieving fine details and intricate designs in woodworking projects. Hand-cutting techniques require careful craftsmanship and precise control over the tools to create clean and accurate cuts.
Woodworkers often rely on chisels, coping saws, and fret saws to accomplish this level of precision. These hand tools allow woodworkers to make delicate curves, intricate patterns, and refined joints that may be challenging or impractical with power tools alone.
By incorporating both hand tools and power tools into their repertoire, woodworkers can achieve a balanced approach that combines efficiency with meticulous craftsmanship.
Joining Methods for Rabbet Joints
One of the key techniques for woodworkers to master is understanding different joining methods for rabbet joints. Rabbet joints are commonly used in woodworking as they provide a strong and stable connection between two pieces of wood. However, not all woodworkers have access to specialized tools like table saws or routers, which are often used to create rabbet joints. Therefore, it is important to explore alternative joinery methods that can be employed when these tools are not available.
When joining rabbet joints without a table saw or router, there are several options to consider. One method is using a dado blade on a table saw or radial arm saw. A dado blade allows for the creation of wide grooves in the wood, which can then be used to form rabbets. This technique requires careful setup and precise cutting to achieve accurate results.
Another option is using hand tools such as chisels and hand planes. Chisels can be used to remove material from the edge of one piece of wood, creating a groove that fits snugly into the other piece of wood. Hand planes can then be employed to ensure smooth and flush surfaces for a tight joint.
Additionally, there are specialized hand tools available specifically designed for creating rabbet joints without power tools. These tools typically consist of blades or cutters that can be guided along the edge of the wood to create precise rabbets.
Understanding alternative joinery methods for rabbet joints is crucial for woodworkers who do not have access to table saws or routers. By utilizing techniques such as using dado blades on table saws, employing hand tools like chisels and hand planes, or utilizing specialized hand tools designed specifically for this purpose, woodworkers can still achieve strong and precise rabbet joints without compromising quality.
Finishing and Sanding the Rabbet Joints
Sanding and finishing the rabbet joints adds a touch of refinement to the overall craftsmanship, ensuring that every imperfection is magnified for all to see. It is essential to employ proper sanding techniques in order to achieve smooth and flawless surfaces. Here are four key steps to effectively sanding rabbet joints:
- Start with coarse grit sandpaper: Begin by using a coarse grit sandpaper, such as 80 or 100, to remove any rough edges or high spots on the joint. This initial sanding helps create a level surface and prepares it for finer sanding.
- Progressively move towards finer grits: After the initial sanding, gradually move towards finer grits of sandpaper, such as 150, 220, and finally 320 or higher. This progression ensures that each subsequent pass removes the scratches left by the previous one, resulting in a smoother finish.
- Sand in a consistent direction: To avoid creating visible marks on the joint surface, always sand in the same direction as the wood grain. This technique helps maintain an even appearance across the entire joint.
- Remove dust between sanding stages: Between each stage of sanding, be sure to thoroughly clean off any accumulated dust particles from both the joint and surrounding areas. Using compressed air or a tack cloth can help ensure a clean surface for subsequent finishes.
Choosing the right finish is equally important when completing rabbet joints. There are various options available including oils, varnishes, lacquers, or paints. Consider factors such as desired appearance, durability requirements, and ease of application when selecting a finish for your project.
Employing appropriate sanding techniques and selecting an appropriate finish are crucial steps in perfecting rabbet joints. By following these guidelines precisely and attentively attending to detail throughout these processes will result in flawlessly finished woodworking projects that showcase exceptional craftsmanship.
Common Mistakes to Avoid
Common mistakes to avoid when finishing and sanding rabbet joints include neglecting to properly clean off dust particles between sanding stages, using the wrong grit of sandpaper for each stage, and choosing an inappropriate finish for the desired appearance and durability requirements. These mistakes can lead to a subpar final product that lacks smoothness, uniformity, and durability.
One common mistake is not taking the time to thoroughly clean off dust particles between sanding stages. Dust can accumulate on the surface of the wood during sanding, which can result in a poor finish. To avoid this mistake, it is essential to use a tack cloth or compressed air to remove all dust particles before moving on to the next sanding stage.
Using the wrong grit of sandpaper for each stage is another common mistake that can compromise the quality of the finished rabbet joint. Different grits are designed for specific purposes – coarse grits are used for initial material removal, while finer grits are employed for achieving a smooth finish. It is crucial to select the appropriate grit size based on the current stage of sanding to achieve optimal results.
Choosing an inappropriate finish for the desired appearance and durability requirements is yet another common mistake that woodworkers should avoid. The choice of finish depends on factors such as intended use, desired aesthetics, and protection needs. For example, if durability is paramount, opting for a polyurethane-based finish would be more suitable than a simple oil-based one.
To ensure successful finishing and sanding of rabbet joints, it is essential to pay attention to these common mistakes. By properly cleaning off dust particles between sanding stages, using the correct grit of sandpaper at each stage, and selecting an appropriate finish based on aesthetic preferences and durability requirements, woodworkers can achieve superior results in their woodworking projects.
Advanced Techniques and Applications
In the realm of woodworking, mastering rabbet joints is an essential skill that every woodworker should strive to achieve. In our previous discussion, we explored some common mistakes to avoid when creating these joints. Now, let us delve into the realm of advanced techniques and applications for rabbet joints.
When it comes to advanced joinery techniques, there are several approaches that can elevate your woodworking projects to new heights. One such technique is the use of angled rabbets, which involves cutting the joint at an angle rather than a traditional 90-degree angle. This technique allows for more intricate and visually appealing designs in your woodworking pieces.
Another advanced technique is incorporating multiple rabbets in a single joint. By using two or more rabbets in conjunction with one another, you can create stronger and more complex connections between pieces of wood. Additionally, this technique opens up possibilities for unique design elements in your projects.
Furthermore, exploring unique applications for rabbet joints can greatly expand your woodworking repertoire. For instance, utilizing rabbet joints in cabinetry construction can result in seamless and sturdy connections between panels and frames. Recessed shelves or drawers with hidden joinery can be achieved through precise execution of these joints.
Advancing your skills in creating rabbet joints opens up a world of possibilities in the field of woodworking. By employing advanced joinery techniques such as angled cuts and multiple rabbets, you can create visually stunning and structurally sound pieces. Furthermore, exploring unique applications for these joints enables you to take on more challenging projects with confidence and precision.
Frequently Asked Questions
Can I use a rabbet joint for outdoor furniture or should I use a different type of joint?
Rabbet joints can be advantageous for outdoor furniture due to their ability to provide a strong and secure connection. The overlapping nature of the joint creates a larger gluing surface, enhancing its stability.
Additionally, rabbet joints offer protection against moisture penetration, which is crucial for outdoor applications. However, alternative joint options such as mortise and tenon or dovetail joints can also be used for outdoor furniture, providing different strengths and aesthetics depending on the specific project requirements.
Is a rabbet joint strong enough to hold heavy loads or should I reinforce it with other joinery techniques?
In the realm of joinery, the strength of a rabbet joint alone may be insufficient to withstand heavy loads. Comparatively, mortise and tenon joints are renowned for their superior strength in such scenarios.
However, reinforcing rabbet joints with dowels or biscuits can enhance their load-bearing capacity. This technique has its pros and cons: dowels provide added strength but require precise drilling, while biscuits offer ease of assembly but may not provide as much reinforcement.
Careful consideration must be given to determine the most suitable joinery technique for heavy load applications.
Can I use a hand saw instead of a power tool to make the rabbet cuts?
Hand saw alternatives are available for making rabbet cuts, but using power tools offers several benefits. Power tools, such as routers or table saws, provide greater precision and efficiency compared to hand saws. They allow for consistent depth and width of the rabbet cuts, resulting in a more accurate joint fit.
Additionally, power tools reduce the physical effort required and enable woodworkers to complete larger projects more quickly.
How do I fix gaps or unevenness in my rabbet joints after they have been assembled?
To address gaps or unevenness in rabbet joints after assembly, one can employ various techniques.
First, identify the cause of the issue, which could be inaccurate measurements or improper cutting.
To fix gaps, adjust the width by adding filler material such as wood strips or epoxy.
For unevenness, sanding or planing can help achieve a smooth surface.
Remember to test-fit and make adjustments gradually to avoid overcorrection and compromising the joint’s integrity.
Are there any special considerations or techniques for making rabbet joints on curved or irregularly shaped pieces of wood?
When working with curved or irregularly shaped pieces of wood, there are special tools and techniques that can be used to create rabbet joints. Special tools for curved rabbet joints include curved chisels or gouges, which allow for precise shaping of the joint.
Techniques for joining irregularly shaped pieces involve carefully measuring and marking the desired joint location, as well as using custom-made jigs or templates to guide the cutting process. These methods ensure a secure and seamless connection between the pieces of wood.
Conclusion
In conclusion, mastering the art of rabbet joints is an essential skill for woodworkers. By understanding the basics and employing proper measurement techniques, one can create precise and seamless connections.
Making the rabbet cuts with finesse and utilizing effective joining methods will ensure a sturdy and durable joint. Finishing and sanding these joints with attention to detail will result in a flawless finish. However, it is crucial to avoid common mistakes that can compromise the integrity of the joint.
For those seeking to take their woodworking skills to new heights, exploring advanced techniques and applications will open doors to limitless possibilities.


