
In the realm of woodworking, box joints are revered for their strength and aesthetic appeal. The sight of perfectly interlocking wooden fingers coming together to form a seamless joint is enough to ignite a sense of awe in any craftsman or enthusiast. However, achieving such flawless box joints requires not only skill but also the right tools and techniques.
Enter table saw jigs – the key to unlocking the secrets of perfect box joints. These ingenious devices, when used correctly, allow woodworkers to create precise and tight-fitting joints effortlessly. By harnessing the power of a table saw and employing specific jig designs, craftsmen can elevate their box joint game to new heights.
This article delves deep into the world of perfect box joints with a focus on table saw jigs. It provides an in-depth understanding of box joints, introduces various types of table saw jigs, guides readers through building their own jig, offers tips for fine-tuning joint skills, explores advanced techniques, troubleshoots common issues encountered during the process, and ultimately inspires woodworkers to showcase their masterpieces.
Whether you’re an aspiring artisan or a seasoned professional seeking improved craftsmanship, this article will equip you with invaluable knowledge that will enable you to unlock the secrets behind creating flawless box joints using table saw jigs.
Key Takeaways
- Box joints in woodworking are revered for their strength and aesthetic appeal.
- Table saw jigs, such as sled jigs and finger joint jigs, are key to achieving perfect box joints.
- Adjustable box joint jigs offer flexibility and fine-tuning options for precise cuts.
– Troubleshooting common box joint issues, such as gaps or tear-out, can be done by proper alignment, adjusting table saw settings, and using sharp blades.
Understanding the Basics of Box Joints
Box joints, also known as finger joints, are a type of joinery technique commonly used in woodworking where interlocking rectangular fingers are created to connect two or more pieces of wood at right angles, resulting in a strong and visually appealing joint.
The design of box joints involves creating equally spaced fingers on the edges of the adjoining wood pieces that interlock with corresponding fingers on the opposite piece. This pattern provides maximum surface area for glue adhesion and enhances the overall strength and stability of the joint.
One key advantage of box joints is their versatility and wide range of applications. They can be used to create durable and aesthetically pleasing connections in various woodworking projects such as drawers, cabinets, boxes, frames, and furniture. Box joints have gained popularity due to their distinct appearance, which adds visual interest to finished products.
To achieve precise box joints, it is crucial to pay attention to several factors. The first consideration is the width and depth of the fingers. These dimensions should be carefully chosen based on the thickness and overall size of the wood pieces being joined together. Additionally, ensuring tight tolerances between each finger is essential for creating a seamless fit.
Another crucial aspect is selecting an appropriate jig for cutting box joints on a table saw. A well-designed jig helps guide the workpiece accurately while providing necessary support during cuts. There are various types of jigs available commercially or even homemade options that can be tailored to specific project requirements.
Understanding the basics of box joint design and its applications allows woodworkers to create strong connections between wooden pieces at right angles while adding visual appeal to their projects. By utilizing proper techniques and tools like jigs designed for table saws, one can unlock the secrets to perfecting box joints in woodworking endeavors.
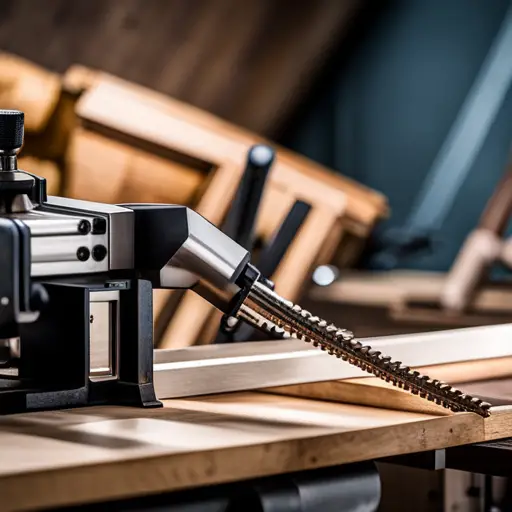
Introducing Table Saw Jigs
Woodworking enthusiasts can enhance their precision and craftsmanship by employing specialized tools to create flawless interlocking connections.
One such tool that proves indispensable in achieving perfect box joints is the table saw jig. Table saw jigs come in various types, each offering distinct benefits and disadvantages.
One type of table saw jig commonly used for creating box joints is the sled jig. This jig consists of a flat base with runners that glide along the table saw’s miter slots. It allows woodworkers to make precise cuts at specific angles, resulting in accurately aligned box joint pieces. The sled jig also ensures consistent spacing between the fingers of the joint, leading to a tight and secure fit. However, its main disadvantage lies in its limited capacity for accommodating larger workpieces due to its fixed size.
Another type of table saw jig used for box joints is the finger joint or comb jig. This versatile jig features multiple rows of precisely spaced pins or fingers that interlock with corresponding notches cut into the workpiece. The finger joint jig enables woodworkers to customize the size and spacing of the fingers according to their project requirements. However, it may require more setup time compared to other jigs due to its intricate design.
Additionally, there are commercially available adjustable box joint jigs that offer flexibility in terms of finger size and spacing. These jigs often incorporate micro-adjustment features, allowing woodworkers to fine-tune their cuts for a perfect fit.
Table saw jigs provide woodworking enthusiasts with invaluable assistance in creating flawless box joints. Whether using sled jigs, finger joint jigs, or adjustable box joint jigs, each type offers unique benefits and disadvantages that cater to different project requirements and preferences. By utilizing these specialized tools effectively, woodworkers can achieve impeccable interlocking connections with ease and precision.
Building Your Own Table Saw Jig
One effective method for enhancing precision in creating interlocking connections involves constructing a customized jig specifically designed for use with a table saw. Building your own table saw jig allows you to tailor it to your specific needs and ensures that it is made from high-quality building materials, resulting in a durable and reliable tool.
When building your own table saw jig, it is important to consider safety precautions. Always wear appropriate personal protective equipment, such as safety glasses and gloves, to prevent injuries. Additionally, ensure that the jig is securely fastened to the table saw to avoid any accidents or mishaps during operation.
To begin constructing the jig, gather the necessary building materials. This typically includes plywood or solid wood for the main body of the jig, screws or bolts for assembly, and an accurate measuring tool such as a ruler or tape measure. It may also be beneficial to have access to a drill press or other woodworking tools for precise cuts and holes.
When building the jig, pay attention to detail and accuracy. Measure twice before making any cuts or drilling any holes to ensure everything aligns properly. Use clamps or other methods of securing pieces together while assembling to maintain stability and alignment.
Constructing your own table saw jig can greatly enhance precision when creating interlocking connections. By using high-quality building materials and following proper safety precautions throughout the construction process, you can create a durable tool that will assist in achieving accurate results time after time.
Fine-tuning Your Box Joint Skills
Achieving mastery in the art of creating precise and seamless interlocking connections requires a meticulous approach akin to a skilled pianist fine-tuning their finger placement on each key, ensuring harmonious melodies with every stroke. When it comes to box joints, fine-tuning your skills is essential for improving accuracy and optimizing efficiency.
Here are some key strategies to enhance your box joint technique:
- Calibrating Your Table Saw: Start by making sure that your table saw is properly calibrated. Check the alignment of the blade and fence to ensure accurate cuts. Adjust any misalignments or deficiencies before proceeding.
- Using Precision Jigs: Invest in high-quality precision jigs specifically designed for box joints. These jigs provide stability and guide the workpiece through the cutting process, resulting in clean and tight-fitting joints. Ensure that the jig is securely attached to your table saw.
⦿ Types of Box Joint Jigs:
- Standard Box Joint Jig: Offers versatility for different joint sizes.
- Dovetail Jig: Allows you to create intricate dovetail joints with ease.
⦿ Additional Features:
- Adjustable Pins or Keys: Enable customization for varying joint widths.
- Built-in Measuring Systems: Help achieve precise positioning for consistent results.
By incorporating these techniques into your woodworking practice, you can refine your box joint skills and achieve greater accuracy in creating perfect interlocking connections.
Remember to always observe proper safety precautions when working with power tools, such as wearing safety glasses and using push sticks or blocks when necessary. With dedication and practice, you will be able to unlock the secrets of perfect box joints with table saw jigs, taking your craftsmanship to new heights of precision and satisfaction.
Exploring Advanced Box Joint Techniques
Exploring the realm of advanced techniques in box joint craftsmanship unveils a world of intricate variations and creative possibilities. Advanced box joint techniques allow craftsmen to push the boundaries of traditional box joint designs, resulting in unique and visually captivating creations. These techniques go beyond the basic interlocking pattern of regular box joints, offering new ways to enhance both form and function.
One such technique is the incorporation of decorative elements within the box joint design. Craftsmen can experiment with different shapes and sizes, creating patterns that add aesthetic appeal to their projects. By varying the width or depth of individual fingers, they can achieve interesting visual effects that catch the eye and elevate their work to a more artistic level.
Additionally, advanced box joint techniques enable craftsmen to explore unconventional materials for their joinery projects. Instead of relying solely on wood, they can incorporate other materials such as metal or acrylic into their designs. This opens up a whole new range of possibilities for creating truly unique pieces that stand out from traditional wooden boxes.
Furthermore, craftsmen can draw inspiration from various sources when designing advanced box joints. They may look to nature’s patterns and textures or explore architectural motifs for ideas on how to create intricate and visually stunning joints. The combination of creativity and technical skill allows artisans to develop one-of-a-kind designs that showcase their expertise in this specialized craft.
Delving into advanced box joint techniques offers craftsmen an opportunity to expand their skills and create extraordinary pieces. Through incorporating decorative elements, experimenting with unconventional materials, and seeking inspiration from various sources, artisans can unlock endless possibilities in crafting intricate and visually striking box joints.
Troubleshooting Common Box Joint Issues
This discussion will focus on troubleshooting common box joint issues. Specifically, it will address the key points of dealing with gaps or loose joints, fixing misaligned or uneven box joints, and preventing tear-out and splintering during the cutting process.
When dealing with gaps or loose joints in box joints, it is important to ensure that the wood pieces are properly aligned and securely clamped together.
Misaligned or uneven box joints can be fixed by carefully adjusting the table saw fence and blade height to achieve precise cuts.
To prevent tear-out and splintering during the cutting process, using a zero-clearance insert on the table saw and making multiple light passes can help maintain clean edges.
Dealing with gaps or loose joints
Addressing the issue of gaps or loose joints requires a meticulous approach, ensuring that every component of the box joint is precisely aligned and snugly fitted together.
To fix gaps in box joints, there are several methods that can be employed. One option is to use a chisel or file to carefully remove excess material from the joint until it fits tightly.
Another option is to glue thin shims into the gaps to fill them in and improve joint strength. It is important to ensure that any excess glue is wiped away before it dries, as this can interfere with the fit of the joint.
Additionally, applying clamps or using a mallet and block to gently tap the pieces together can help close any remaining gaps and create a more secure joint.
By employing these techniques, one can achieve tight-fitting box joints with improved strength.
Fixing misaligned or uneven box joints
When dealing with gaps or loose joints in box joints, it is important to address misaligned or uneven joints as well. Misaligned or uneven box joints can result from various factors such as inaccurate measurements, improper setup of the table saw jig, or even minor errors in cutting.
To fix this issue and achieve a perfect fit, adjustments must be made to the box joint fit. One way to adjust the fit is by using shims or spacers between the workpieces to compensate for any misalignment.
Another method is to sand down any high spots on the joint faces until they are level and flush. Additionally, improving box joint accuracy requires meticulous attention to detail during setup and precise execution of each cut.
By implementing these techniques, one can overcome misalignments and create flawless box joints.
Preventing tear-out and splintering during the cutting process
To ensure clean and smooth cuts, it is essential to employ techniques that minimize tear-out and splintering during the cutting process. Tear-out refers to the chipping or splintering of wood fibers along the edges of the cut, while splintering involves the separation or breaking of wood layers.
Minimizing tear-out and preventing splintering can be achieved through several methods. Firstly, using a sharp blade with a high tooth count reduces tearing by cleanly slicing through the wood fibers.
Secondly, employing a zero-clearance insert on the table saw helps support the wood fibers close to the blade, reducing tear-out.
Additionally, using a backer board behind thin or fragile pieces prevents them from splitting or splintering during cutting.
Lastly, making sure to feed the workpiece steadily and at an appropriate speed also aids in minimizing tear-out and preventing splintering.
By implementing these strategies, one can achieve cleaner cuts with minimal tear-out and splintering.
Showcasing Your Box Joint Masterpieces
Exhibiting one’s meticulously crafted box joints can serve as a testament to the skill and precision required in creating such masterpieces. When showcasing box joint designs, it is important to pay attention to the finishing details that enhance the overall aesthetic appeal of the joint.
One effective way to showcase box joints is through thoughtful design choices that highlight the unique pattern created by interlocking fingers. To make your box joints stand out, consider using contrasting wood species or incorporating decorative elements such as inlays or veneers. These additions can add visual interest and emphasize the craftsmanship of the joint.
Additionally, paying attention to the finishing techniques can further elevate the appearance of your box joints. When finishing box joints, it is crucial to sand them thoroughly to achieve a smooth surface free from any rough edges or imperfections. Start with a coarse grit sandpaper and gradually work your way up to finer grits for a polished finish. Applying an appropriate stain or varnish can enhance the natural beauty of the wood and provide protection against wear and tear.
Another tip for showcasing your box joint masterpieces is to present them in well-crafted display cases or shelves that complement their style. Custom-made boxes with clear acrylic lids allow viewers to appreciate both the exterior design and internal compartments, while wall-mounted shelving units provide an elegant way to exhibit multiple pieces together.
Exhibiting meticulously crafted box joints requires careful attention not only during construction but also when considering finishing touches and presentation methods. By showcasing thoughtful design choices, employing proper finishing techniques, and presenting them in fitting displays, you can truly showcase your mastery of this intricate woodworking technique.
Frequently Asked Questions
What is the origin of box joints and when were they first used in woodworking?
The origin of box joints can be traced back to ancient woodworking practices. Craftsmen used this technique to create strong and sturdy joinery. The evolution of box joints over time has seen various improvements in design and execution, leading to the development of more precise and efficient methods. This historical progression reflects the enduring importance and utility of box joints in woodworking, making them a fundamental aspect of the craft.
Can box joints be used for other types of joinery besides creating boxes?
Box joints can indeed be used for various types of joinery beyond creating boxes. The versatility of box joints allows them to be applied in a range of woodworking projects, such as drawers, cabinets, and furniture construction.
The main advantage of using box joints is their strength and durability, as they provide a large surface area for glue bonding. However, box joints have limitations in terms of flexibility and aesthetics compared to other joinery techniques like dovetail or mortise and tenon joints.
Are there any alternative tools or techniques to create box joints if a table saw is not available?
What alternative tools and techniques can be used to create box joints if a table saw is not available?
Without the use of a table saw, there are several alternatives that can be employed.
One option is using a router with a straight bit and a guide bushing. This allows for precise cuts in the material, resulting in clean and accurate box joints.
Another technique involves using a bandsaw with a specialized jig to cut the joint. This method requires careful setup, but can produce satisfactory results.
What type of wood is best suited for creating box joints?
When considering the best wood types for box joints, it is important to choose a hardwood that provides strength and stability.
Woods such as maple, oak, and walnut are commonly used for this purpose due to their durability and resistance to warping.
Additionally, selecting wood with straight grain patterns can enhance the overall appearance of the joint.
To create perfect box joints, precise measurement and cutting techniques are crucial.
Ensuring accurate spacing and using a sharp blade will help achieve optimal results in box joint construction.
Are there any safety precautions to keep in mind when working with table saw jigs for box joints?
When working with table saw jigs for box joints, it is crucial to prioritize safety precautions in order to avoid potential hazards.
Common mistakes can lead to serious injuries, such as improper positioning of hands or fingers near the blade, lack of proper eye protection, and failure to secure the workpiece adequately.
It is essential to follow manufacturer’s instructions carefully, maintain a clean and organized workspace, and use appropriate safety equipment at all times.
Conclusion
In conclusion, mastering the art of box joints is a journey that requires both skill and precision. By understanding the basics and utilizing table saw jigs, you can unlock the secrets to creating perfect box joints.
Building your own jig allows for customization and fine-tuning, while exploring advanced techniques takes your skills to new heights. Troubleshooting common issues ensures flawless results every time.
With practice and patience, you will soon be showcasing your box joint masterpieces with confidence and pride. So go forth, armed with knowledge and tools, and let the rhythmic flow of precise craftsmanship guide you towards perfection.


