
In the world of woodworking, achieving seamless miter joints is a coveted skill that separates the novice from the expert.
Miter joints are commonly used in furniture making and carpentry to create clean, strong corners. When done correctly, these joints appear as if they were made from a single piece of wood, showcasing the craftsman’s precision and attention to detail.
To master this technique, advanced table saw users must possess not only the right tools and materials but also an understanding of precision measurements and cutting techniques.
Additionally, enhancing joint strength and durability through proper assembly methods is crucial for long-lasting results.
Lastly, finishing and sanding play a vital role in achieving a professional look.
This comprehensive guide will provide advanced table saw users with the knowledge necessary to achieve flawless miter joints. By following these precise instructions and utilizing their expertise, woodworkers can elevate their craftsmanship to new heights.
Key Takeaways
- Precision measurements and cutting techniques are crucial for achieving seamless miter joints.
- Proper assembly methods and the use of reinforcing fasteners enhance joint strength and durability.
- Finishing and sanding play a vital role in achieving a professional look for miter joints.
– Choosing the right wood types and using high-quality tools, such as a table saw with a miter gauge, are essential for accurate cuts.
Understanding Miter Joints
Miter joints, a common woodworking technique, involve joining two pieces of material at a 45-degree angle to create an elegant and seamless corner that appears to be a single piece of wood. Achieving seamless miter joints requires precision and careful execution.
There are several common mistakes to avoid when creating miter joints. One mistake is not accurately measuring the angles. A slight variation in the angle can result in gaps or misalignment, compromising the quality of the joint. It is crucial to use precise measuring tools, such as a protractor or an adjustable bevel gauge, and ensure that the angles are cut precisely.
Another mistake is not preparing the edges properly before joining them. Any imperfections or unevenness on the edges will affect how tightly they fit together and may cause visible gaps in the joint. It is essential to carefully sand or plane both edges to ensure they are smooth and square before joining them.
Different types of miter joints have specific applications depending on their function and appearance. The most common types include butt miters, edge miters, and corner miters. Butt miters are used for joining two pieces at a 90-degree angle without overlapping them. Edge miters are used for joining two pieces along their length with one piece overlapping the other at a 45-degree angle. Corner miters are used for creating corners in frames or boxes by joining four pieces together at 45-degree angles.
Understanding these different types of miter joints and avoiding common mistakes will help advanced table saw users achieve seamless results with their woodworking projects.
Choosing the Right Tools and Materials
When selecting appropriate equipment and materials, it is crucial for experienced individuals using a table saw to carefully consider their choices.
Achieving seamless miter joints requires the use of specific wood types and essential tools. Here are some factors to consider when choosing the right tools and materials:
- Selecting appropriate wood types: The choice of wood plays a significant role in achieving seamless miter joints. It is essential to select stable and high-quality lumber that has minimal defects such as knots or warping. Hardwoods like maple, oak, or walnut are commonly used for their durability and stability. These woods have tight grain patterns that allow for clean cuts and create strong joints.
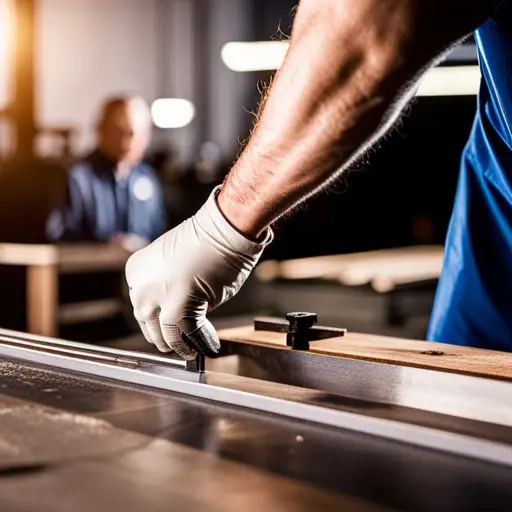
- Identifying essential tools: To achieve precise miter joints, certain tools are necessary. A high-quality table saw with a reliable miter gauge is the primary tool required for accurate cuts at various angles. Additionally, a sharp crosscutting blade with fine teeth will ensure clean edges on the wood pieces being joined together. Other useful tools include a reliable combination square for measuring angles accurately and clamps or hold-downs to secure workpieces during cutting.
- Choosing appropriate fasteners: In addition to selecting the right wood types and using essential tools, choosing appropriate fasteners is crucial for achieving seamless miter joints. Depending on the project requirements, options such as biscuits, dowels, or splines can be used to reinforce the joint strength.
By carefully considering these factors when selecting tools and materials, experienced individuals using a table saw can increase their chances of achieving seamless miter joints. It is important to prioritize precision and quality throughout the process to ensure successful outcomes in advanced woodworking projects.
Mastering Precision Measurements
Mastering precision measurements is a critical skill for individuals looking to excel in woodworking projects involving the use of a table saw. Precision measuring techniques are essential for achieving seamless miter joints, as even the smallest discrepancy can result in noticeable gaps or misalignments. Accuracy is of utmost importance when working with wood, as it ensures that each piece fits together perfectly and creates a finished product that is not only aesthetically pleasing but also structurally sound.
To achieve precise measurements, woodworkers must utilize various tools and techniques. One commonly used tool is the tape measure, which allows for quick and accurate measurements of length. However, it is important to consider parallax error when using a tape measure, as the angle at which it is viewed can affect the reading. To avoid this issue, it is recommended to position oneself directly in front of the measurement being taken.
In addition to tape measures, woodworkers often rely on other measuring tools such as calipers and squares. Calipers are useful for measuring small distances with great accuracy, while squares ensure that angles are perfectly perpendicular. These tools allow woodworkers to make precise cuts and ensure that pieces fit together seamlessly.
The importance of accuracy cannot be overstated when it comes to achieving seamless miter joints using a table saw. By mastering precision measurements and utilizing appropriate tools and techniques, woodworkers can greatly enhance their ability to create high-quality projects with flawless miter joints.
Perfecting the Cutting Technique
To ensure precise and clean cuts, woodworkers must focus on the artistry of their cutting technique, allowing the blade to effortlessly glide through the wood like a smoothly flowing river. Achieving seamless miter joints requires not only a skilled hand but also attention to blade maintenance and safety precautions.
Blade maintenance is crucial for achieving accurate and smooth cuts. Regularly inspecting the blade for any signs of wear or damage is essential. A dull or damaged blade can result in rough edges and uneven cuts, compromising the overall quality of the joint. Keeping the blade clean from sawdust and debris is equally important as it ensures proper contact with the wood, reducing friction and minimizing any potential burn marks.
Safety precautions should never be overlooked when perfecting cutting techniques. Always wear personal protective equipment such as safety glasses, ear protection, and a dust mask to protect against flying debris and harmful particles released during cutting. Maintaining a stable stance with proper posture helps maintain control over the saw while reducing strain on your body.
When making precise cuts for miter joints, using a push stick or push block can greatly enhance safety by keeping hands at a safe distance from the blade. Additionally, ensuring that both the fence and miter gauge are properly aligned before making any cuts promotes accuracy.
Achieving seamless miter joints requires more than just technical knowledge; it demands attention to detail in every aspect of woodworking. By prioritizing blade maintenance and implementing necessary safety precautions, woodworkers can master their cutting technique and achieve impeccable results in their projects.
Achieving a Flawless Fit
Attaining a flawless fit in woodworking projects necessitates meticulous attention to detail and precise measurements. Achieving seamless miter joints requires the use of accurate measuring techniques and alignment methods.
Here are three key points to consider when striving for a flawless fit:
- Measuring accuracy: To achieve precise miter joints, it is crucial to measure accurately. Using a high-quality tape measure or precision measuring tools can help ensure accurate measurements. When measuring, it is important to account for any variations in the material thickness or irregularities in the wood grain that may affect the final fit.
- Alignment techniques: Proper alignment is essential for achieving seamless miter joints. One common technique is the use of stop blocks or jigs to hold the workpiece securely in place during cutting. This helps maintain consistent angles and prevents any movement that could result in misaligned joints. Additionally, using clamps or other securing devices can help keep the workpiece stable throughout the cutting process.
- Test fits and adjustments: Before making permanent cuts, it is advisable to perform test fits by dry assembling the pieces together. This allows for any necessary adjustments to be made before committing to final cuts. If gaps or misalignments are present, fine-tuning can be done by adjusting angles, sanding edges, or using shims to fill small gaps.
By paying close attention to measuring accuracy and employing proper alignment techniques, woodworkers can achieve flawless fits in their projects. These steps not only enhance the aesthetic appeal but also contribute to the overall strength and durability of miter joints.
Enhancing Joint Strength and Durability
Enhancing the strength and durability of joints is a crucial aspect in woodworking projects, as it ensures the longevity and stability of the finished piece. When it comes to achieving seamless miter joints, there are several techniques that can be employed to enhance joint strength and durability.
One method is reinforcing miter joints with dowels or biscuits. Dowels are cylindrical rods made of wood or metal that can be inserted into holes drilled in the joint to provide additional support. Biscuits, on the other hand, are small oval-shaped wooden pieces that can be placed in slots created by a biscuit joiner. Both dowels and biscuits help align the joint and prevent it from separating over time.
In addition to using reinforcements, applying adhesive and utilizing clamping techniques can significantly increase joint stability. Wood glue is commonly used for its strong bonding properties. It is important to choose an adhesive specifically designed for woodworking projects and apply it evenly along the entire length of the joint.
Clamping is another essential step in enhancing joint strength. Properly positioned clamps exert pressure on the joint, ensuring a tight bond between the two pieces of wood. It is recommended to use multiple clamps positioned at regular intervals along the length of the joint for even distribution of pressure.
To summarize, reinforcing miter joints with dowels or biscuits, as well as applying adhesive and using clamping techniques, are effective ways to enhance joint strength and durability in woodworking projects. By incorporating these methods into your table saw work, you can achieve seamless miter joints that will withstand years of use without compromising stability or longevity.
| Reinforcing Miter Joints | Applying Adhesive | Clamping Techniques |
|---|---|---|
| Use dowels or biscuits | Choose wood glue | Position multiple clamps |
| Drill holes for dowels | Apply evenly | Exert even pressure |
| Insert dowels | Along entire length | Regular intervals |
| Align joint | along the joint |
Finishing and Sanding for a Professional Look
The process of finishing and sanding is a crucial step in woodworking projects, as it contributes to the overall professional appearance and evokes a sense of pride in the audience. By utilizing refinishing techniques, woodworkers can achieve smooth surfaces that enhance the aesthetic appeal of their projects.
To achieve a professional look through finishing and sanding, consider the following techniques:
- Sanding: The first step in achieving a smooth surface is proper sanding. Start with coarse-grit sandpaper to remove any imperfections or rough spots on the wood. Gradually progress to finer grits for a smoother finish. Use long, even strokes along the grain of the wood to prevent scratches and ensure an even surface.
- Staining: Applying stain can enhance the natural beauty of wood while providing protection against wear and tear. Before staining, ensure that all surfaces are sanded evenly and free from dust particles. Apply the stain using a brush or cloth, following the instructions provided by the manufacturer. Allow sufficient drying time before applying additional coats or finishes.
- Sealing: Sealing is essential to protect wood from moisture damage and prolong its lifespan. After applying stain or paint, seal the surface with an appropriate sealer or topcoat. This will provide added durability and resistance to scratches.
By incorporating these refinishing techniques into your woodworking projects, you can achieve smooth surfaces that showcase your craftsmanship while ensuring longevity for your workpieces. Remember to always follow safety precautions when working with finishing materials and tools, such as wearing protective gloves and adequate ventilation in enclosed spaces.
Overall, investing time in finishing and sanding not only enhances joint strength but also contributes significantly to achieving seamless miter joints that display professional craftsmanship.
Frequently Asked Questions
How do I prevent tear-out when cutting miter joints?
Preventing tear-out in miter joints and achieving clean cuts requires the application of specific techniques.
To minimize tear-out, start by using a sharp and appropriate blade for your material.
Adjusting the cutting speed to avoid excess heat buildup can also help.
Supporting the workpiece with a zero-clearance insert or backing board prevents splintering.
Additionally, utilizing a scoring cut technique or employing a sacrificial piece can further enhance the quality of miter joint cuts by reducing tear-out risks.
What is the best way to align the miter gauge on my table saw?
Proper alignment techniques for miter gauges are crucial in ensuring accurate miter cuts on a table saw.
To align the miter gauge, start by loosening the locking mechanism and placing a square against the blade. Adjust the gauge until it is parallel to the square.
Additionally, check that the fence is perpendicular to the blade using a combination square.
Finally, tighten the locking mechanism to secure the miter gauge in place for precise and reliable cuts.
Can I achieve seamless miter joints using a handheld circular saw?
Using a handheld circular saw for miter joints presents both pros and cons. One advantage is its portability, allowing for flexibility in work location. However, achieving clean and precise miter joints with a handheld circular saw can be challenging due to the lack of a stable cutting platform.
To overcome this, it is recommended to use a guide or jig to ensure accurate angles. Additionally, taking time to carefully mark and align the cuts will contribute to achieving cleaner results.
Are there any specific safety precautions I should take when working with table saws for miter joints?
Table saw safety precautions are crucial when working with miter joints.
To ensure a safe working environment, it is essential to wear appropriate protective gear such as safety goggles and ear protection.
Additionally, the proper technique for miter joint cutting involves using a miter gauge or sled to guide the workpiece and keeping hands at a safe distance from the blade.
Adhering to these safety measures reduces the risk of accidents and promotes successful miter joint cutting.
How do I fix a gap in a miter joint after it has been glued?
To fill gaps in miter joints without using glue, there are techniques available for repairing damaged joints without disassembling the entire piece.
One method involves using wood filler or epoxy resin to fill the gap and create a seamless appearance.
Another option is to use wedges or shims to close the gap by gently tapping them into place.
Additionally, adding decorative elements such as inlays or veneers can help conceal and strengthen the joint.
These techniques allow for effective repair of miter joints while maintaining structural integrity and aesthetic appeal.
Conclusion
Achieving seamless miter joints requires advanced table saw skills and attention to detail. By understanding the concept of miter joints and using the right tools and materials, users can create precise cuts for a flawless fit.
Mastering precision measurements is crucial in obtaining accurate results. Additionally, enhancing joint strength and durability through proper techniques will ensure long-lasting results.
Finally, finishing and sanding techniques are essential for achieving a professional look. For example, a case study involving a skilled woodworker who utilized these strategies resulted in perfectly aligned miter joints that enhanced the overall aesthetics of their project, impressing both clients and peers alike.


