
In the realm of woodworking, achieving precise and accurate cuts is paramount. However, table saw alignment issues can often impede the attainment of such precision. To address this concern, a step-by-step guide has been developed to assist individuals in solving these alignment problems effectively.
This comprehensive guide emphasizes the importance of identifying the specific alignment issue before proceeding further. Subsequently, it provides detailed instructions on adjusting the blade angle to ensure optimal cutting performance.
Furthermore, readers are guided through the process of checking and aligning both the fence and miter gauge to enhance accuracy during various cutting operations. Additionally, attention is given to checking and adjusting the rip fence for improved parallelism with the saw blade.
Finally, readers are encouraged to conduct thorough tests and fine-tune their table saw’s alignment for optimal results. By following this meticulous guide, woodworkers can overcome alignment challenges and achieve exceptional cutting precision with their table saws.
Key Takeaways
- Identifying the specific alignment issue before proceeding is crucial for effective and accurate cuts.
- Adjusting the blade angle, fence, and miter gauge is necessary for optimal cutting performance and accuracy.
- Regular testing and fine-tuning of the table saw’s alignment is essential for maintaining optimal performance.
– Proper calibration of adjustments and settings is necessary to ensure accurate cuts and a safe working environment.
Identify the Alignment Issue
The first step in solving table saw alignment problems is identifying the specific issue affecting the alignment. Common causes of table saw misalignment can include a variety of factors.
One possible cause is improper blade installation, where the blade may not be properly aligned with the miter slot or parallel to the fence. Another potential cause is worn out or damaged parts, such as a bent arbor or a warped table surface.
To troubleshoot table saw alignment problems, there are several tips that can help. Firstly, it is important to check if the blade is aligned with both the miter slot and the fence. This can be done by using a combination square or a specialized alignment tool. Additionally, checking for any signs of damage or wear on critical components like the arbor assembly or trunnions can also reveal misalignment issues.
Another tip is to ensure that all adjustments and settings are properly calibrated. This includes checking if the rip fence is parallel to both the miter slot and blade, as well as verifying that all angle adjustments are accurate.
Identifying and troubleshooting table saw alignment problems requires careful examination of common causes such as improper blade installation and worn-out parts. By following these tips for troubleshooting, users can take necessary steps towards resolving their table saw alignment issues effectively.
Adjust the Blade Angle
To rectify the issue at hand, commence by adjusting the angle of the blade on the table saw.
Blade angle adjustment techniques are crucial in addressing common blade alignment issues that may arise during woodworking projects. When a table saw is not cutting accurately or producing straight cuts, one possible cause is an incorrect blade angle.
To begin with, it is important to ensure that the table saw is turned off and unplugged before attempting any adjustments.
The first step in adjusting the blade angle involves locating the bevel scale or indicator on the saw. This scale indicates the current angle of the blade and allows for precise adjustments.
Next, using a combination square or a specialized tool such as a digital bevel gauge can help determine if the blade is perfectly perpendicular to the tabletop. If not, loosen the bolts holding the trunnion assembly in place and carefully adjust it until achieving perfect alignment.
Additionally, some table saws have micro-adjustment features that allow for fine-tuning of small deviations in blade angles. These features can be beneficial when striving for more accurate cuts.
By following these meticulous steps and utilizing appropriate tools, woodworkers can successfully adjust their table saw’s blade angle to rectify common alignment issues and ultimately achieve precise cuts necessary for their projects’ success.
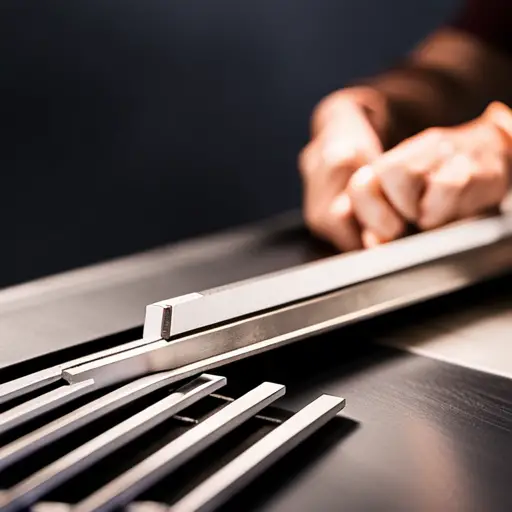
Check and Adjust the Fence Alignment
Checking and adjusting the fence alignment is an important step in ensuring precise and accurate cuts on the table saw. The fence, which serves as a guide for the workpiece, should be properly calibrated to ensure it is parallel to the blade. This calibration process involves making precision adjustments to align the fence perfectly.
To begin, start by checking if the fence is parallel to the miter gauge slots on the table saw. Use a straight edge or a measuring tool to verify this alignment. If there are any discrepancies, adjustments will need to be made.
To calibrate the fence, locate the adjustment screws or bolts that are used for fine-tuning its position. Carefully loosen these screws while supporting the fence, and make small adjustments until it is parallel to both sides of the blade. It may be necessary to use shims or washers between the adjustment points and fence rail if more significant corrections are needed.
Once you have achieved proper alignment, tighten all screws securely while ensuring that no movement occurs during tightening.
By carefully checking and adjusting the fence alignment on your table saw, you can guarantee precise and accurate cuts every time. Taking these steps will help minimize errors and improve overall safety when using this powerful tool.
Align the Miter Gauge
Precise alignment of the miter gauge is crucial for achieving accurate and controlled crosscuts on the table saw, enhancing the overall performance and versatility of this tool. Aligning the miter gauge ensures that the angle at which the workpiece is cut remains consistent throughout, improving accuracy and ensuring precision in every cut.
To align the miter gauge effectively, follow these steps:
- Begin by loosening the locking mechanism on the miter gauge.
- Place a reliable square against both sides of the miter gauge to verify its perpendicularity to the blade.
- Adjust the miter gauge until it aligns perfectly with both edges of the square.
- Tighten down the locking mechanism to secure it in place.
Aligning the miter gauge improves accuracy by maintaining a consistent angle during crosscuts. It ensures precision by preventing any deviation or errors caused by misalignment. This step is particularly important when working on projects that require precise angles or when making repetitive cuts.
By taking care to align your table saw’s miter gauge accurately, you can achieve clean and accurate crosscuts consistently, resulting in higher-quality workpieces.
Check and Adjust the Rip Fence
Inspecting and adjusting the rip fence is an essential task to ensure proper alignment and accuracy in the table saw’s cutting process. The rip fence, also known as the guide fence, is used to guide the workpiece during a rip cut. It should be parallel to the saw blade for precise cuts.
To troubleshoot potential issues with the rip fence alignment, start by checking if it is parallel to the miter gauge slots on the table surface. Use a measuring tool such as a straightedge or combination square to verify this alignment. If it is not parallel, adjustments are necessary.
Common alignment issues include a misaligned or skewed rip fence that can result in inaccurate cuts. To address these issues, loosen any locking mechanisms on the rip fence and adjust its position accordingly until it runs parallel to both miter gauge slots. Tighten the locking mechanisms once aligned.
Additionally, check for any deflection or bending in the rip fence itself. This can occur due to damage or wear over time. If detected, consider replacing or repairing the rip fence as needed.
By inspecting and adjusting the rip fence regularly, woodworkers can ensure accurate cuts and prevent safety hazards caused by misalignment during table saw operations.
Test and Fine-Tune the Alignment
To ensure accurate and precise cuts with your table saw, it is essential to test and fine-tune its alignment. This step further enhances the performance of the machine and minimizes potential safety hazards. Testing accuracy involves verifying the parallelism between the blade and the miter slot, as well as perpendicularity between the blade and the table surface. Troubleshooting techniques are then employed to address any misalignments that may be detected.
To facilitate understanding, a 2-column, 5-row table has been included below:
| Alignment Issue | Troubleshooting Technique |
|---|---|
| Blade not parallel to miter slot | Adjusting trunnion bolts |
| Blade not perpendicular to table surface | Adjusting tilt mechanism |
| Uneven blade height across its travel | Leveling or replacing arbor bearings |
| Miter gauge not square to blade | Calibrating miter gauge |
| Rip fence drifts away from or towards blade during cuts | Aligning rip fence rails |
By systematically testing each aspect of alignment using appropriate measurement tools, such as dial indicators or precision squares, you can identify any discrepancies accurately. Once detected, troubleshooting techniques can be applied accordingly. It is important to follow manufacturer guidelines when making adjustments to avoid compromising safety or voiding warranties. Regularly testing and fine-tuning your table saw’s alignment will ensure optimal performance while maintaining a safe working environment.
Frequently Asked Questions
How often should I check and adjust the alignment of my table saw?
Regularly monitoring and adjusting the alignment of a table saw is crucial for ensuring accurate and precise cuts. To maintain optimal performance, it is advisable to check the alignment periodically, ideally every few weeks or after significant use.
By doing so, potential issues can be detected early on, minimizing the need for extensive troubleshooting later. Implementing this practice will enhance both the longevity of your table saw and the quality of your woodworking projects.
Can I use any type of blade with my table saw?
Blade compatibility is an important consideration when using a table saw. While some table saws may allow for the use of different blade types, it is crucial to consult the manufacturer’s guidelines to ensure proper usage.
Additionally, regular blade maintenance is necessary to maintain optimal performance. Cleaning and lubricating the table saw blade should be done on a regular basis, although the frequency will depend on usage and environmental factors.
Following these practices will help extend the lifespan of the blade and ensure accurate cuts.
How do I know if my table saw blade is dull and needs replacement?
A dull table saw blade can lead to inefficient cuts and potential safety hazards. To determine if a blade needs replacing, there are several signs to look for.
One should inspect the teeth for any chips or missing pieces, as well as check if the blade is not cutting smoothly or producing burn marks on the wood.
Properly cleaning a table saw blade involves removing it from the saw and using an appropriate cleaning solution to remove resin buildup and debris.
What safety measures should I take while adjusting the blade angle?
When adjusting the blade angle on a table saw, it is important to wear safety goggles to protect the eyes from any potential flying debris.
Additionally, precautions should be taken when handling the blade adjustment mechanism. This includes ensuring that the saw is turned off and unplugged before making any adjustments, using caution to avoid accidental contact with the blade, and following the manufacturer’s instructions for proper adjustment techniques.
These safety measures are crucial in preventing accidents and injuries while working with a table saw.
Is it necessary to align the miter gauge if I mainly use the rip fence for my woodworking projects?
Miter gauge alignment plays a crucial role in achieving accurate crosscuts, ensuring the desired angles are precisely executed. Proper alignment enhances the overall precision and consistency of the cuts, resulting in high-quality woodworking projects.
On the other hand, optimizing rip fence alignment is essential for precise rip cuts. By aligning it parallel to the blade, woodworkers can achieve straight and uniform rip cuts with ease.
These alignments contribute significantly to attaining desired outcomes in woodworking endeavors.
Conclusion
The process of solving table saw alignment problems involves several steps.
First, the alignment issue must be identified, whether it’s a problem with the blade angle, fence alignment, miter gauge, or rip fence.
Once identified, adjustments can be made accordingly.
Finally, the alignment should be tested and fine-tuned for optimal results.
To illustrate this process metaphorically, imagine a symphony orchestra preparing for a performance. Each musician must ensure their instrument is perfectly tuned and in harmony with the rest of the ensemble.
Similarly, aligning the various components of a table saw ensures that they work together seamlessly to produce accurate and precise cuts.
By following these steps and taking the time to properly align your table saw, you can achieve professional-level results in your woodworking projects.
Just as a well-tuned orchestra captivates its audience with beautiful music, a well-aligned table saw will impress with its impeccable craftsmanship.


