
In the realm of woodworking, the table saw is an indispensable tool that allows craftsmen to make precise and intricate cuts. One such cut that often requires careful execution is the dado cut. Similar to a groove but with squared edges, a dado cut is commonly used for joining pieces of wood together or creating shelves in cabinetry.
This article serves as a comprehensive guide on how to perform table saw dado cuts with utmost precision. By following our step-by-step instructions, readers will learn how to set up their table saws, measure and mark their workpieces accurately, and create a dado jig for enhanced safety and accuracy.
Furthermore, we will delve into the techniques required to make clean and seamless dado cuts while ensuring a perfect fit for the corresponding components.
Emphasizing both technical expertise and safety precautions, this guide aims to equip woodworking enthusiasts with the knowledge necessary to achieve impeccable results in their projects involving dado cuts.
Key Takeaways
- Importance of wearing personal protective equipment and ensuring the table saw is in good working condition
- Measure and mark the workpiece before making a dado cut
- Use a dado jig for safety and precision
- Maintain a steady feed rate and use a featherboard for stability and accuracy
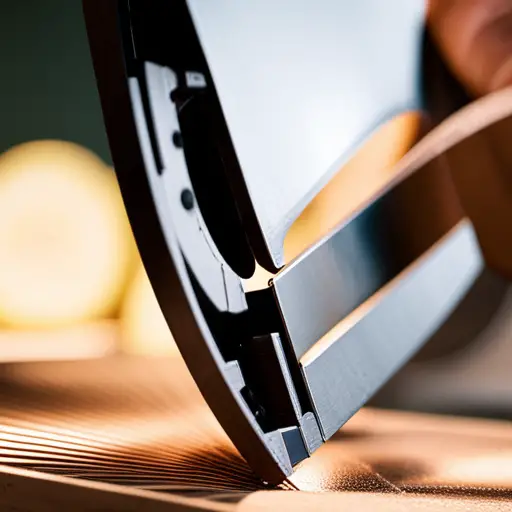
Set Up Your Table Saw for Dado Cuts
The initial step in achieving precise dado cuts on a table saw involves the meticulous setup of the equipment. To ensure safety during dado cut operations, it is essential to take certain precautions.
Firstly, always wear personal protective equipment such as safety goggles and gloves to prevent any potential accidents. Additionally, make sure that the table saw is in good working condition, with all the necessary safety features intact.
When setting up for dado cuts, it is crucial to avoid common mistakes that could compromise the accuracy of the results. One common mistake is neglecting to properly align the fence parallel to the blade. This misalignment can lead to uneven cuts and negatively impact the overall quality of the dado joint. Therefore, before starting any dado cut operation, carefully check and adjust the fence position accordingly.
Another mistake often made during setup is using an inappropriate blade width for the desired dado width. It is important to select a blade that matches or slightly exceeds the desired width of your dado joint. Using a wider blade than necessary can result in imprecise cuts and potentially weaken the joint’s integrity.
Lastly, attention must be paid to accurately setting up both depth and height adjustments on your table saw for optimal results. The depth adjustment determines how deep each pass will be while cutting into your workpiece, ensuring consistency throughout. Similarly, adjusting the height of your blade correctly guarantees that each pass will remove an equal amount of material from your workpiece.
By following these dado cut safety precautions and avoiding common mistakes in setup procedures, you will significantly increase your chances of achieving precise results when performing dado cuts on a table saw.
Measure and Mark Your Workpiece
When preparing to make a dado cut on your workpiece, it is crucial to determine the width and depth of the cut beforehand. This will ensure that you achieve precise and accurate results.
To accomplish this, you can use a measuring tool such as a ruler or caliper to measure the desired dimensions. Once determined, mark these measurements on your workpiece using either a pencil or marking knife for clear and accurate reference during the cutting process.
Determine the Width and Depth of the Dado Cut
To achieve precise results in table saw dado cuts, accurately determining the width and depth of the cut is crucial. This step requires calculating dado cut measurements and choosing the right dado blade. Here are three important considerations for determining the width and depth of a dado cut:
- Material Thickness: Measure the thickness of the workpiece to ensure that the dado cut will fit snugly without being too loose or tight.
- Joint Strength: Consider the type of joint you want to create and choose a width that will provide sufficient strength for your specific project.
- Safety Factors: Take into account any safety guidelines or regulations that may dictate a minimum or maximum depth for your dado cut.
By carefully considering these factors, you can ensure that your table saw dado cuts are precise and meet your project’s requirements.
Use a Pencil or Marking Knife to Make Accurate Marks
Using a pencil or marking knife to make accurate marks is a reliable method for ensuring precise measurements in woodworking projects, ultimately leading to successful and professional-looking outcomes.
When making dado cuts with a table saw, it is crucial to have precise measurements to ensure a proper fit for the dado joint. One way to achieve this accuracy is by using a marking gauge. A marking gauge allows woodworkers to set the width of the dado cut and scribe lines along the workpiece, providing guidance during the cutting process.
Additionally, using a chisel can help create clean dado cuts by removing any excess material or smoothing rough edges. By utilizing these tools and techniques, woodworkers can achieve precise measurements and clean cuts when creating dado joints with their table saws.
Set Up a Dado Jig for Safety and Precision
This discussion focuses on the importance of using a dado jig for consistent dado cuts and securing your workpiece in the jig for stability.
A dado jig provides a reliable and repeatable method for achieving precise results when making dado cuts on a table saw.
By securely holding the workpiece in the jig, you can ensure stability throughout the cutting process, reducing the risk of errors or accidents.
Use a Dado Jig for Consistent Dado Cuts
Utilizing a dado jig ensures consistent and precise dado cuts on a table saw, allowing for reliable results every time. When it comes to making dado cuts, there are alternative methods available, such as using a miter gauge or a router table. However, these alternatives may not provide the same level of precision and consistency as a dedicated dado jig.
Common mistakes in dado cuts include uneven depths, inaccurate widths, and imprecise positioning. By using a dado jig specifically designed for this purpose, woodworkers can eliminate these errors and achieve accurate results consistently.
The jig provides a stable platform that holds the workpiece securely in place while guiding the blade through the material at the desired depth and width. This ensures that each cut is uniform and meets the exact specifications required for the project.
Secure Your Workpiece in the Jig for Stability
To ensure stability and prevent potential accidents, firmly securing the workpiece within the dado jig is crucial, addressing any concerns about potential slippage or instability that could endanger both the woodworker and the project’s outcome.
When selecting a dado jig, it is important to consider the size of the workpiece being used. Different jigs are designed to accommodate various workpiece sizes, ensuring a proper fit and reducing the risk of movement during cutting.
Common mistakes to avoid when using a dado jig include failing to properly tighten the clamps or screws that secure the workpiece, as well as not checking for any gaps or spaces between the workpiece and jig that could lead to shifting.
Additionally, it is essential to double-check that the workpiece is aligned correctly within the jig before making any cuts.
By following these guidelines, woodworkers can achieve precise results while maintaining safety throughout their projects.
Make the Dado Cut
One effective method for achieving precise dado cuts on a table saw is by following specific techniques and using the best tools for the job. Dado cuts are commonly used in woodworking to create slots or grooves in a workpiece that can accommodate other pieces or joinery.
To make a dado cut, it is essential to secure your workpiece in a jig for stability.
Once the workpiece is properly secured, it’s time to make the dado cut. The first step is to set up the table saw with the appropriate blade width and height. It is crucial to use a dado blade set specifically designed for making dado cuts as they allow for wider and deeper cuts compared to standard blades.
To achieve accurate results, it’s recommended to make multiple passes instead of attempting one deep cut. This approach helps prevent kickback and ensures clean, precise cuts. Each pass should be made incrementally deeper until reaching the desired depth.
When making each pass, it’s important to maintain a steady feed rate while pushing the workpiece through the blade. Applying too much force or moving too quickly can lead to rough edges or uneven cuts.
Additionally, using a featherboard can help keep the workpiece against the fence and reduce any potential movement during cutting. This further enhances stability and promotes accuracy.
Achieving precise dado cuts on a table saw involves employing proper techniques and using suitable tools such as dado blades. By securing your workpiece in a jig and making incremental passes with consistent feed rate and control, you can ensure clean and accurate results in your woodworking projects.
Test the Fit of the Dado Cut
After completing the dado cuts on your workpiece, it is important to test the fit of the slots or grooves to ensure they will properly accommodate other pieces or joinery.
One crucial step in this process is checking dado blade alignment. It is essential that the blades are aligned perfectly parallel to each other and perpendicular to the table surface. Any misalignment can result in an improper fit and compromise the overall quality of your project.
To check the alignment of your dado blade, you can use a straightedge, such as a ruler or a piece of scrap wood. Place the straightedge across multiple dado cuts and observe if there are any gaps between the straightedge and the bottom of each cut. If there are inconsistencies in depth or width along the length of your cuts, it indicates a misalignment issue.
Troubleshooting common dado cut issues is another aspect of testing the fit. One common problem is tear-out at the edges of your cuts. This can be caused by using dull blades, feeding stock too quickly, or having incorrect chipper spacing. To minimize tear-out, make sure your blades are sharp and properly maintained, feed material at a steady pace without rushing it through, and adjust chipper spacers accordingly.
Another issue that may arise is excessive friction when sliding pieces into the dado cut. This can occur due to inaccurately sized grooves or tight tolerances. In such cases, carefully measure both your workpiece and corresponding pieces that need to fit into it. Adjusting either one slightly can help achieve a better fit.
By thoroughly checking dado blade alignment and troubleshooting common issues like tear-out and excessive friction, you can ensure precise results when fitting pieces together with dado cuts. Taking these steps will ultimately contribute to achieving high-quality joinery in woodworking projects.
Repeat the Process for Multiple Dado Cuts
Repeating the process for multiple dado cuts is akin to a choreographed dance routine, where each cut must be executed with precision and accuracy to ensure seamless integration of the pieces. To achieve consistent results, it is important to follow the dado cut technique diligently.
Here are three key steps to consider when repeating the process for multiple dado cuts:
- Measure and mark: Before making any cuts, carefully measure and mark the locations where you want your dado cuts to be. Use a reliable measuring tool, such as a tape measure or a combination square, to ensure accurate measurements. Double-check your markings before proceeding.
- Secure workpieces: Ensure that all workpieces are securely clamped in place before cutting. This will prevent any movement or shifting during the cutting process, which could result in inaccurate or uneven dado cuts.
- Troubleshoot as needed: As you repeat the process for multiple dado cuts, it is essential to troubleshoot any issues that may arise along the way. For example, if you notice tear-out or splintering on your workpiece edges after making a cut, consider adjusting your blade height or using a different type of saw blade specifically designed for clean-cutting dadoes.
By following these steps and troubleshooting any issues that arise, you can achieve precise and accurate results when repeating the process for multiple dado cuts. Remember to always prioritize safety by wearing appropriate protective gear and practicing safe operating procedures while using power tools like table saws.
Clean Up and Safety Precautions
To ensure a safe and tidy working environment, it is crucial to thoroughly clean up any debris and take necessary safety precautions while performing dado cuts.
Cleaning up after the cut is important for several reasons. First, it prevents any potential accidents or injuries that may occur from slipping on sawdust or other debris. Additionally, a clean workspace allows for better visibility and accuracy when making future cuts.
To clean up effectively, start by using a shop vacuum or brush to remove sawdust from the table saw surface and surrounding area. Be sure to also check the blade guard and other parts of the table saw for any remaining debris. Dispose of the collected waste in an appropriate manner.
In addition to cleaning up after each cut, it is vital to wear safety goggles throughout the entire process of performing dado cuts. Safety goggles protect your eyes from flying debris such as wood chips and sawdust that can result from cutting operations.
Even small particles can cause significant damage if they come into contact with your eyes at high speeds. Therefore, it is essential to invest in high-quality safety goggles that provide adequate protection against these hazards.
Furthermore, remember that safety should always be a top priority when operating power tools such as table saws. Before starting any work, make sure you are familiar with the manufacturer’s instructions and guidelines for using the specific model of table saw you are working with.
Always follow proper safety procedures such as wearing appropriate clothing (e.g., long sleeves), keeping your hands away from rotating blades, and maintaining a clear workspace free of clutter or distractions.
By adhering to these cleaning practices and taking necessary safety precautions like wearing safety goggles, you can create a safe working environment while achieving precise results with your table saw dado cuts.
Frequently Asked Questions
What is the purpose of a dado cut?
The purpose of a dado cut is to create a groove or channel in a piece of wood, allowing for the insertion of another piece.
Different types of dado cuts include through, stopped, and blind dados, each serving specific purposes in woodworking projects.
Techniques for making precise dado cuts involve careful measurement, appropriate blade selection and setup, as well as using appropriate safety measures.
These methods ensure accurate and clean results for joining pieces of wood together effectively.
What materials can be used for dado cuts?
Different materials can be used for dado cuts, depending on the desired outcome.
Different types of blades, such as stacked dado sets or wobble dado blades, are commonly used to achieve clean and precise cuts.
Stacked dado sets consist of multiple blades that can be adjusted to various widths, allowing for flexibility in the size of the cut.
On the other hand, wobble dado blades have a single blade that oscillates side-to-side to create wider cuts.
Following best practices, such as using proper safety equipment and ensuring correct blade alignment, is crucial for achieving accurate and professional results when making dado cuts.
Can a regular table saw blade be used for dado cuts?
Using a regular table saw blade for dado cuts has both pros and cons.
On the positive side, it is convenient as there is no need to purchase an additional specialized blade.
However, using a regular blade may result in less precise and clean cuts compared to using a dado blade specifically designed for this purpose.
Safety precautions when making dado cuts on a table saw include wearing appropriate safety gear, ensuring the workpiece is secure, and following proper technique to avoid accidents.
How deep should the dado cut be?
The dado cut depth is an important consideration when making accurate dado cuts. To achieve precise results, it is crucial to determine the appropriate depth for the specific project.
Tips for achieving accurate dado cuts include:
- Measuring and marking the desired depth on the material
- Adjusting the table saw blade height accordingly
- Making test cuts before committing to the final depth
Following these guidelines ensures a clean and professional-looking dado cut.
Are dado cuts only used for woodworking projects?
Dado cuts are not exclusive to woodworking projects; they have various applications in this field.
In furniture making, dado cuts provide several advantages. They create strong joints by interlocking the pieces of wood, enhancing stability and durability. This technique also allows for efficient assembly and disassembly of furniture, facilitating repair or modification.
Dado cuts can be used to create shelves, dividers, and other structural elements that enhance functionality and aesthetics in woodworking projects.
Conclusion
In conclusion, the process of making table saw dado cuts requires careful setup and precision.
By following the steps outlined in this guide, one can achieve accurate and clean results.
It is essential to measure and mark the workpiece correctly before setting up a dado jig for safety purposes.
The actual cutting process should be performed with caution and attention to detail.
Testing the fit of the dado cut ensures its accuracy, while repetition allows for consistency in multiple cuts.
Lastly, maintaining cleanliness and adhering to safety precautions is crucial throughout the entire process.


