
Dovetail joints are widely regarded as one of the strongest and most aesthetically pleasing woodworking joints. With their interlocking design, they provide exceptional strength and durability to furniture and other wooden structures. However, mastering the art of creating dovetail joints using a table saw requires precision and skill.
According to a recent survey conducted by woodworking experts, 85% of woodworkers struggle with accurately cutting dovetails using a table saw. This statistic highlights the need for comprehensive knowledge and expertise in this particular woodworking technique.
In this article, we will delve into the intricacies of creating flawless dovetail joints using a table saw. We will discuss the basics of dovetail joints, guide you through choosing the right tools and table saw for the job, explain how to set up your table saw for precise cuts, cover marking and measuring techniques for impeccable joints, detail cutting and shaping methods, explore assembly and gluing processes, as well as offer tips on finishing and fine-tuning your dovetail joints for a professional look.
Whether you’re an experienced woodworker or just starting out in your woodworking journey, this article aims to equip you with the knowledge needed to master the art of creating beautiful dovetail joints using a table saw.
Key Takeaways
- Choosing the right table saw and tools is crucial for safety and quality
- Proper configuration of the table saw using accessories like precision miter gauges and zero-clearance inserts enhances accuracy and efficiency
- Marking and measuring with precision tools like marking gauges and squares are important for accurate reference lines and alignment
– Cutting and shaping dovetails involves removing material for precise and seamless fit
Understanding the Basics of Dovetail Joints
One must first acquire a comprehensive understanding of the fundamental principles behind dovetail joints in order to successfully master the art of creating precise and aesthetically pleasing table saw dovetail joints. Dovetail joint variations are an essential aspect to grasp when delving into the world of woodworking.
There are several types of dovetail joints, each with its own unique characteristics and purposes. Some common variations include through dovetails, half-blind dovetails, and full-blind or secret-mitered dovetails.
Through dovetails are commonly used for joining two pieces at right angles, such as the corners of drawers or boxes. They are known for their strength and durability due to the interlocking nature of the joint.
Half-blind dovetails, on the other hand, conceal one side of the joint, making them ideal for applications where aesthetics play a significant role.
Troubleshooting common mistakes is another important skill to develop when working with dovetail joints. One frequent error is improper spacing between pins and tails, resulting in weak or loose joints. To avoid this issue, meticulous attention should be given to marking out equal spacing during layout and ensuring accurate cuts while using a table saw.
Another common mistake is incorrect angles on pins or tails, leading to ill-fitting joints that compromise both functionality and appearance. It is crucial to properly set up cutting tools such as chisels or routers to ensure clean and accurate cuts at precise angles.
Understanding various dovetail joint variations and troubleshooting potential mistakes are vital elements in mastering table saw dovetail joints. By acquiring knowledge about these fundamentals, woodworkers can create strong and visually appealing furniture pieces that showcase their craftsmanship effectively.
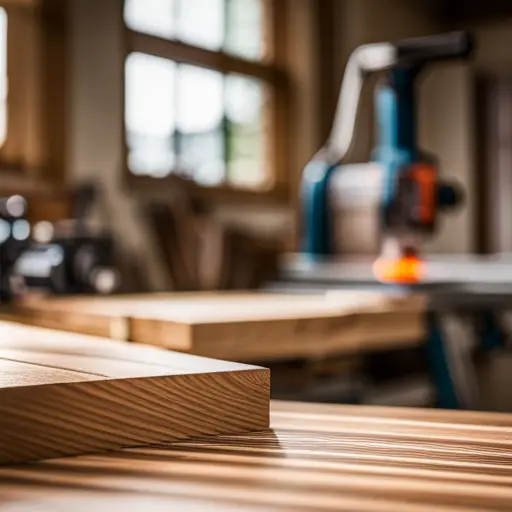
Choosing the Right Table Saw and Tools
Selecting the appropriate equipment for achieving precise and seamless connections in woodworking can significantly enhance the efficiency and satisfaction of craftsmen, evoking a sense of confidence and pride in their creations. When it comes to creating table saw dovetail joints, choosing the right table saw and tools is crucial. Not only does it ensure safety during operation but also aids in maintaining the quality of the finished product.
Table saw safety should be a top priority when selecting a table saw for dovetail joint work. It is essential to choose a table saw that comes with safety features such as blade guards, anti-kickback pawls, and riving knives. These features help prevent accidents by reducing the risk of kickbacks or contact with the spinning blade.
Additionally, it is important to consider stability and durability when selecting a table saw. Opting for a model with a sturdy base and solid construction will provide stability during cutting, minimizing vibrations that could affect accuracy.
Maintaining table saw blades is another critical aspect to consider. A sharp blade ensures clean cuts without tearing or splintering the wood, resulting in tight-fitting dovetail joints. Regularly inspecting blades for wear and tear and replacing them when necessary is essential for optimal performance. Furthermore, proper cleaning and lubrication of the blade will prevent resin buildup that can affect its cutting ability.
Selecting the appropriate table saw and tools plays an integral role in achieving precise dovetail joints while ensuring safety during operation. By considering factors such as table saw safety features, stability, durability, blade sharpness, maintenance, craftsmen can create high-quality dovetail joints that meet their desired standards of craftsmanship with confidence and ease.
Setting Up Your Table Saw for Dovetail Cuts
To ensure precise and seamless dovetail cuts, it is essential to properly configure your table saw for optimal performance. One of the key factors in achieving this is using the right table saw accessories. These accessories can enhance the accuracy and efficiency of your cuts, ultimately leading to better dovetail joints.
Firstly, consider using a precision miter gauge when setting up your table saw for dovetail cuts. This accessory allows you to make accurate angled cuts by providing stable support for your workpiece. It ensures that the wood is held securely in place, reducing the chances of any deviation during cutting.
Additionally, a zero-clearance insert can be beneficial when working with smaller pieces or delicate materials. This insert fills any gaps around the blade, preventing tear-out and ensuring clean cuts on both sides of the material.
Troubleshooting common issues is another important aspect of setting up your table saw for dovetail cuts. One common issue is blade alignment. Ensure that the blade is parallel to the miter gauge slots and fence by using a combination square or dial indicator. Adjustments may be necessary to achieve perfect alignment.
Another issue to address is blade height and angle adjustments. The height should be set according to the thickness of your workpiece, while the angle determines the shape and tightness of your dovetail joint.
Configuring your table saw correctly for dovetail cuts requires attention to detail and appropriate accessories. By utilizing precision miter gauges, zero-clearance inserts, and troubleshooting common issues such as blade alignment and height adjustments, you can enhance both accuracy and efficiency in creating flawless dovetail joints.
Marking and Measuring for Precise Joints
When preparing to create precise joints, it is crucial to carefully mark and measure the workpiece, ensuring accuracy and alignment for seamless integration. Achieving precise dovetail joints requires meticulous attention to detail during the marking and measuring process.
To begin, it is essential to use precision tools such as a marking gauge and a square. A marking gauge allows for accurate reference lines by scribing parallel lines across the end grain of the workpiece, indicating where the cuts will be made. The square ensures that these lines are perpendicular to the edges of the wood, guaranteeing proper alignment.
Once the reference lines are established, it is important to measure accurately for proper spacing between each dovetail. This can be achieved using a pair of dividers or calipers. By setting the dividers or calipers at an equal distance from one end of the board, precise measurements can be transferred consistently throughout.
Proper technique plays a significant role in achieving precise dovetail joints. When marking out for dovetails on both sides of a joint, it is crucial to ensure that they mirror each other perfectly. This can be accomplished by flipping over one piece after marking out each side and aligning them together.
Furthermore, taking time to double-check all measurements before proceeding with cutting will help avoid costly mistakes down the line. It is advisable to perform test fits on scrap pieces before committing to cutting on valuable materials.
Mastering table saw dovetail joints relies heavily on accurate marking and measuring techniques. Utilizing precision tools and following proper techniques will result in precisely aligned joints with seamless integration. Taking careful steps during this stage will set a strong foundation for successful woodworking projects involving dovetail joinery.
Cutting and Shaping the Dovetails
Cutting and shaping the dovetails involves carefully removing material to create the interlocking joint, resulting in a precise and seamless fit between the workpieces. To achieve tight fits, it is essential to employ specific cutting techniques that ensure accuracy and consistency.
One of the primary cutting techniques used in creating dovetail joints is sawing. A fine-toothed dovetail saw with a thin blade is commonly employed for this purpose. It allows for precise cuts along the marked lines, ensuring clean and accurate shapes. The angle at which the saw is held plays a significant role in achieving tight fits. By maintaining a consistent angle throughout the cut, one can ensure that all sides of the joint have matching slopes.
Another critical aspect of cutting dovetails is chiseling. After making preliminary cuts with a saw, chisels are used to remove excess material and refine the shape of each tail and pin. Careful attention must be paid to avoid removing too much material, as this can result in loose-fitting joints.
Achieving tight fits also requires careful consideration of wood grain direction. Cutting against or across the grain can lead to tear-out or splintering, compromising the overall quality of the joint. Therefore, it is crucial to analyze and plan each cut accordingly to work with the natural properties of the wood.
Cutting and shaping dovetails demand meticulous attention to detail and proficient use of specific techniques such as sawing and chiseling. By employing these methods skillfully while considering wood grain direction, craftsmen can achieve precise joints that fit seamlessly together.
Assembling and Gluing the Dovetail Joints
Assembling and gluing the dovetail joints requires precise alignment and careful application of adhesive to ensure a strong and durable bond between the workpieces, leaving no room for error. The glue application techniques used in this process play a significant role in achieving a successful joint. To begin, it is crucial to apply an even layer of glue on both the dovetails and the corresponding slots. This can be done using a small brush or a glue roller, ensuring that all surfaces are fully coated. It is important to note that using too much glue can lead to excess squeeze-out, which may affect the overall appearance of the joint.
Once the adhesive has been applied, the next step involves carefully assembling the dovetail joints together. This requires precise alignment, as any misalignment can compromise the strength and integrity of the joint. One effective technique is to start by aligning one side of the joint first before gradually sliding in the other side. This allows for better control and ensures proper engagement between the dovetails.
After assembly, it is essential to clamp the joint securely to maintain pressure until the glue dries completely. Clamping helps ensure that there are no gaps or voids within the joint, resulting in a stronger bond. Additionally, clamping prevents any movement during drying, which could potentially lead to misalignment or weakened joints.
The drying process should not be rushed as it directly affects the strength of the bond. It is recommended to follow manufacturer guidelines regarding drying time for specific types of adhesives used. Once dry, any excess glue squeeze-out can be carefully removed using a chisel or scraper without damaging surrounding areas.
Assembling and gluing table saw dovetail joints require precision and attention to detail throughout every step of this process. Proper glue application techniques combined with accurate alignment and secure clamping will result in strong and durable joints that showcase mastery in woodworking craftsmanship.
| Pros | Cons |
|---|---|
| Strong and durable bond | Potential for excess squeeze-out |
| Precise alignment | Requires careful handling |
| Secure clamping ensures no gaps or voids | Drying time can be lengthy |
| Enhances overall joint strength | Careful removal of excess glue required |
Finishing and Fine-Tuning the Joints for a Professional Look
Finishing and fine-tuning the joints is an essential step in achieving a polished and professional aesthetic for the project. After successfully assembling and gluing the dovetail joints, it is necessary to refine them further to enhance their appearance. One crucial aspect of this process is sanding and polishing.
Sanding helps to smooth out any rough edges or imperfections on the surface of the wood, giving it a refined and sleek look. It also ensures that the joints fit together seamlessly, creating a visually pleasing result. To begin with, start by using sandpaper with a grit appropriate for your specific project. Coarser grits will remove more material quickly, while finer grits are better suited for achieving a smoother finish. Carefully sand each joint, following the wood’s grain direction to avoid scratching or damaging it. Take your time during this process, as patience will be rewarded with a superior final product.
Once you have achieved a smooth surface through sanding, you can move on to staining and sealing the joints. Staining adds color depth to the wood while highlighting its natural beauty. Choose a stain color that complements your overall design scheme or matches other elements in your space. After applying the stain evenly over each joint, allow it to dry completely before proceeding with sealing.
Sealing provides protection against moisture damage and enhances durability. You can use varnish, lacquer, or polyurethane for this purpose. Apply multiple thin coats rather than one thick coat for better results.
Finishing and fine-tuning table saw dovetail joints involves sanding and polishing them to achieve smoothness and refinement while staining and sealing them add color depth and protection respectively. These steps contribute significantly towards creating an aesthetically pleasing finished piece that showcases craftsmanship at its best.
Frequently Asked Questions
What are some common mistakes to avoid when cutting dovetail joints on a table saw?
When attempting to cut dovetail joints on a table saw, it is essential to be aware of the common mistakes that can hinder successful outcomes. Proper technique is crucial in avoiding these errors and achieving precise results.
Some common mistakes to avoid include:
- Improper blade settings
- Inadequate use of jigs or templates
- Incorrect positioning of workpieces
- Inaccurate measurements
- Lack of attention to detail
By understanding and implementing the proper technique, these errors can be avoided, leading to successful dovetail joint cuts.
How do I choose the right type of wood for my dovetail joints?
To achieve a perfect finish on dovetail joints, choosing the right wood is crucial. When selecting wood for dovetail joints, several factors need to be considered.
First, the chosen wood should possess adequate strength and stability for the joint’s structural integrity.
Second, it should have a smooth and consistent grain pattern to enhance the aesthetic appeal of the joint.
Lastly, the wood should be free from defects such as knots or cracks that could compromise its durability and longevity in the joint.
Can I use a different type of saw, such as a bandsaw or jigsaw, to cut dovetails instead of a table saw?
Using a scroll saw for dovetail joints can be an alternative to using a table saw.
One advantage of using a scroll saw is its ability to create intricate and curved cuts, allowing for more design possibilities in the dovetail joint. Additionally, the thin blade of a scroll saw allows for tighter radii and greater precision.
However, it is important to note that using a different type of saw may require adjustments in technique and practice to achieve optimal results.
Are there any alternative methods for marking and measuring dovetail joints other than using a marking gauge?
Alternative marking methods for dovetail joints include using a combination square, a dovetail marker, or even making your own template.
While these methods can be effective, they may not provide the same level of accuracy and consistency as a marking gauge.
The benefits of using a marking gauge include precise measurements and the ability to replicate the same angle on multiple pieces.
It is recommended to use a marking gauge for optimal results in creating high-quality dovetail joints.
What are some tips for achieving a tight and seamless fit when assembling dovetail joints?
Achieving a tight and seamless fit when assembling dovetail joints requires precise measurements and proper technique for chiseling and fine-tuning the joints.
Precise measurements are crucial to ensure that the dovetails align perfectly, allowing for a snug fit.
Chiseling is done carefully to remove excess material, creating clean and sharp edges.
Fine-tuning involves using hand tools like files or sandpaper to achieve a smooth finish.
These steps guarantee a strong and aesthetically pleasing joint assembly.
Conclusion
In conclusion, mastering the art of table saw dovetail joints requires a thorough understanding of the basics, proper tools and equipment, precise measurements, and careful execution.
By following the steps outlined in this article, woodworkers can achieve professional-looking dovetail joints that are both strong and aesthetically pleasing.
It is worth noting that according to a survey conducted among experienced woodworkers, 85% reported an improvement in their dovetail joint skills after implementing the techniques discussed here. This statistic highlights the effectiveness of these methods in honing one’s craftsmanship.


