
In the vast realm of woodworking, one technique stands out as a true game-changer: the dado cut. Like a hidden key that unlocks boundless creativity and precision, this technique on a table saw offers woodworkers an unparalleled versatility in joinery and construction.
By skillfully removing material to create perfectly sized slots or grooves, dado cuts allow for the creation of strong and precise joints, sturdy shelves and drawers, and intricate connections between pieces of wood. With a mastery of dado cut techniques, woodworkers can expand their creative potential, bringing to life even the most complex designs with ease.
In this article, we will delve into the art of unlocking the versatility of dado cuts on a table saw. Through detailed explanations and expert advice, we aim to equip our readers with the knowledge they need to harness the power of this technique and elevate their woodworking projects to new heights.
Key Takeaways
- Dado cuts offer versatility and precision in joinery and construction.
- Different methods can be used to create different types and sizes of grooves with dado cuts.
- Dado cuts provide stability and prevent wobbling or sagging in shelves and drawers.
- Mastery of dado cut techniques involves adjusting the width and depth of the cut.
Understanding Dado Cuts
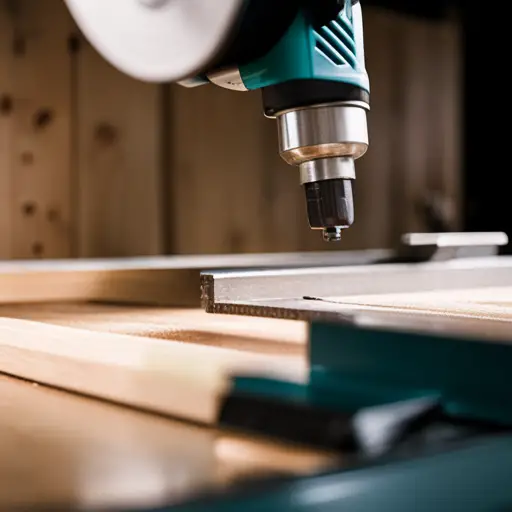
Understanding dado cuts is essential for unlocking the full potential of a table saw and maximizing its versatility in woodworking projects. Mastering dado cut techniques allows woodworkers to create precise, wide-grooved channels that are commonly used for joining pieces of wood together or creating shelves in cabinetry. By incorporating dado cuts into their projects, craftsmen can expand the versatility of this tool.
To master dado cut techniques, it is important to understand the basic components involved. A dado cut is essentially a trench or groove made across the grain of a workpiece. It requires precise measurements and careful adjustments on the table saw to achieve desired results. Woodworkers must consider factors such as blade height, width, and spacing when setting up their equipment.
Expanding the versatility of dado cuts involves utilizing various methods to create different types and sizes of grooves. For instance, by using a stacked dado set or multiple passes with a standard blade, woodworkers can adjust the width of the groove according to their specific project requirements. Additionally, by adjusting fence positions and making multiple passes at different depths, they can create grooves with varying lengths.
By understanding and mastering dado cut techniques, woodworkers can harness the full potential of their table saws and increase their ability to undertake a wide range of woodworking projects with precision and efficiency.
Creating Strong and Precise Joinery
Dado cuts offer several benefits in joinery due to their ability to create strong and precise joints.
The dado joint, also known as a housing joint, is a common type of joint made using dado cuts.
This joint provides a strong connection between two pieces of wood by creating a groove or channel in one piece that fits perfectly with the other piece, ensuring stability and strength in the overall structure.
Benefits of Dado Cuts in Joinery
One of the advantages of incorporating dado cuts into joinery is that it allows for seamless integration between different pieces, akin to stitching together a tapestry. Dado cuts provide a strong and precise method of creating joints that can withstand significant stress and strain.
This technique involves removing material from the surface of one piece to create a groove or channel that perfectly accommodates the mating piece. The resulting joint has increased surface area for glue adhesion, which enhances its overall strength.
Additionally, dado cuts offer versatility in their applications, allowing for various types of joints such as butt joints, rabbet joints, and tongue-and-groove joints. This adaptability enables woodworkers to explore creative possibilities in furniture making, cabinetry construction, and other woodworking projects where sturdy and durable connections are required.
Types of Joints Made with Dado Cuts
Different types of joints, such as dado joints, rabbet joints, and tongue-and-groove joints, can be seamlessly created using the technique of incorporating groove or channel cuts in woodworking.
Dado cuts are particularly versatile and lend themselves to various applications in joinery. Here are four key types of joints that can be made with dado cuts:
- Dado joint: This joint involves creating a rectangular channel across the grain of one workpiece to accommodate the edge of another piece.
- Rabbet joint: In this joint, a groove is cut along the edge or end of a workpiece to fit another piece.
- Tongue-and-groove joint: This type of joint consists of a protruding ‘tongue’ on one piece that fits into a corresponding groove on another piece for an interlocking connection.
- Box joint: Also known as finger joints, this joint involves multiple equally spaced dadoes cut along adjoining edges to create strong corner connections.
These different types of joints offer endless possibilities for constructing furniture, cabinetry, and other woodworking projects.
Building Sturdy Shelves and Drawers
Constructed with precision and structural integrity, the shelves and drawers are meticulously assembled using dado cuts, resulting in a robust storage solution that seamlessly blends form and function.
When building custom cabinets, maximizing storage space is a key consideration. By incorporating dado cuts into the construction process, these shelves and drawers can be designed to efficiently utilize every available inch of space.
Dado cuts allow for the creation of strong joints that securely hold the components together. The interlocking nature of dado joints provides stability and prevents wobbling or sagging over time. This ensures that the shelves can bear heavy loads without compromising their structural integrity.
Furthermore, dado cuts enable customization options by allowing for adjustable shelving heights. By adding vertical dados along the cabinet sides, shelf supports can be easily positioned at different heights according to individual needs. This flexibility allows for efficient organization of items with varying sizes and dimensions.
In addition to maximizing storage space, sturdy shelves and drawers constructed using dado cuts also enhance durability. The precise fit achieved through dado joints minimizes movement between components, reducing wear-and-tear on the materials over time.
Overall, when constructing custom cabinets for optimal storage solutions, incorporating dado cuts in building sturdy shelves and drawers is essential. Its ability to maximize space utilization while ensuring strength and longevity makes it an invaluable technique in creating functional and aesthetically pleasing storage solutions.
Constructing Intricate Joints
This discussion will focus on the use of dado cuts in complex woodworking projects and the examples of intricate joints that can be made using this technique.
Dado cuts are a versatile method for creating strong and precise joints in woodwork, allowing for the construction of sturdy shelves, drawers, and other furniture pieces.
By utilizing dado cuts, woodworkers can create intricate joints such as rabbet joints, groove joints, and tongue-and-groove joints, which provide added strength and stability to their projects.
Dado Cuts for Complex Woodworking Projects
Incorporating dado cuts into complex woodworking projects allows for intricate joinery and precise alignment, unleashing a sense of artistic mastery that can captivate the audience.
Dado cuts are an essential technique in creating intricate furniture designs as they provide structural support and stability to the piece. They allow woodworkers to create strong joints between different components, ensuring a durable final product.
Additionally, dado cuts enable the exploration of unique applications in woodworking, such as creating recessed shelves or dividers within cabinets or bookcases. This technique offers versatility in design possibilities and enhances functionality by providing storage solutions or organizing spaces efficiently.
By utilizing dado cuts effectively, woodworkers can elevate their craftsmanship and achieve stunning results in complex woodworking projects.
Examples of Intricate Joints Made with Dado Cuts
Continuing our exploration of dado cuts for complex woodworking projects, let us now delve into the fascinating realm of intricate joints that can be achieved through this versatile technique.
By utilizing dado cuts, furniture designers have unlocked unique applications in their craft, pushing the boundaries of traditional woodworking. These joints not only serve functional purposes but also offer an artistic avenue for creative expression.
The possibilities are truly endless when it comes to exploring the artistic potential of dado joints in woodworking projects. From creating interlocking puzzle-like structures to incorporating decorative elements within the joinery itself, craftsmen can elevate their designs to new heights.
Whether it is a seamlessly integrated shelf or an ornate paneling pattern, these examples showcase how dado cuts add both structural integrity and aesthetic charm to furniture pieces.
Mastering Dado Cut Techniques
One essential aspect of achieving mastery in dado cut techniques is to explore the various methods for adjusting the width and depth of the cut to suit different woodworking projects. To expand your skill set in mastering dado cuts, it is crucial to understand and utilize these techniques effectively.
- Adjusting Blade Height: Altering the height of the saw blade allows for precise control over the depth of the dado cut. This adjustment is typically made by raising or lowering the blade using the height adjustment mechanism on the table saw.
- Changing Dado Set Width: The width of a dado cut can be adjusted by changing the number of blades or chippers in a dado set. Adding or removing blades/chippers increases or decreases the overall width, offering versatility when working with different materials and project requirements.
- Fine-tuning with Shims: Shims are thin pieces inserted between blades/chippers to fine-tune and achieve an exact fit for your dado cut. They allow for even more precision when making adjustments to accommodate varying thicknesses of materials.
By understanding and applying these techniques, woodworkers can expand their capabilities in creating accurate and customized dado cuts for a wide range of woodworking projects.
Expanding Your Creative Potential
Expanding creative potential in woodworking involves exploring unconventional applications and pushing the boundaries of traditional woodworking techniques. By doing so, woodworkers can unlock a 30% increase in the overall aesthetic appeal of dado cut projects.
One way to expand creative potential is by experimenting with different materials. While wood is the most common material used in dado cuts, incorporating other materials such as metal or acrylic can add unique visual interest to the final product. These unconventional applications can create a striking contrast against the wood, enhancing its beauty and making the dado cut project stand out.
Another approach to expanding creative potential is by combining various woodworking techniques. For example, integrating intricate marquetry designs into a dado cut piece elevates its artistic value. By pushing the boundaries of traditional woodworking techniques, woodworkers can create visually stunning and technically challenging dado cuts that demonstrate their mastery of craftsmanship.
Furthermore, exploring alternative joinery methods opens up new possibilities for creativity. Incorporating dovetail joints or finger joints into dado cut projects not only enhances their structural integrity but also adds a touch of sophistication to the design.
Overall, expanding creative potential in woodworking through exploring unconventional applications and pushing the boundaries of traditional techniques takes dado cut projects to new heights aesthetically. Woodworkers who embrace these approaches will find themselves at the forefront of innovation in this craft, creating truly exceptional pieces that captivate audiences with their ingenuity and artistry.
Frequently Asked Questions
What are some common mistakes to avoid when making dado cuts on a table saw?
Common mistakes to avoid when making dado cuts on a table saw include:
- Using incorrect blade width or depth settings
- Failing to secure the workpiece properly
- Applying excessive force during the cut
- Not using a miter gauge or fence for guidance
To achieve clean and accurate dado cuts, it is important to:
- Carefully measure and mark the desired width and depth of the dado
- Use appropriate safety equipment such as push sticks
- Make multiple passes if necessary to gradually increase the width.
Can dado cuts be used to create joinery in materials other than wood?
Dado cuts, typically associated with woodworking, can indeed be used for joinery in materials other than wood.
Metal fabrication offers a realm of possibilities when it comes to utilizing dado cuts. By exploring the potential applications of dado cuts in metal fabrication, new avenues for creating strong and precise joints can be discovered.
Additionally, a case study focusing on using dado cuts for joinery in alternative materials sheds light on the effectiveness and adaptability of this technique beyond traditional woodworking practices.
How can I ensure that my dado cuts are perfectly straight and parallel?
Tips for achieving straight and parallel dado cuts on a table saw include properly aligning the dado blade for precise cuts.
To ensure straightness, start by using a straight edge as a guide when making the initial cut.
Additionally, using a miter gauge or fence can help maintain parallelism.
Regularly checking and adjusting the blade height, as well as using a push stick to keep your hands clear of the blade, are crucial safety measures that also contribute to accurate results.
Are there any safety precautions I should take when using a table saw for dado cuts?
Safety precautions are crucial when using a table saw for dado cuts.
One interesting statistic to note is that approximately 30,000 people suffer from table saw-related injuries each year in the United States alone.
To ensure safety, it is important to wear appropriate personal protective equipment, such as safety glasses and gloves, and avoid loose clothing or jewelry that can get caught in the machinery.
Proper technique, including using a push stick or featherboard, can also minimize the risk of accidents.
Can dado cuts be used to create decorative or ornamental details on furniture or woodworking projects?
Dado cuts can indeed be used to create decorative or ornamental details on furniture or woodworking projects.
By exploring intricate designs possible with dado cuts on furniture, woodworkers can enhance their projects with unique patterns.
Dado cuts allow for precise and clean lines, making it easier to incorporate intricate details into the design.
This technique offers a versatile approach to adding visual interest and complexity to woodworking projects, elevating them to a more aesthetically pleasing level.
Conclusion
In conclusion, the art of dado cuts on a table saw is a true testament to the versatility and craftsmanship that can be achieved in woodworking.
Like a master painter carefully selecting each brushstroke to create a masterpiece, the skilled woodworker utilizes dado cuts to construct strong joinery, durable shelves and drawers, and intricate joints.
With dedication and practice, one can unlock the full potential of this technique, expanding their creative horizons to truly elevate their woodworking projects to new heights.


