
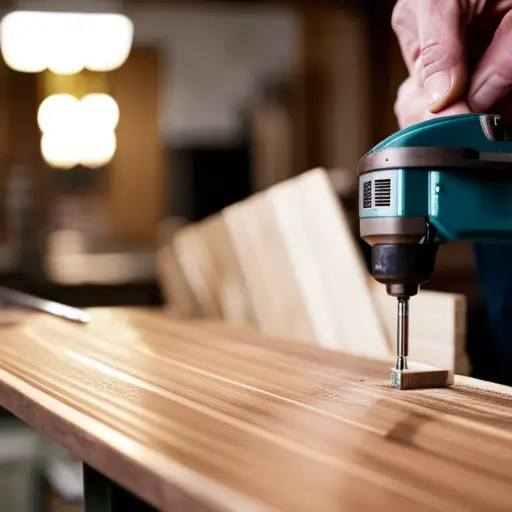
Woodworking is a craft that requires precision, skill, and attention to detail. One technique that can elevate your woodworking skills is mastering half-lap joints on a table saw.
Did you know that half-lap joints are one of the strongest and most versatile woodworking joints? They provide exceptional strength and stability, making them ideal for constructing furniture, cabinets, and other wooden structures.
In this article, we will guide you through the process of mastering half-lap joints with expert precision and technicality. We will explain the step-by-step procedure in detail, ensuring accuracy in measurements and cuts. You will learn how to:
- Choose the right materials
- Measure and mark accurately
- Set up your table saw correctly
- Cut the joint precisely
- Test for proper fitment
- Make adjustments if needed
- Finish off with sanding for a flawless result.
As passionate woodworkers ourselves, we understand the importance of continuously improving our skills. Through this article’s knowledgeable and informative approach, we aim to inspire you to explore new techniques while providing valuable tips and tricks from our expertise.
Get ready to elevate your woodworking skills as we delve into mastering half-lap joints on a table saw!
Key Takeaways
- Accurate measurements and cuts are crucial for creating a precise fit between the two pieces.
- Selecting the right wood is important for durability, stability, and appearance.
- Setting up the table saw correctly is important for achieving precise cuts.
- Testing and adjusting the fit of the joint is crucial for achieving a seamless and strong connection.
Understanding Half-Lap Joints
The understanding of half-lap joints is essential for woodworkers seeking to enhance their craftsmanship and create structurally sound furniture pieces.
A half-lap joint is a woodworking technique that involves cutting away material from two adjoining pieces of wood so that they interlock with each other. This type of joint provides strength and stability, making it a popular choice for constructing furniture frames, cabinets, and shelving units.
There are several variations of the half-lap joint, each serving a specific purpose in woodworking projects. The most common variation is the basic half lap joint, where equal amounts of material are removed from both pieces to create a flush connection.
Another variation is the crossed half lap joint, which involves cutting notches on opposite sides of the wood pieces, allowing them to cross over one another for added strength. Additionally, there is the mitered half lap joint, where the ends of the wood pieces are cut at an angle before being joined together.
While mastering half-lap joints can greatly enhance woodworking skills, there are some common mistakes to avoid. One such mistake is not accurately measuring and marking the depth and width of the cuts needed for creating a precise fit between the two pieces. Inaccurate measurements can result in loose or misaligned joints that compromise structural integrity.
Another mistake is applying too much force when assembling the joint, which can cause splitting or cracking of the wood.
To overcome these challenges and achieve mastery in crafting flawless half-lap joints, attention to detail and patience are crucial. Woodworkers should carefully measure and mark their cuts using precision tools such as a combination square or marking gauge. They should also take care when assembling by applying gentle pressure and using clamps if necessary.
Understanding various variations of half-lap joints and avoiding common mistakes play vital roles in elevating one’s woodworking skills. By honing these techniques through precise measurements and careful assembly methods, woodworkers can create structurally sound furniture pieces that showcase their expertise and craftsmanship.
Choosing the Right Materials
When it comes to selecting the right wood for your woodworking project, it is crucial to consider factors such as durability, stability, and appearance. Different types of wood have varying characteristics that can affect the overall quality of your finished product.
Additionally, using the proper tools and equipment is essential in ensuring precise and accurate cuts when working with half-lap joints. Investing in high-quality saw blades, measuring tools, and clamps will not only make your work easier but also ensure professional-grade results.
Selecting the Right Wood
To select the right wood for mastering half-lap joints on a table saw, it is important to consider factors such as the wood’s hardness, density, and grain pattern.
Wood with a tight and straight grain pattern is ideal for creating strong and durable half-lap joints.
The moisture content of the wood should also be taken into account, as excessive moisture can lead to warping or splitting during the woodworking process.
It is recommended to use kiln-dried hardwoods with a moisture content of around 6-8% for optimal results.
Additionally, different types of woods have varying levels of hardness and density, which can affect the ease of cutting and overall stability of the joint.
Oak or maple are often preferred choices due to their strength and workability.
By carefully selecting the right wood, craftsmen can ensure precise and long-lasting half-lap joints that elevate their woodworking skills to new heights.
Using the Proper Tools and Equipment
Using the appropriate tools and equipment is crucial in achieving precise and professional results when creating half-lap joints.
When it comes to woodworking, using hand tools such as a table saw, chisels, and a mallet can greatly enhance the accuracy of your work. The table saw allows you to make straight and clean cuts, ensuring that the joint fits together seamlessly. Chisels are essential for removing excess wood and refining the edges of the joint for a perfect fit.
However, it is important to prioritize safety when working with these tools. Always wear protective goggles to shield your eyes from flying debris, as well as gloves to protect your hands from sharp edges. Additionally, ensure that all tools are properly maintained and sharpened for optimal performance.
By using hand tools and practicing proper safety precautions, you can elevate your woodworking skills and create flawless half-lap joints.
Measuring and Marking
In order to achieve precise and accurate half-lap joints, it is crucial to focus on accurate measurements. Woodworkers must carefully measure the thickness of the material being used and ensure that all measurements are consistent throughout the project.
Additionally, marking the half-lap joint accurately is essential for a successful outcome. Woodworkers should use sharp marking tools such as a marking knife or a square to make clear and precise marks that will guide them during the cutting process.
Accurate Measurements
Precision is the key to successful woodworking; just as a symphony requires each instrument to be tuned precisely, accurate measurements in woodworking ensure that each piece fits together harmoniously.
To achieve accurate measurements, woodworkers must employ precise marking techniques. Here are three essential tips for achieving accurate measurements:
- Use a reliable measuring tool: A high-quality tape measure or ruler with clear markings and a stable locking mechanism will help ensure consistent and precise measurements.
- Take multiple measurements: To account for any slight variations caused by imperfections in the wood or human error, take multiple measurements of the same dimension and average them out for greater accuracy.
- Consider expansion and contraction: Wood is a natural material that expands and contracts with changes in humidity. When measuring components, leave room for these natural movements to prevent warping or splitting.
By following these guidelines, woodworkers can elevate their craftsmanship by producing accurately measured pieces that fit together flawlessly.
Marking the Half-Lap Joint
Accurate measurements are crucial when it comes to woodworking, and they play a pivotal role in creating precise half-lap joints. However, marking the half-lap joint is equally essential in ensuring a flawless fit.
To achieve this, woodworkers employ various measuring techniques that guarantee accuracy. One commonly used method involves using a marking gauge or combination square to scribe lines along the edge of the workpiece. These lines indicate the depth and width of the half-lap joint, allowing for precise cuts on the table saw.
Additionally, troubleshooting tips can be employed during this process. For instance, if the lines do not align perfectly with each other or appear crooked, double-checking measurements and re-marking may be necessary to avoid errors further down the line.
By mastering these marking techniques and employing troubleshooting tips, woodworkers can elevate their skills and ensure impeccable half-lap joints on their projects.
Setting Up the Table Saw
To achieve optimal results when setting up the table saw for mastering half-lap joints, it is essential to ensure that all components are aligned meticulously and calibrated precisely. This will not only guarantee accurate cuts but also promote safety in the workshop.
Here are four key steps to follow when setting up the table saw:
- Setting up the workspace:
– Before beginning any woodworking project, it is crucial to create a suitable workspace.
– Clear the area of clutter, ensuring there is enough room to maneuver around the table saw.
– Additionally, set up proper lighting and ventilation to enhance visibility and maintain a comfortable working environment.
- Safety precautions:
– Woodworking can be dangerous if proper safety measures are not taken.
– Always wear appropriate personal protective equipment (PPE), including safety glasses and ear protection.
– Familiarize yourself with the emergency shut-off procedures of your specific table saw model and keep a fire extinguisher nearby in case of emergencies.
- Aligning the fence:
– The fence plays a critical role in achieving precise cuts on a table saw.
– Use a combination square or precision measurement tool to align the fence parallel to the blade’s path accurately.
– Ensure that both ends of the fence are equidistant from the blade for consistent results.
- Calibrating the blade height:
– Properly calibrating the height of your table saw blade is essential for obtaining clean and accurate cuts on half-lap joints.
– Adjusting it too high or too low can result in uneven joint surfaces or excessive tear-out in your workpiece.
By following these steps, woodworkers can establish an efficient setup for their table saws while prioritizing safety in their workspace. Adhering to meticulous alignment processes and precise calibration techniques ensures optimal performance when mastering half-lap joints on a table saw, allowing woodworkers to elevate their skills and produce high-quality craftsmanship.
Cutting the Half-Lap Joint
When cutting a half-lap joint on a table saw, the first cut is crucial in creating the initial groove. This involves setting the blade height and fence position accurately to achieve the desired depth and width of the joint.
The second cut is equally important as it determines the final dimension of the joint by removing excess material from both sides of the groove.
Once both cuts are made, cleaning up the joint becomes essential to ensure a tight fit and smooth finish. This can be achieved by using chisels or a dado set to remove any remaining waste material and refine the edges of the joint for a precise fit.
Making the First Cut
Precision is key when making the first cut in order to ensure a seamless and flush fit of the half-lap joint. To achieve this, start by setting the table saw blade at a 45-degree angle. This angled cut will create the shoulder of the joint. It is important to measure and mark the correct depth on both pieces of wood to ensure a precise fit.
Here are some common mistakes to avoid when making the first cut:
- Inaccurate measurements: Double-check your measurements before cutting to prevent any errors.
- Uneven cuts: Use a miter gauge or sled to guide your wood through the table saw, ensuring an even and straight cut.
- Tear-out: To minimize tear-out, use a sharp blade and make slow, steady cuts.
By following these tips and troubleshooting common mistakes, you can master the art of making precise angled cuts for half-lap joints on a table saw.
Making the Second Cut
The second cut is a crucial step in achieving a seamless and professional half-lap joint, ensuring the pieces of wood fit together perfectly.
To make angled cuts for the second pass, it is important to set the table saw blade at the correct angle. A protractor or angle gauge can be used to accurately measure and adjust the blade tilt.
Additionally, it is essential to position the wood piece against the miter gauge or fence so that it remains stable throughout the cut.
Troubleshooting common issues during this process may involve adjusting the blade height, checking for any misalignment or wobbling in the table saw, and ensuring that both ends of the wood are properly aligned before making the cut.
By mastering these techniques, woodworkers can achieve precise half-lap joints with ease.
Cleaning Up the Joint
After making the second cut on your half-lap joint, it’s important to clean up the joint to ensure a seamless and strong connection. Cleaning up the joint involves removing any excess material or rough edges that may affect the fit and appearance of the joint.
To clean up the joint, you can use various techniques such as sanding or chiseling. Sanding is an effective method for smoothing out any imperfections on the surface of the joint. Start with coarse-grit sandpaper and gradually work your way up to finer grits for a smooth finish.
Chiseling is another technique that can be used to remove excess material from inside corners or tight spaces of the joint. Be careful not to remove too much material, as this can compromise the strength of the joint.
By using these cleaning techniques, you will achieve a clean and precise half-lap joint ready for assembly.
Testing and Adjusting
This discussion will focus on the key points of checking the fit and making adjustments when testing a half-lap joint.
When it comes to checking the fit, precision is crucial. The expert woodworker must carefully inspect the joint to ensure that both pieces align perfectly and that there are no gaps or irregularities.
If any issues are identified, adjustments must be made promptly in order to achieve a flawless fit. This requires a deep understanding of woodworking techniques and the ability to make precise measurements and cuts.
By mastering these skills, woodworkers can create high-quality half-lap joints that not only enhance the structural integrity of their projects but also showcase their expertise and passion for their craft.
Checking the Fit
To ensure a precise fit, one must carefully examine the interlocking components of the half-lap joint. Checking the fit is crucial in woodworking as it determines the strength and stability of the joint.
Here are four key steps to consider when checking the fit:
- Measure: Use a caliper or ruler to measure the thickness and width of each piece that forms the joint. Ensure they match accurately to prevent gaps or tight spots.
- Dry-fit: Assemble the pieces without glue to check if they align perfectly. Inspect for any misalignments or unevenness that may affect the final fit.
- Adjust: If there are any issues with alignment or tightness, use a chisel or sandpaper to make necessary adjustments until both pieces fit snugly together.
- Test strength: Apply pressure on the joint from different angles to test its durability and stability.
By following these steps, woodworkers can troubleshoot any issues with their half-lap joints and achieve a precise fit for strong and visually appealing results.
Making Adjustments
In order to achieve a precise fit for half-lap joints, woodworkers must make necessary adjustments to ensure the interlocking components align perfectly and eliminate any misalignments or unevenness that may affect the final fit.
When making precise cuts for half-lap joints on a table saw, it is important to troubleshoot common issues that may arise during the process. One common issue is having gaps between the joint surfaces. To address this, woodworkers can adjust the table saw fence and blade height to create a snug fit.
Another issue is experiencing tight fits that prevent easy assembly of the joint. To solve this problem, slight adjustments can be made by sanding or planing down the edges until a proper fit is achieved. By troubleshooting these common issues and making necessary adjustments, woodworkers can master half-lap joints and elevate their woodworking skills to new heights.
| Common Issue | Troubleshooting Solution |
|---|---|
| Gaps between joint surfaces | Adjust table saw fence and blade height |
| Tight fits preventing easy assembly | Sand or plane down edges until proper fit is achieved |
Finishing and Sanding
Moreover, achieving a smooth and flawless finish on half-lap joints requires careful attention to sanding techniques and the use of high-quality finishing materials.
To ensure the best results, woodworkers should consider the following tips when finishing and sanding their half-lap joints:
- Choose the right sandpaper grit: Start with a coarse grit, such as 80 or 100, to remove any roughness or imperfections on the joint surfaces. Gradually progress to finer grits, like 150 or 180, to achieve a smoother finish.
- Sand in a consistent direction: Always sand along the grain of the wood to avoid creating scratches or swirl marks that can detract from the final appearance of your joint.
- Use hand-sanding for precision: While power tools like orbital sanders can be efficient for larger areas, using hand-sanding techniques allows for more control and precision when working on small details and corners of your half-lap joint.
- Apply multiple coats of finish: After sanding, apply a high-quality wood finish evenly across the entire surface of your joint using a brush or cloth. Allow each coat to dry completely before applying another layer. This will enhance both the appearance and durability of your work.
By following these finishing techniques and sanding tips, woodworkers can elevate their woodworking skills by achieving flawlessly finished half-lap joints that are visually appealing and structurally sound.
It is important to remember that patience is key during this process; taking time to properly prepare and perfect each step will ultimately result in a superior end product.
Frequently Asked Questions
Can half-lap joints be used for all types of woodworking projects?
Half-lap joints are versatile joinery techniques commonly used in woodworking projects. While they can be employed in a wide range of applications, their suitability depends on several factors.
The pros of using half-lap joints include their strength, aesthetics, and ease of construction. However, they may not be suitable for certain projects that require more complex or decorative joinery methods.
Woodworkers should carefully consider the specific requirements and limitations of each project before deciding to use half-lap joints.
What safety precautions should be taken when using a table saw for cutting half-lap joints?
When working with a table saw for cutting half-lap joints, it is crucial to prioritize safety and prevent accidents. To ensure table saw safety, several precautions should be taken.
Firstly, always wear appropriate personal protective equipment such as safety glasses and hearing protection.
Secondly, maintain a clear workspace by removing any potential obstructions or debris.
Additionally, use push sticks or feather boards to keep your hands at a safe distance from the blade.
Lastly, familiarize yourself with the specific safety features of your table saw and follow the manufacturer’s instructions meticulously to minimize risks.
Are there any alternative methods for cutting half-lap joints if a table saw is not available?
When a table saw is not available, there are alternative methods for cutting half-lap joints in woodworking projects.
One method involves using a dado blade on a radial arm saw or router table to create the shoulder and cheek cuts. This technique requires precise measurements and careful alignment of the workpiece.
Another option is using a handheld router with a straight bit and guide fence to make the necessary cuts.
Both methods offer benefits such as strength, stability, and aesthetic appeal in woodworking projects.
Can half-lap joints be used with different types of wood, such as hardwood or softwood?
Half-lap joints can be used with different types of wood, including hardwood and softwood. The suitability of a particular wood species for half-lap joints depends on its strength and durability.
Hardwoods such as oak or maple are commonly used due to their stability and resistance to wear. Softwoods like pine or cedar can also be utilized, but they may require reinforcement or extra care during assembly.
Half-lap joints offer advantages in woodworking projects by providing a strong connection between pieces, increasing overall stability and allowing for easy disassembly if necessary.
What are some common mistakes to avoid when cutting and fitting half-lap joints?
When cutting and fitting half-lap joints, it is crucial to avoid common mistakes that can compromise the quality and precision of your woodworking project.
One such mistake is inaccurate measuring and marking, which can lead to ill-fitting joints.
Additionally, using improper sawing techniques or not maintaining a consistent cutting depth can result in uneven surfaces and weak joints.
To achieve tight and precise half-lap joints, ensure accurate measurements, use sharp blades, maintain proper technique, and double-check the fit before finalizing the joint.
Conclusion
In conclusion, half-lap joints are a fundamental woodworking technique that can elevate your skills and craftsmanship. By understanding the principles behind this joint and following precise measurements and techniques, you can create strong and visually appealing connections in your woodworking projects.
Remember to choose the right materials, set up your table saw accurately, and test and adjust as needed for a perfect fit. With passion, knowledge, and practice, you can master the art of half-lap joints and take your woodworking skills to new heights.
So grab your tools, embrace the sawdust, and let your creativity soar!


