
Dado cuts on a table saw have long been regarded as an essential technique in woodworking, enabling the creation of strong joints and versatile design possibilities.
However, some may question the usefulness or difficulty of incorporating dado cuts into their projects. This article aims to address these concerns by unlocking the potential of dado cuts on your table saw.
To begin, it is important to understand what dado cuts are and how they can enhance your woodworking capabilities. By using a special blade known as a dado blade, you can create precise and wide grooves in wood, allowing for seamless integration of shelves, dividers, and other components. Choosing the right dado blade for your specific needs is crucial to achieving accurate results.
Setting up your table saw properly is another key aspect that cannot be overlooked. From aligning the fence to adjusting the height and width of the blade, each step plays a vital role in ensuring precise dado cuts.
Once equipped with this knowledge, you will be able to make accurate dado cuts effortlessly. Moreover, we will explore how these cuts can create strong joints that withstand time and pressure within various woodworking projects.
Furthermore, we will delve into shelf construction techniques where dado cuts are indispensable for creating sturdy yet elegant structures. Finally, we will also touch upon advanced techniques that utilize dado cuts creatively.
By understanding these aspects thoroughly, you will unlock the full potential of dado cuts on your table saw and expand your repertoire in woodworking significantly.
Key Takeaways
- Proper setup of the table saw is crucial for accurate dado cuts.
- Dado cuts create strong joints that withstand time and pressure in woodworking projects.
- Choosing the right dado blades and joinery techniques enables woodworkers to create strong and visually appealing connections.
- Meticulous attention to detail and understanding of the alignment process are required for accurate dado cuts on a table saw.
Understanding Dado Cuts
Dado cuts, also known as dado joints, are a woodworking technique where a slot is cut across the grain of the wood to create a secure and flush connection between two pieces.
This joint provides increased strength and stability compared to other types of connections, making it particularly useful in furniture construction, cabinetry, and shelving.
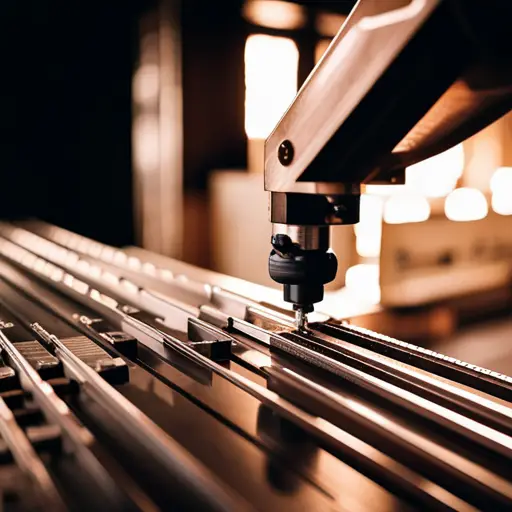
When it comes to creating dado cuts, one crucial factor to consider is choosing the appropriate dado blades. Dado blades are special circular saw blades designed specifically for making these types of cuts. They consist of two outer blades that are flanked by multiple chippers or spacers. The width of the dado cut can be adjusted by adding or removing these chippers/spacers. It is important to select the right size blade for your specific project in order to achieve accurate and precise results.
In addition to selecting the appropriate dado blades, there are various dado cut joinery techniques that can be applied depending on the desired outcome. Some common techniques include stopped dados, which do not extend all the way through the workpiece; through dados, which go completely through; and rabbeted dados that have an additional step along one edge.
Understanding these different techniques allows woodworkers to create different configurations and designs based on their specific needs. By incorporating dado cuts into their projects, woodworkers can unlock new possibilities for creating strong and visually appealing connections between pieces of wood.
Overall, understanding how to choose the right dado blades and employing various joinery techniques enables woodworkers to harness the full potential of dado cuts on their table saws. This knowledge empowers them with greater flexibility in constructing durable and aesthetically pleasing wooden structures.
Choosing the Right Dado Blade
This discussion will focus on the key points to consider when choosing the right dado blade.
Firstly, width and depth considerations are crucial in determining the suitability of a dado blade for a particular project.
Adjusting the blade for different materials is also essential to ensure accurate and clean cuts.
Lastly, it is important to take necessary safety precautions when using dado blades, as they can be potentially hazardous if not used properly.
Width and depth considerations
When considering the width and depth of dado cuts on a table saw, it is essential to carefully evaluate the dimensions in order to fully harness their potential in woodworking projects. The width and depth ratio plays a crucial role in determining the strength and stability of the joint, as well as maximizing material usage.
Here are three key considerations:
- Joint Strength: A wider dado cut provides greater surface area for gluing and increases the overall strength of the joint. However, it is important to strike a balance between joint strength and the structural integrity of the workpiece.
- Material Usage: Selecting an appropriate width ensures efficient use of materials by minimizing waste. By carefully measuring and planning, woodworkers can optimize material utilization without compromising joint performance.
- Stability: The depth of a dado cut affects how securely a workpiece fits into another piece. It is crucial to consider both the thickness of the material being joined and its intended purpose when determining the appropriate depth.
By carefully evaluating these factors, woodworkers can unlock the full potential of dado cuts on their table saws while ensuring strong, stable joints and optimal material usage in their woodworking projects.
Adjusting the blade for different materials
To optimize the performance of a table saw when working with different materials, it is essential to make precise adjustments to the blade in order to achieve desired results.
One key adjustment is blade alignment, which ensures that the blade is parallel to the miter slot and fence. Improper alignment can lead to inaccurate cuts and increased safety risks.
To align the blade, start by unplugging the saw and using a combination square or dial indicator to measure the distance between the blade and miter slot at both ends. Adjustments can be made by loosening bolts or screws on the trunnion assembly and moving it accordingly.
Additionally, troubleshooting common issues such as burning or binding during cuts can often be resolved by adjusting both fence position and feed rate.
By making these precise adjustments, users can unlock the full potential of dado cuts on their table saws while ensuring accurate and safe operation.
Safety precautions when using dado blades
Safety precautions should always be taken into consideration when using dado blades on a table saw.
One of the most important safety measures is preventing kickback accidents, which can occur when the material being cut gets stuck between the blade and the fence, causing it to be forcefully thrown back towards the user.
To prevent kickback, it is crucial to ensure that the blade is properly aligned with the fence and that sufficient space is left between the blade and the fence for smooth material movement.
Additionally, push sticks should be used to keep hands at a safe distance from the blade during cutting operations. Push sticks provide stability and control while reducing the risk of accidental contact with rotating parts.
By following these safety precautions, users can minimize potential hazards associated with dado cuts on a table saw.
Setting Up Your Table Saw
Properly aligning the blade and fence on your table saw is essential in creating precise dado cuts, ensuring a seamless connection between the workpiece and the blade. When setting up your table saw for dado cuts, there are several important factors to consider.
To begin, it is crucial to check that the blade is parallel to the miter gauge slots of the table saw. This can be achieved by using a reliable measuring tool such as a dial indicator or a precision square. By making slight adjustments to the angle of the blade, you can ensure that it runs perfectly parallel to the slots, allowing for accurate dado cuts.
Another crucial step in setting up your table saw for dado cuts is aligning the fence with the blade. The fence should be positioned exactly parallel to both sides of the blade at all times. This alignment ensures that your workpiece remains stable throughout the cut and prevents any unwanted movement or kickback.
For beginners attempting dado cuts on their table saw, there are some useful tips to keep in mind. Firstly, always double-check all measurements before making any adjustments or starting a cut. Secondly, ensure that you have chosen an appropriate width for your dado blades based on your project requirements. Lastly, regularly inspect and clean your table saw’s components to avoid any potential issues or malfunctions.
Properly setting up your table saw for dado cuts is vital in achieving precise and accurate results. By following these tips for beginners and troubleshooting common issues effectively, you can unlock the full potential of dado cuts on your table saw while maintaining safety and efficiency in your woodworking projects.
Making Accurate Dado Cuts
Achieving precise and accurate results when making dado cuts requires meticulous attention to detail and a thorough understanding of the alignment process. To ensure a flawless outcome, it is essential to employ fine-tuning techniques and be familiar with troubleshooting tips.
To achieve optimal results, consider the following fine-tuning techniques when making dado cuts on your table saw:
- Blade height adjustment: Ensuring that the blade height matches the desired depth of cut is crucial for accuracy. Use the table saw’s built-in height adjustment mechanism to make precise adjustments.
- Fence alignment: Proper alignment between the fence and blade is vital. Ensure that both are parallel by using a reliable measuring tool such as a dial indicator or a precision square.
In addition to these fine-tuning techniques, it is important to be aware of common troubleshooting tips that can help overcome potential challenges during dado cutting:
- Tear-out prevention: To minimize tear-out on the edges of your dado cuts, use sacrificial boards or backer boards behind your workpiece. This technique provides support and reduces chip-out.
- Test cuts: Before committing to your final workpiece, perform test cuts on scrap material. This allows you to evaluate the accuracy of your setup and make any necessary adjustments without compromising your project.
By employing these fine-tuning techniques and troubleshooting tips, you can unlock the full potential of dado cuts on your table saw. Attaining precision and accuracy will not only enhance your woodworking skills but also elevate the quality of your finished projects.
Creating Strong Joints with Dado Cuts
Creating strong joints with dado cuts involves precisely cutting grooves in the wood that interlock together, creating a secure and stable connection. This technique is commonly used in woodworking to create strong and durable joints for furniture, cabinets, and other wooden structures. When done correctly, dado cuts can provide both structural integrity and aesthetic appeal.
To create decorative dado cuts, woodworkers can employ various techniques such as using different blade profiles or adding decorative elements within the groove. By experimenting with different blade angles and depths, intricate designs can be achieved, enhancing the overall visual appeal of the joint.
However, troubleshooting common issues with dado cuts is crucial to ensure a successful outcome. One common issue is tear-out, which occurs when the wood fibers splinter or break during the cutting process. To minimize tear-out, it is important to use a sharp blade specifically designed for making dado cuts.
Another challenge that woodworkers may encounter is achieving consistent depth throughout the entire length of the cut. Inconsistent depth can weaken the joint and compromise its strength. Using a precision fence system or a dedicated dado sled can help maintain uniformity in depth.
Furthermore, ensuring proper alignment of multiple dado cuts is essential for creating tight-fitting joints. Even slight deviations in alignment can result in loose or ill-fitting joints. Utilizing accurate measurements and marking guidelines on the workpiece will aid in achieving precise alignment.
Creating strong joints with dado cuts requires attention to detail and precise execution. By incorporating decorative elements into these grooves while troubleshooting common issues such as tear-out and inconsistent depth, woodworkers can unlock their full potential for both functional strength and aesthetic beauty.
| Keyword | Description |
|---|---|
| Creating decorative dado cuts | Experimenting with different blade angles and depths to achieve intricate designs |
| Troubleshooting common issues with dado cuts | Minimizing tear-out by using sharp blades; maintaining consistent depth using precision tools; achieving proper alignment for tight-fitting joints |
Incorporating Dado Cuts in Shelf Construction
This discussion focuses on the incorporation of dado cuts in shelf construction. Key design considerations for ensuring strong and durable shelves include:
- Selecting appropriate dimensions for the dado cuts
- Determining the spacing between the dado cuts
- Considering the weight-bearing capacity of the shelves
Additionally, adding support and reinforcement to shelves can further enhance their strength and stability. This can be done by using additional bracing or incorporating vertical dividers.
Finally, finishing touches such as sanding, staining, or painting can give a professional look to the shelves while also protecting them from wear and tear.
Design considerations for dado-cut shelves
One important aspect to consider when designing dado-cut shelves is the incorporation of proper dimensions and spacing to ensure structural stability.
Designing dado-cut shelves involves careful consideration of various factors, such as design tips and material selection.
To maximize the structural integrity of the shelves, it is essential to determine appropriate dimensions for both the width and depth of the dado cuts. The width should be slightly wider than the thickness of the material being used, allowing for a snug fit that provides optimal support.
Additionally, spacing between each dado cut should be carefully calculated to evenly distribute weight and prevent sagging or warping over time.
Material selection is another crucial factor in designing dado-cut shelves, with options including plywood, particleboard, or solid wood depending on desired aesthetics and durability requirements.
By considering these design considerations, one can create sturdy and visually appealing dado-cut shelves that effectively utilize this technique’s potential.
Adding support and reinforcement to shelves
Incorporating additional support and reinforcement is a crucial step in ensuring the long-term stability and durability of dado-cut shelves. By adding these elements, you can maximize the storage capacity of your shelves while also enhancing their aesthetic appeal.
Here are some key considerations when it comes to adding support and reinforcement:
- Brackets or corbels: These decorative elements not only provide extra support but also add visual interest to your shelves.
- Backing boards: Installing a solid backing board at the rear of the shelf helps distribute weight evenly and prevents sagging.
- Cleats or supports: Placing cleats or supports underneath each shelf can further enhance its strength and prevent bowing over time.
- Adjustable shelving systems: Utilizing adjustable shelving systems allows for flexibility in configuring your shelves to accommodate items of various sizes, maximizing storage capacity.
By implementing these measures, you can ensure that your dado-cut shelves remain sturdy, functional, and aesthetically pleasing for years to come.
Finishing touches for a professional look
To achieve a polished and professional appearance, attention to detail is key when applying the finishing touches to dado-cut shelves.
When it comes to decorative options, there are several choices available. One popular option is adding edge banding to conceal the exposed edges of the shelf. This can be done using veneer tape or solid wood strips that match the shelf material.
Another option is applying a finish such as paint or stain to enhance the overall look and protect the surface from wear and tear.
Additionally, troubleshooting tips can help ensure a flawless finish. It is important to carefully sand all surfaces before applying any finishes to remove any imperfections or rough spots. Furthermore, using a high-quality brush or roller can help achieve an even coat of paint or stain for a professional result.
Exploring Advanced Techniques with Dado Cuts
Exploring the full potential of dado cuts on your table saw involves delving into advanced techniques that allow for precise, clean cuts with intricate patterns and designs. These advanced dado techniques can greatly enhance the efficiency and effectiveness of your dado cuts, maximizing their potential.
One advanced technique is the use of a dado blade set, which consists of multiple blades stacked together to create wider and deeper cuts. This allows for more flexibility in creating different dado sizes and depths, enabling you to achieve more intricate designs and patterns. Additionally, using a dado blade set reduces the number of passes required to make a dado cut, saving time and effort.
Another technique to consider is using accessories such as featherboards or hold-down clamps. These accessories help to secure the workpiece firmly against the table saw’s fence, preventing any movement during the cutting process. This ensures that your cuts are accurate and consistent throughout.
Furthermore, utilizing zero-clearance inserts can greatly improve the quality of your dado cuts. These inserts provide additional support around the blade area, reducing tear-out and splintering when making dados. They also help in minimizing chip buildup around the blade area, resulting in cleaner cuts with smoother edges.
Lastly, incorporating precise measurements and careful planning before making any dado cut is crucial for achieving optimal results. Taking into account material thicknesses, desired widths and depths of dados, as well as proper setup adjustments on your table saw will greatly contribute to successful outcomes.
By adopting these advanced techniques when working with dado cuts on your table saws, you can unlock their full potential while ensuring precision and efficiency in producing clean-cut dados with intricate patterns and designs.
Frequently Asked Questions
Can dado cuts be made on a miter saw or do they need to be done on a table saw?
Dado cuts, a versatile woodworking technique, can be accomplished on both miter saws and table saws. However, utilizing a table saw for dado cuts offers distinct advantages. Table saws allow for precise control of the width and depth of the cut, resulting in clean and accurate joints. Miter saws lack this level of precision, making them less suitable for dado cuts that require consistent measurements.
Therefore, when it comes to creating dado cuts, a table saw is the preferred choice for optimal results.
What safety precautions should I take when making dado cuts on a table saw?
When making dado cuts on a table saw, it is important to prioritize safety precautions.
This includes using a push stick to keep hands at a safe distance from the blade and reduce the risk of injury.
Additionally, wearing safety goggles protects the eyes from flying debris, gloves provide hand protection, and ear protection guards against excessive noise levels.
These measures are crucial in ensuring the well-being of individuals operating table saws during dado cutting tasks.
Can I make dado cuts with a regular saw blade or do I need a specific dado blade?
Dado cuts, the magical key to unlocking hidden potential in woodworking projects. When it comes to making these cuts on a table saw, one may wonder if a regular saw blade will suffice or if a specific dado blade is required.
To achieve precision and efficiency, it is advisable to use a dedicated dado blade. Unlike a regular saw blade, a dado blade is specifically designed with multiple cutting teeth and varying widths for creating wide, clean grooves effortlessly.
Are dado cuts only used for creating shelves or can they be used for other woodworking projects as well?
Dado cuts are not limited to creating shelves; they can be used in various woodworking projects. Different woodworking projects that can benefit from dado cuts include constructing cabinets, drawers, bookcases, and picture frames.
To achieve precise and clean dado cuts without a table saw, alternative methods such as using a router or a dado blade on a circular saw can be employed. These techniques require careful measurement and control to ensure accurate results.
How deep should I make my dado cuts for different types of wood?
To choose the appropriate width for dado cuts in different wood types, several factors must be considered.
First, the thickness of the material being joined should match the width of the dado cut.
Additionally, considering the strength required for the joint is crucial; softer woods may necessitate narrower dado cuts compared to harder ones.
Achieving clean and precise dado cuts can be facilitated by using sharp blades, proper blade height adjustments, and using a miter gauge or fence for guidance.
Conclusion
In conclusion, unlocking the potential of dado cuts on your table saw can greatly enhance your woodworking skills. By understanding the concept of dado cuts and choosing the right blade, you can create accurate and strong joints for various projects.
Incorporating dado cuts in shelf construction allows for sturdy and efficient storage solutions. Moreover, exploring advanced techniques with dado cuts opens up endless possibilities for intricate designs.
Like a master craftsman wielding a precise tool, harnessing the power of dado cuts unleashes creativity and craftsmanship in woodworking.


