
Mortise and tenon joinery is a fundamental technique in woodworking that provides strength and durability to furniture and other wooden structures. According to recent studies, it is estimated that over 80% of professional woodworkers utilize this technique in their projects.
In order to achieve precise and accurate results, the use of a table saw is essential.
This article aims to explore various table saw techniques for mortise and tenon joinery, providing readers with a comprehensive understanding of the process. We will begin by explaining the concept of mortise and tenon joinery, highlighting its importance in creating sturdy connections between wooden pieces.
Essential tools and materials required for this technique will be discussed, ensuring readers are well-equipped before starting their projects.
Furthermore, step-by-step instructions on setting up a table saw for mortise and tenon joinery will be provided, along with detailed guidelines on creating both mortises and tenons using this versatile tool.
Additionally, we will delve into advanced techniques and creative variations that can elevate your joinery skills.
By the end of this article, readers will have gained valuable knowledge on utilizing table saws for mortise and tenon joinery, enabling them to embark on woodworking projects with confidence and precision.
Key Takeaways
- Mortise and tenon joinery is a fundamental technique used by over 80% of professional woodworkers.
- Table saws, chisels, marking gauge, and mallet are essential tools for mortise and tenon joinery.
- Accurate measurement, precise adjustments, and attention to detail are crucial for successful mortise and tenon joinery using a table saw.
- Advanced techniques such as compound angles, haunched tenons, and wedged through-tenons can be explored to create visually striking joinery pieces.
Understanding Mortise and Tenon Joinery
Mortise and tenon joinery is a traditional woodworking technique that involves creating a solid, durable connection between two pieces of wood by inserting one piece into a corresponding slot in the other. This method has been used for centuries due to its strength and reliability.
When considering design options for mortise and tenon joinery, there are several factors to take into account. Firstly, the size of the joint should be appropriate for the scale of the project. Smaller joints may not provide enough strength, while larger joints can weaken the overall structure.
Additionally, the shape of the joint can vary depending on aesthetic preferences or functional requirements. Common variations include through mortises, blind mortises, and haunched tenons.
To ensure successful execution of mortise and tenon joinery, it is important to troubleshoot common issues that may arise during construction. One issue often encountered is gapping between the joint components. This can be caused by misalignment or improper sizing of parts. It is crucial to carefully measure and mark out the joint before cutting to avoid this problem.
Another common issue is loose-fitting joints that lack stability. This can occur if there is insufficient glue coverage or if clamping pressure was not evenly applied during assembly. To address this problem, it is recommended to apply an appropriate amount of glue evenly throughout the joint surfaces and use clamps or other pressure-applying devices to secure tight contact until drying.
Understanding design considerations and troubleshooting techniques are essential for achieving successful mortise and tenon joinery connections in woodworking projects. By paying attention to details such as joint size, shape variations, alignment accuracy, glue application, and clamping methods; craftsmen can create strong and aesthetically pleasing connections that will stand the test of time.
Essential Tools and Materials
To effectively create strong and precise connections in woodworking, it is essential to have a comprehensive set of tools and materials at your disposal.
When it comes to traditional joinery techniques like mortise and tenon, there are specific tools and materials that are crucial for achieving optimal results.
Firstly, a table saw is an indispensable tool for creating accurate cuts when preparing the lumber for mortise and tenon joinery. It allows woodworkers to make clean and straight cuts, ensuring that the joints fit together tightly.
Additionally, chisels are essential for removing waste material from the mortise and shaping the tenon. A sharp chisel enables precise carving, resulting in well-fitted joints.
Another important tool is a marking gauge or mortising gauge. This tool helps woodworkers mark out the dimensions of the joint accurately on the lumber, ensuring proper alignment during cutting and assembly.
A mallet is also necessary for driving chisels into the wood without damaging them or risking injury.
In terms of materials, selecting the right lumber is crucial for successful mortise and tenon joinery. Hardwoods such as oak or maple are commonly used due to their durability and strength. The lumber should be free from knots or other defects that could weaken the joint.
Having a comprehensive set of tools including a table saw, chisels, marking gauge, mallet, along with carefully selected hardwood lumber is essential when undertaking traditional joinery techniques like mortise and tenon. These tools and materials enable woodworkers to create strong connections while maintaining precision in their craftsmanship.
Setting Up Your Table Saw
Setting up a woodworking station requires careful arrangement of the necessary equipment and tools, including ensuring that the table saw is properly positioned and ready for use. Table saw safety is of utmost importance when working with this powerful tool. Before starting any project, it is essential to familiarize oneself with the manufacturer’s instructions and guidelines for safe operation.
To begin setting up your table saw, make sure it is placed on a sturdy workbench or stand that provides stability during operation. The surface should be level and free from any obstructions. Additionally, ensure that there is ample space around the table saw for maneuvering large workpieces.
Proper blade selection is another crucial aspect of setting up your table saw. The type of blade you choose will depend on the material you are working with and the type of cut you intend to make. Different blades are designed for cutting different materials such as wood, plastic, or metal.
When selecting a blade, consider its tooth count as well. A higher tooth count generally results in smoother cuts but may require more time to complete a cut. Conversely, a lower tooth count can remove material quickly but may leave rougher edges.
Before using the table saw, inspect both the machine and the blade for any signs of damage or wear. Ensure that all safety features are functional and in place, such as blade guards and anti-kickback pawls. It is also advisable to wear appropriate personal protective equipment like safety glasses and hearing protection while operating the table saw.
By following these guidelines for setting up your table saw safely and choosing the right blade for your specific needs, you can ensure smooth operations while minimizing risks associated with woodworking machinery usage.
Creating Mortises with a Table Saw
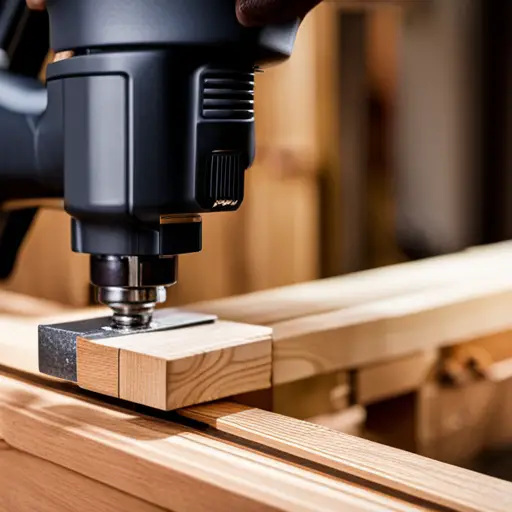
One effective method for creating precise and strong joints in woodworking involves the use of a table saw. The table saw can be used to create mortises, which are rectangular slots that fit into tenons to form a secure joint. Creating mortises with a table saw requires the use of a mortise jig and a chisel technique.
To begin creating mortises with a table saw, it is essential to have a well-built and accurate mortise jig. The jig holds the workpiece securely in place and guides the cutting action of the table saw blade. It ensures that the mortise is cut at the correct depth and angle, resulting in accurate and consistent joints.
Once the workpiece is securely clamped in the jig, it’s time to make cuts using the chisel technique. Start by aligning the blade of the table saw with one end of the marked out area for the mortise. Slowly feed the workpiece into the spinning blade while maintaining firm control over its movement. This will result in clean and precise cuts along both sides of the marked area.
After completing one side of each cut, flip over your workpiece and repeat on each adjacent side until you have removed all material within your marked-out area. Take care not to rush or force any part of this process as doing so can lead to inaccurate cuts or even injury.
When creating mortises with a table saw, it is crucial to use a well-built mortise jig and follow proper chisel technique. This combination allows for accurate cuts that result in strong and precise joints suitable for woodworking projects requiring stability and durability.
Crafting Tenons with a Table Saw
Crafting tenons with a table saw requires precision and finesse, as it involves shaping the ends of the workpiece into interlocking puzzle pieces that seamlessly fit into mortises to create a strong and secure joint.
When creating tenons with a table saw, one must pay careful attention to tenon sizing and adjustment to ensure a proper fit within the corresponding mortise.
To begin crafting a tenon, it is crucial to accurately measure the width and thickness of the mortise in order to determine the appropriate dimensions for the tenon. This measurement will guide the adjustments needed on the table saw.
Using a dado blade or a regular blade with multiple passes, one can gradually remove material from each side of the workpiece until reaching the desired width for the tenon. It is important to make small incremental adjustments and frequently check for fit during this process.
Tenon shoulder techniques play an essential role in creating strong joints. The shoulders refer to the flat surfaces on either side of the tenon that rest against corresponding surfaces on the mortise. These shoulders provide stability and prevent lateral movement within the joint.
One common technique is using an auxiliary fence on top of the table saw’s rip fence to support both sides of the workpiece while making shoulder cuts. This ensures consistent shoulder widths throughout each piece.
Crafting tenons with a table saw requires meticulous attention to detail and precise adjustments. Tenon sizing and adjustment are critical factors in achieving a well-fitting joint. Utilizing proper techniques for cutting shoulders further enhances joint strength and stability.
By following these guidelines, woodworkers can produce quality tenons that seamlessly integrate with their mortises for durable joinery projects.
Assembling and Finishing Your Joinery
After crafting tenons with a table saw, the next crucial step is the assembly and finishing of your joinery. To achieve a professional and polished result, it is essential to pay attention to the finer details of this process.
Once all the tenons have been carefully cut and fitted into their corresponding mortises, it is time to move on to sanding techniques. Sanding plays a vital role in achieving smooth surfaces that will blend seamlessly together. Start with a coarse grit sandpaper to remove any rough edges or imperfections, gradually progressing to finer grits for a smoother finish. This meticulous sanding process ensures that the joints fit snugly without any gaps or irregularities.
With the assembly complete and surfaces properly sanded, attention can now be turned towards staining and sealing methods. Staining enhances the natural beauty of wood while adding depth and richness to its appearance. Choose a stain color that complements your project’s aesthetic and apply it evenly across all surfaces.
To protect your newly assembled joinery from moisture, dirt, and wear, sealing is essential. There are various options available for sealing such as polyurethane varnish or lacquer. Apply multiple coats following manufacturer instructions, allowing proper drying time between each layer.
Remember to consider safety precautions when working with stains or sealants by ensuring adequate ventilation and wearing protective gear like gloves and goggles.
By following these steps diligently, you can achieve flawless joinery that not only showcases precision but also withstands the test of time.
Advanced Techniques and Creative Variations
The pursuit of mastery in woodworking involves delving into advanced techniques and exploring creative variations to elevate the art of joinery to new heights.
When it comes to creating intricate mortise and tenon joints using a table saw, there are several advanced techniques that can be employed. One such technique is the use of angled cuts to create compound angles on the tenon or mortise pieces, resulting in a stronger joint with increased surface area for glue adhesion.
Another advanced technique is the creation of haunched tenons, which involve adding a small shoulder or ‘haunch’ on one side of the tenon. This not only adds visual interest but also strengthens the joint by providing additional support against lateral movement.
Additionally, incorporating wedged through-tenons can add both strength and aesthetic appeal to your joinery projects. By inserting wedges into slots cut across the grain, you can further secure the joint while adding a unique design element.
Innovative designs can also take your joinery skills to new levels. For example, incorporating curved or angled elements into your mortise and tenon joints can create visually striking pieces that stand out from traditional designs.
Furthermore, exploring different wood species and their unique characteristics allows for creative variations in color, texture, and grain pattern.
By incorporating these advanced techniques and innovative designs into your woodworking repertoire, you can push the boundaries of traditional joinery methods and create truly exceptional pieces that showcase your skill as a craftsman.
Frequently Asked Questions
How do I choose the best type of wood for mortise and tenon joinery?
Choosing the best type of wood for mortise and tenon joinery involves considering several factors.
First, select a hardwood species that is strong and durable, such as oak or maple. Avoid softwoods like pine, as they are prone to splitting.
Additionally, consider the grain pattern and density of the wood; straight-grained woods with tight growth rings are ideal for clean and stable joints.
Lastly, ensure the wood is properly seasoned to minimize future warping or shrinking issues.
What safety precautions should I take when using a table saw for mortise and tenon joinery?
When using a table saw for mortise and tenon joinery, it is crucial to prioritize safety measures to prevent accidents.
Firstly, always wear appropriate personal protective equipment such as safety glasses and ear protection.
Additionally, ensure that the table saw is properly set up and the blade is sharp and secured tightly.
Avoid wearing loose clothing or jewelry that could get caught in the blade.
Common mistakes include rushing the process, not using push sticks or feather boards, and attempting cuts without proper knowledge or experience.
Can I use a different tool instead of a table saw to create mortises and tenons?
Using hand tools for mortise and tenon joinery provides an alternative to using a table saw. Hand tools such as chisels and mallets can be used to carefully carve out the mortise and shape the tenon. This method requires precision and patience, but it allows for greater control over the joint’s fit.
Another option is exploring router techniques for creating mortise and tenon joints, which involve using a router with specific bits to create the necessary cuts. Both approaches offer viable alternatives to using a table saw for this woodworking technique.
Are there any alternative techniques for creating mortise and tenon joinery without using a table saw?
Alternative techniques for creating mortise and tenon joinery without using a table saw include utilizing hand tools. Hand tools such as chisels, mallets, and hand saws can be employed to produce precise and accurate mortises and tenons.
Chisels allow for the removal of material to create the mortise, while hand saws enable the cutting of tenons with precision. These traditional methods require patience, skill, and meticulous attention to detail but can result in high-quality joinery.
How do I ensure that my mortise and tenon joints are properly aligned and fit together snugly?
Achieving proper alignment and a snug fit in mortise and tenon joints can be ensured through various aligning techniques. One method involves using a marking gauge or layout lines to accurately mark the positions of the joint components.
Careful chiseling or routing is then employed to create precise mortises and tenons that fit together tightly.
Additionally, using clamps or other forms of pressure during assembly can aid in achieving a snug fit between the joint components.
Conclusion
In conclusion, the use of table saw techniques for mortise and tenon joinery provides a precise and efficient method for creating strong and durable wood joints. By understanding the fundamentals of this traditional woodworking technique and investing in the necessary tools and materials, craftsmen can achieve professional results.
The table saw allows for accurate cutting of both mortises and tenons, resulting in snug-fitting joints that require minimal adjustment. With practice, advanced techniques and creative variations can be explored, expanding the possibilities for exquisite woodworking projects.
Like a master sculptor shaping marble with delicate precision, using a table saw to create mortise and tenon joints offers endless opportunities to craft remarkable pieces of furniture or decorative items.


